

Instructions o wtyczce "Brands with pictures and descriptions"
Brand feature configuration guide for your store.
1. Creating the feature.
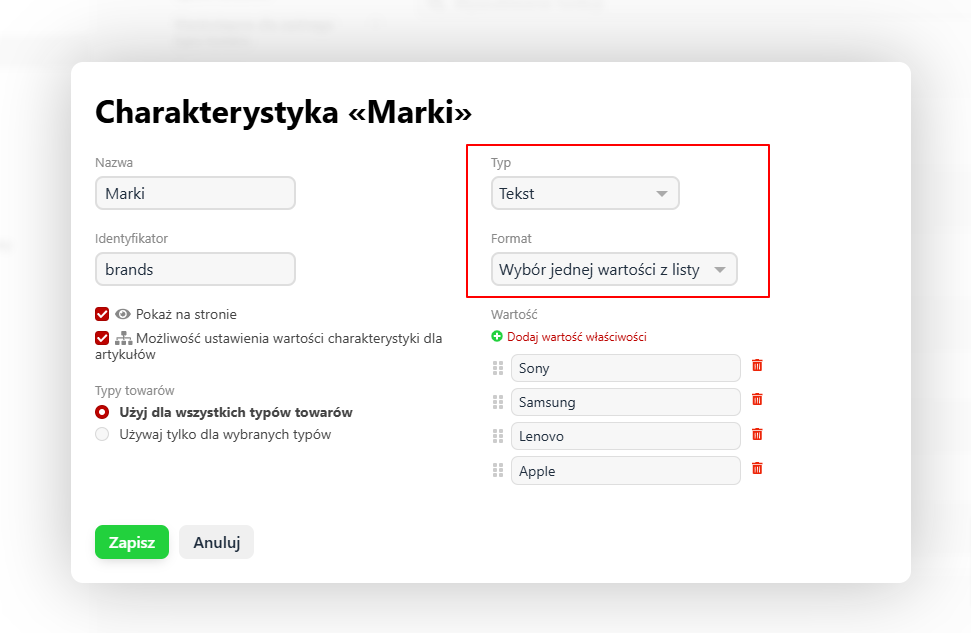
First, you need to create the "Brand" feature.
You can do this in the store settings under "Product types and features".
Set the feature type to Text and format to Select one value from list:
2. Configuring plugins.
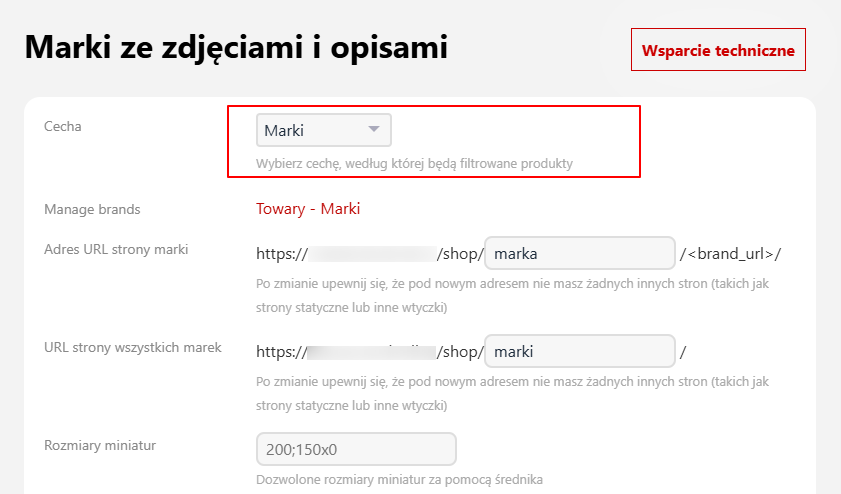
Next, in the plugins settings, specify the feature corresponding to the brand:
3. Filling the feature for products.
The next step is entering the data.
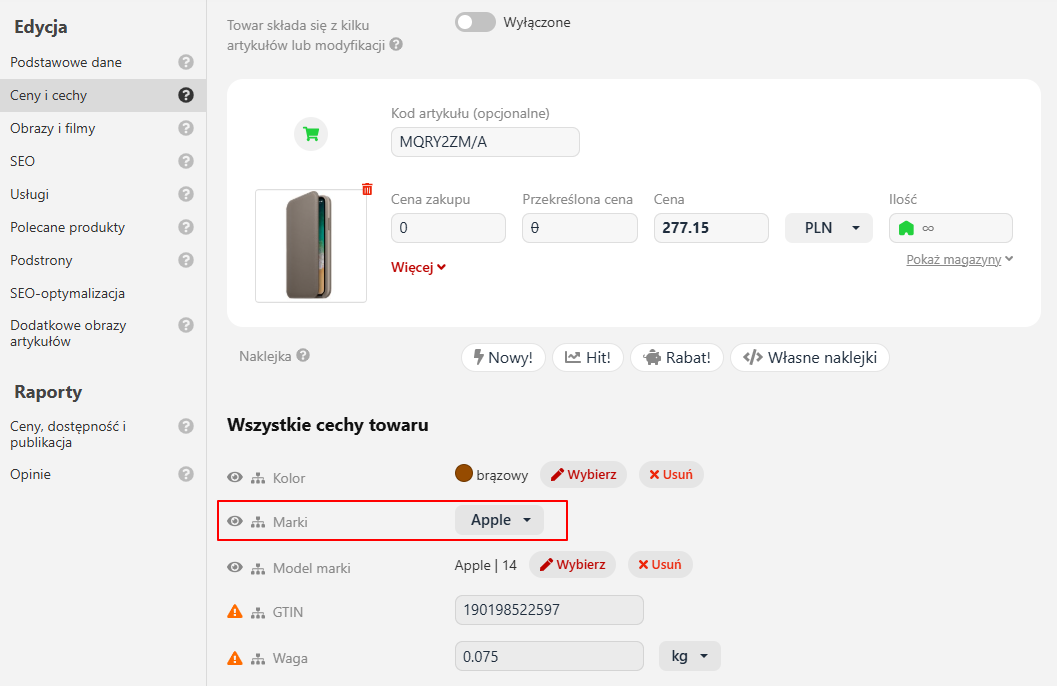
When editing a product, on the "Prices and features" tab, fill in the "Brand" feature for each product:
4. Managing brands.
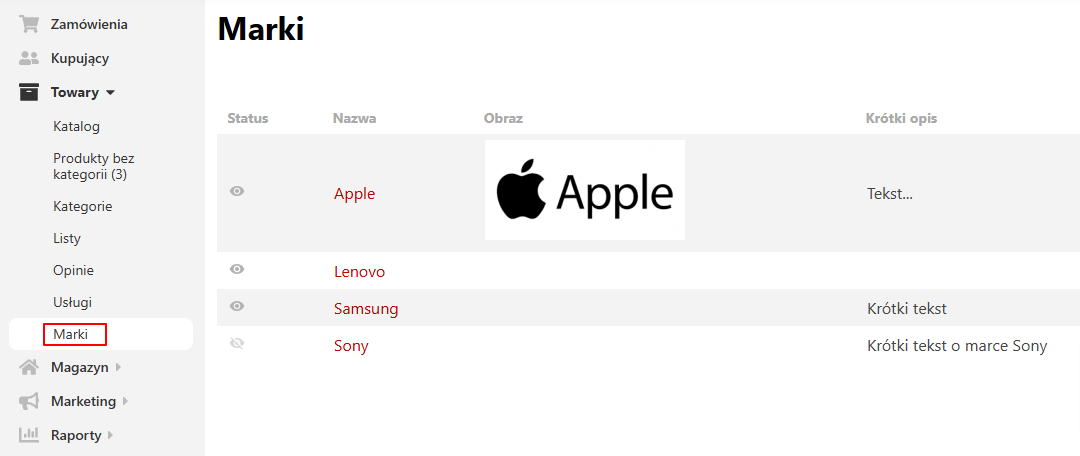
After completing the above steps, an additional "Brands" section should appear in the "Products" tab, where you can easily filter products by brands, open brand settings to upload images and descriptions.
Integration with theme.
Since plugin is integrated with the website, for some themes minor template adjustments may be necessary.
Templates are built differently, so a universal template cannot be created.
If all products on the brand page appear at the very bottom of the page, open the plugins settings, find the setting "Template for displaying brand page on website: search results (frontend_search)", and replace <br clear="left"> with <br>, i.e. remove the clear="left" code in two places.
Displaying the brand list in any location.
You can retrieve the brand list using the helper {shopProductbrandsPlugin::getBrands()}
In the template, you can display it like this:
        {foreach shopProductbrandsPlugin::getBrands() as $b}
        <a title="{$b.name}" href="{$b.url}">
           {* if there is an image, we display the image; if not, we display the brand name *}
           {if $b.image}
              <img alt="{$b.name}" src="">
           {else}
              {$b.name}
           {/if}
        </a>
        {/foreach}
Displaying the brand on the product page.
Open the product.html file of your theme and add the following code in the appropriate place:
        {$_b = shopProductbrandsPlugin::productBrand($product.id)}
        {if $_b}
        <a href="{$_b.url}">{if $_b.image}<img src="">{else}{$_b.name}{/if}</a>
        {/if}
If needed, add the attribute width="150" to the <img> tag to set the image width.
Displaying brands in the product list (category, search results).
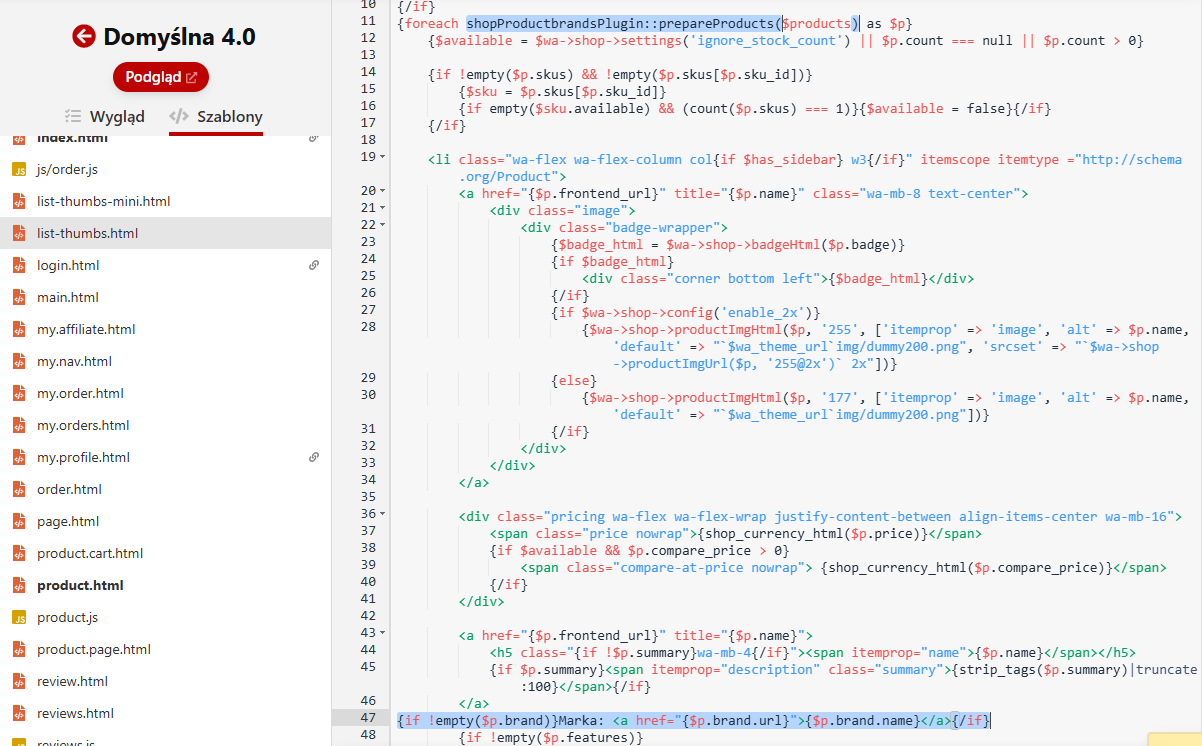
Open the list-thumbs.html file of your theme (in some themes this file may have a different name; if you can't find it, contact the theme author).
Replace the following code in this file:
{foreach $products as $p}
replace with:
{foreach shopProductbrandsPlugin::prepareProducts($products) as $p}
below, in the place where you want to display the product brand, add the following code:
{if !empty($p.brand)}Brand: <a href="{$p.brand.url}">{$p.brand.name}</a>{/if}
Below is an image illustrating the changes to be made, using the Default theme as an example:
Thumbnail sizes.
In the plugins settings, you can define allowed sizes that will be available in themes.
You can specify multiple sizes (e.g., one for the general list, another for the brand page).
This setting is not applied automatically!
To change the displayed thumbnail size, you must specify this size in the theme (in the plugins settings or in the graphic template).
For example:
<img src="{$wa_url}wa-data/public/shop/brands/{$brand.id}/{$brand.id}.200{$brand.image}" align="left">
.200 - this is the image size.
More information about the rules for creating thumbnails can be found here: https://web-systems.pro/baza-wiedzy/miniatury-zdjec-towarow/