

Documentation for plugins "Improvements to checkout in shopping cart"
Settings plugins (exactly as in the admin panel)
Settings plugins settings are shown for demonstration purposes only. You can test how plugins works only after purchase. Please note that the display of plugins settings is poorly adapted to mobile devices (as well as on the plugins settings page in the admin panel). This may be finalized in the future.
- Displaying a link to the privacy policy below the order form block
- Improvements at the "Customers" stage
- Improvements at the "Delivery" stage
- Improvements at the "Payments" stage
- Improvements at the "Confirmation" stage
- Customizing the color scheme
- Configuring icons
- Advanced settings
- Adaptation to design themes
- Custom styles and scripts
Displaying a link to the privacy policy below the order form block
Compatibility plugins
Compatibility with design themes
Plugin should work correctly without integration on all design themes.
It is possible that in some design themes certain page elements will not work as intended when plugin was developed. Therefore, plugin has a huge number of settings, so you can disable the options that do not work correctly and leave the others enabled.
If you encounter problems with the plugin on your design theme - we recommend disabling it and contacting technical support. We plan to keep plugins working correctly on all popular design themes.
Compatibility with plugin shipping plugins
Plugin has been tested with a dozen or so plugin shipping plugins. It includes several plugin fixes, in this regard:
- Plugin shipping "Pickup point"
The risk that plugin will not work as intended with some shipping plugin formats when developing plugins is quite high (because shipping plugins may embed any HTML code: unfortunately, there is no uniform standard for how the shipping block should be displayed). If you experience problems with plugins working together with any shipping plugin - please contact the technical support plugin.
Additional products recommended for use with the plugin
Plugin does not include a number of useful features that are part of the concept of plugins, but there is no need to develop these features, because they are already available in other ready-made solutions. Namely:
- Plugin "Normal phone mask" - designs and implements a mask for the "Phone" field.
- Plugin "Delivery and Payment Filter" - hides certain delivery and payment methods for virtually any condition (coming soon on sale!).
Markings for some settings
Below are detailed descriptions of some plugins settings (not all of them, only those that may be non-intuitive). Links are duplicated directly in the plugins settings - it is more convenient to get to know the plugin from the plugins settings page and learn how each setting works! Use the links:
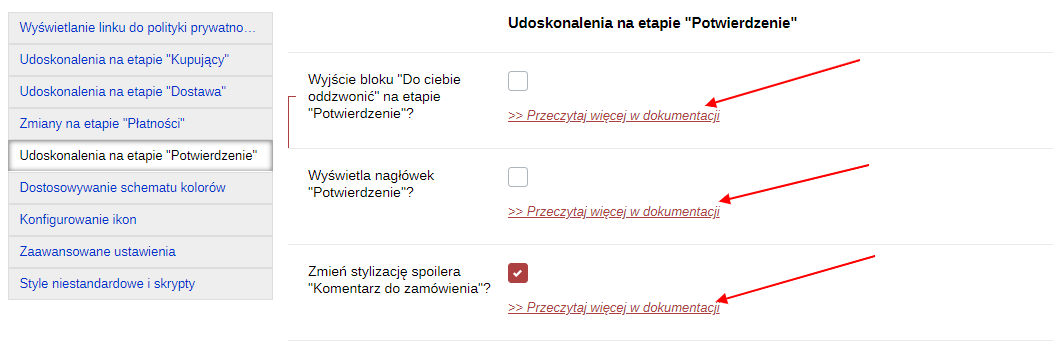
Display a link to the privacy policy in text form?
To comply with the personal data protection law, every form with personal data must obtain the buyer's consent to the processing of their personal data. It is recommended to use the built-in functionality for obtaining user consent (Shopy-Script --> " Settings" --> "Place order" --> block "Confirmation" --> line "Terms of service" --> value "Show"). However, if you do not like the standard appearance (see below), you can disable this setting and use the plugins settings, which will simply display the required information as plain text with a link to a separate page, as many other stores do. Before using and configuring this functionality, I recommend consulting a lawyer. Different countries have different regulations regarding the processing of personal data, and in some cases a checkbox may be required.
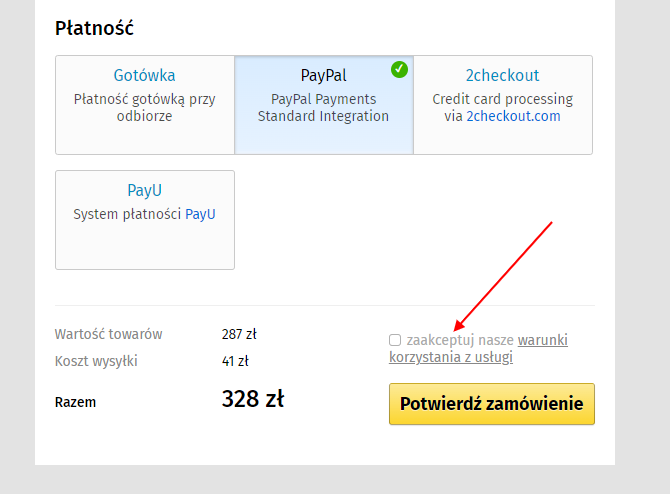
Plugin displays the HTML code defined in the plugins settings under the "Content" block.
-
Example:
- Before making settings:
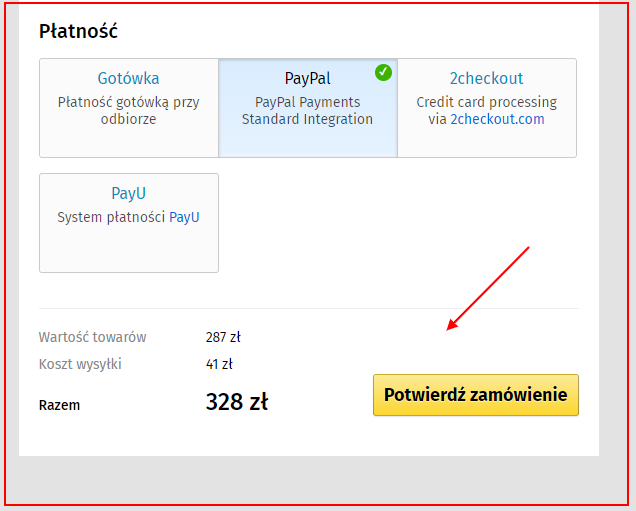
- After applying settings:
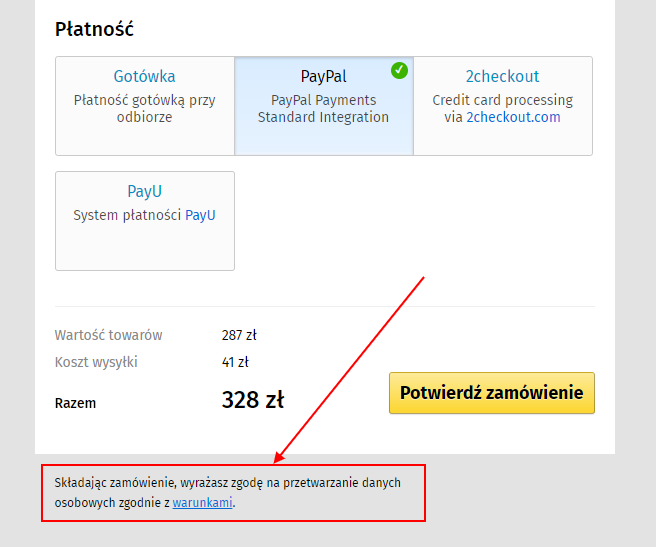
- Before making settings:
Change the message about the inability to place an order?
In the >Web Systems Pro< application, Shopy-Script has one unpleasant feature: if the database contains a contact with a specific email address and/or phone number, and a user who registered a new account on the site (with a different email address) and tried to place an order by entering the same email address/phone number of the previously registered contact, this user will be unable to place the order. The warning looks as follows:
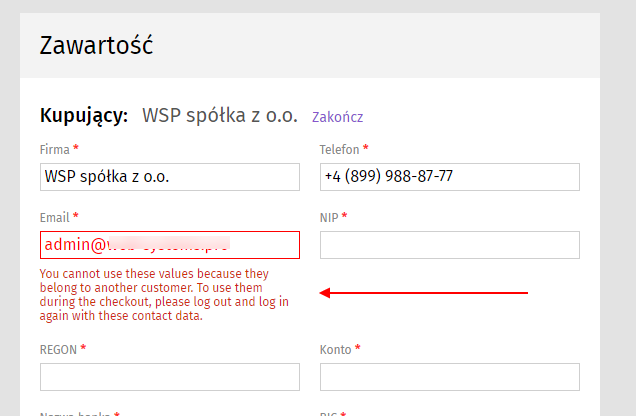
Therefore, thanks to the plugin, it is possible to completely replace this text with any other text (set in the settings). And in the text, you can use a small hint: if the store has the option "Create a new customer profile for each order without authorization" enabled (Shopy-Script --> "Settings" --> "Order placement" --> block "Confirmation" --> line "Updating customer profiles and automatic registration"), if the customer does not need to be logged into their first account, it is enough for them to log out (by the way, I recommend using this option in the "Order placement" settings on all projects, so as not to disrupt the normal order placement process).
Plugin implements the HTML code defined in the plugins settings, replacing the "standard" hint used by the Shopy-Script application (it works correctly both on the new version of the Shopy-Script application and on old versions of the Shopy-Script application - it finds and replaces both the old hint and the new one).
-
Example:
-
After entering the settings:
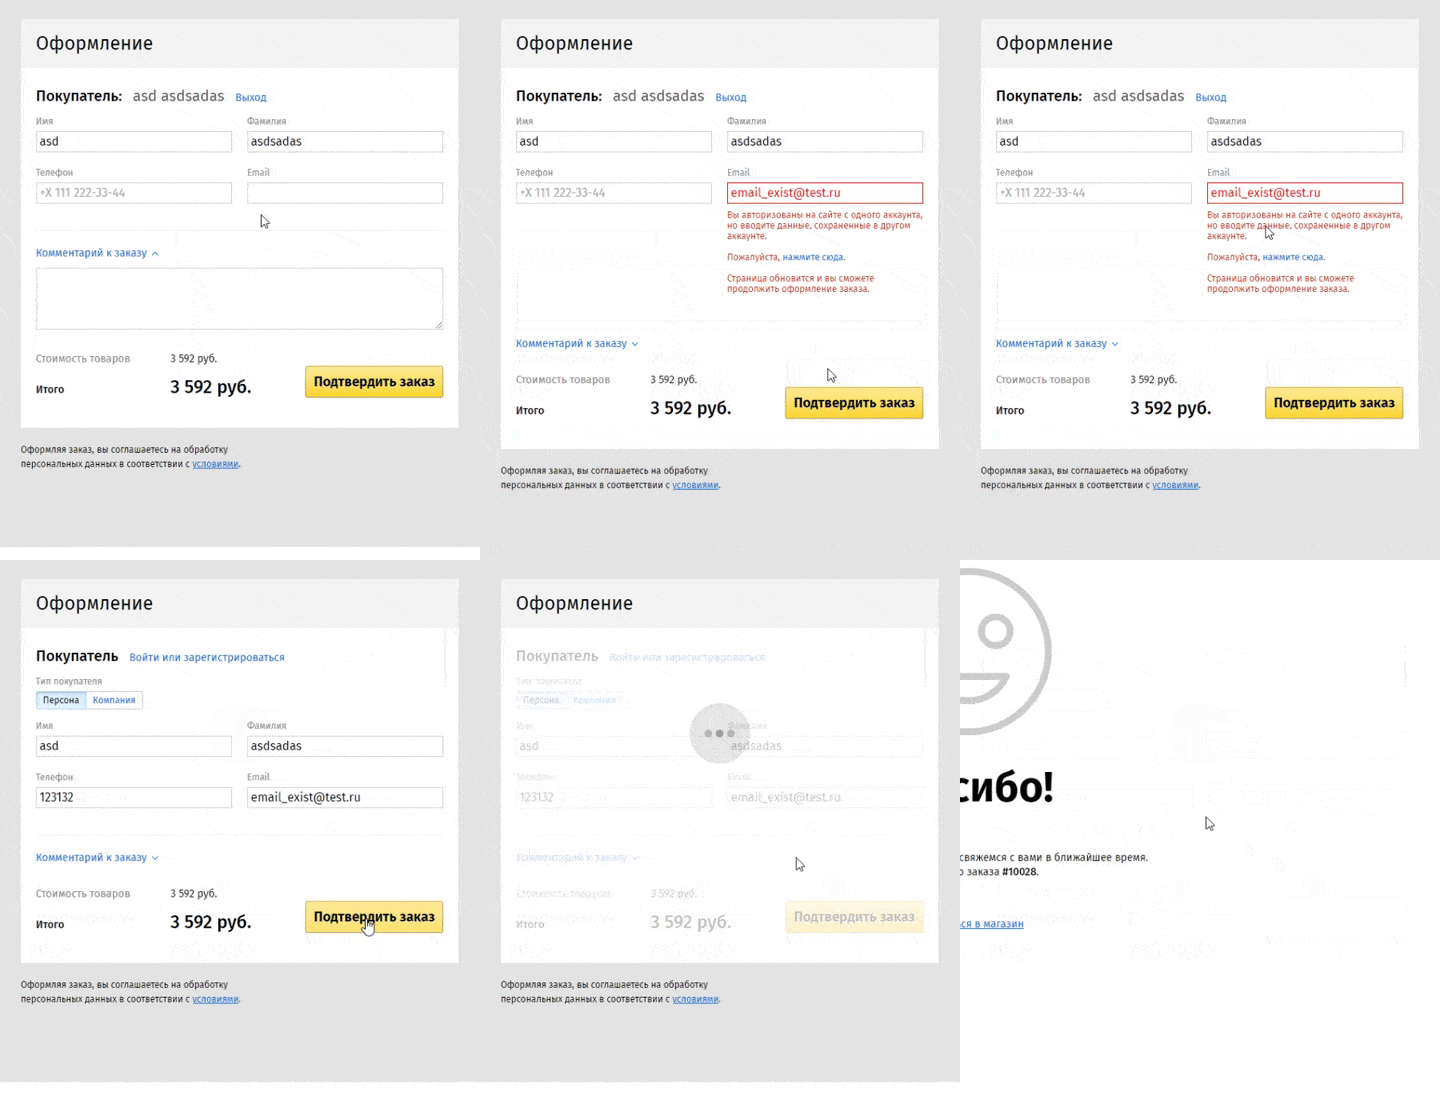
-
After entering the settings:
Important clarification! Do not try to test the "Order placement" functionality by entering the store administrator's email address. In this case, clicking the "click here" link will not help place an order - the same error message will appear repeatedly, because absolutely no one except the store administrator can place an order by entering the store administrator's email address. Real customers will not encounter this problem, so there is no point in refining the error message and showing something like "You cannot use the store administrator's email address".
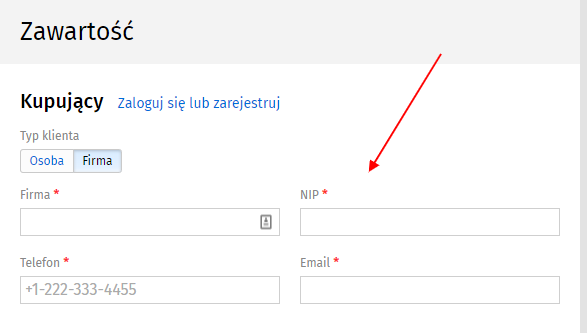
Hide fields with the "Mini" field width?
It is often necessary to configure the checkout process so that when creating and/or editing an order in the backend, the manager can fill in all available fields, while the customer in the cart sees only some of them. In the Shopy-Script app, there is no way to solve this problem with standard tools, but it can be solved using plugins by applying the standard "Field width: mini" setting to the fields you want to hide (Shopy-Script --> "Settings" --> "Placing an order" --> block "Customers" --> select the required field -- > select "Field width" --> value "Mini"):
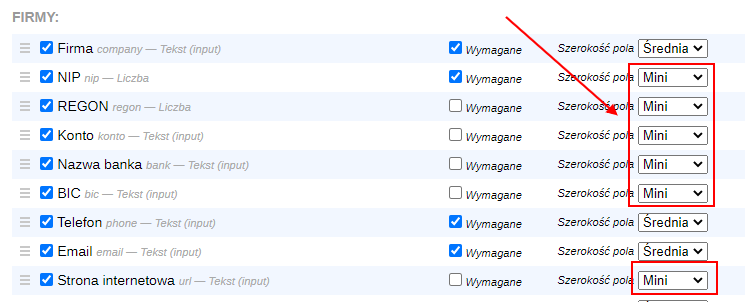
After selecting the appropriate setting, plugin checks the width of the fields displayed in the cart, and all fields with the "Mini" width that are not required to be filled in are hidden from customers.
-
Example:
- Before applying the setting:
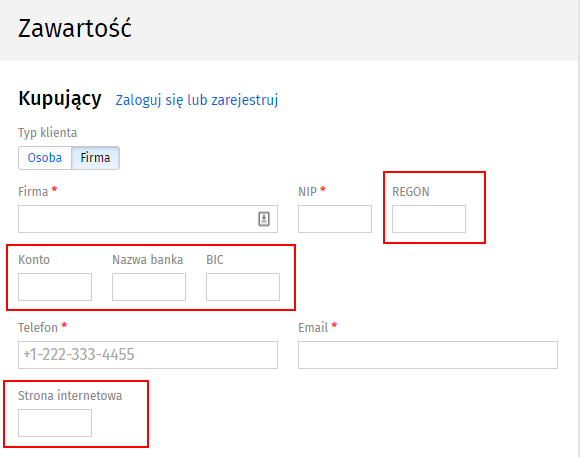
- After applying the setting:
- Before applying the setting:
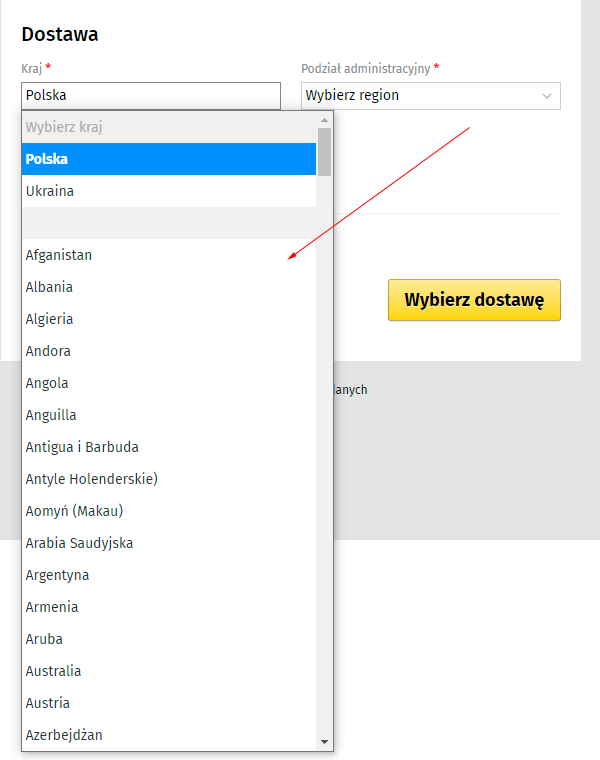
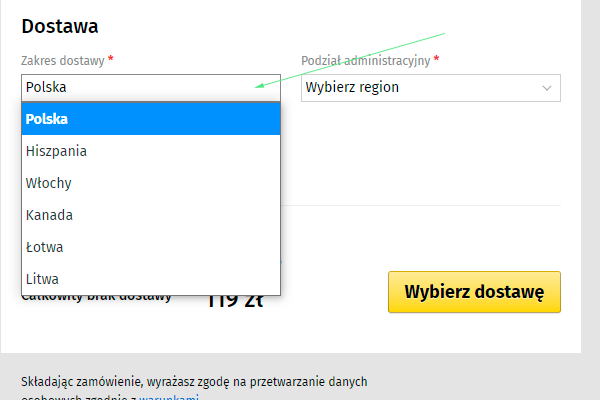
Limit the list of countries that a user can select from the country list?
This setting allows you to hide all countries except those specified in the plugins settings in the country selection field.
-
Example:
- Before applying the setting:
- After applying the setting:
- Before applying the setting:
This configuration may not work on some themes (for example, older versions of the Megashop 2.0 theme; newer versions work correctly), because website theme may replace elements in the page code to style the dropdown list and does not check the display status of the origanal option.
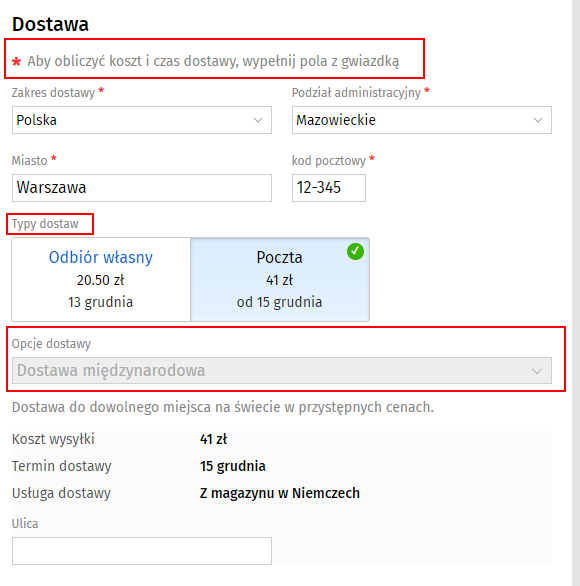
Hide unnecessary elements on the page?
If you work with only one shipping service with delivery to a pickup point (Pickup point), then in the same city, the same information is most often displayed at every pickup point. In my opinion, it only distracts the buyer from placing an order (since the cost and delivery time are shown in the general list of pickup points). Therefore, plugin has the option to hide this block.
-
Example:
- Before applying the setting:
- After applying the setting:
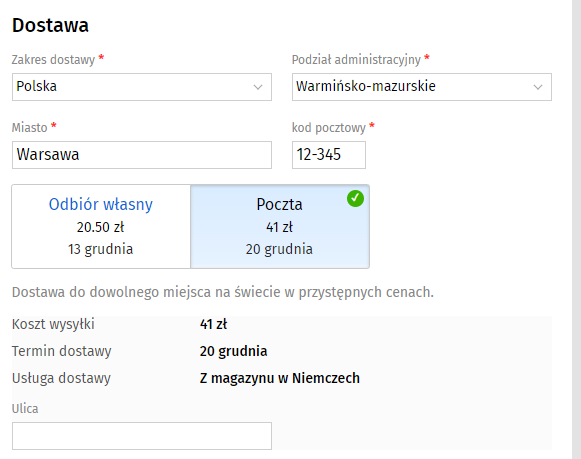
- Before applying the setting:
Hide the pickup point information block in the popup window?
If you work with only one delivery option with delivery to a pickup point (PWZ), then in the same city the same information is usually displayed at every pickup point. In my opinion, it only distracts the buyer from placing the order (since the cost and delivery time are shown in the general list of pickup points). That is why the plugin provides the option to hide this block.
-
Example:
-
Before applying the setting:
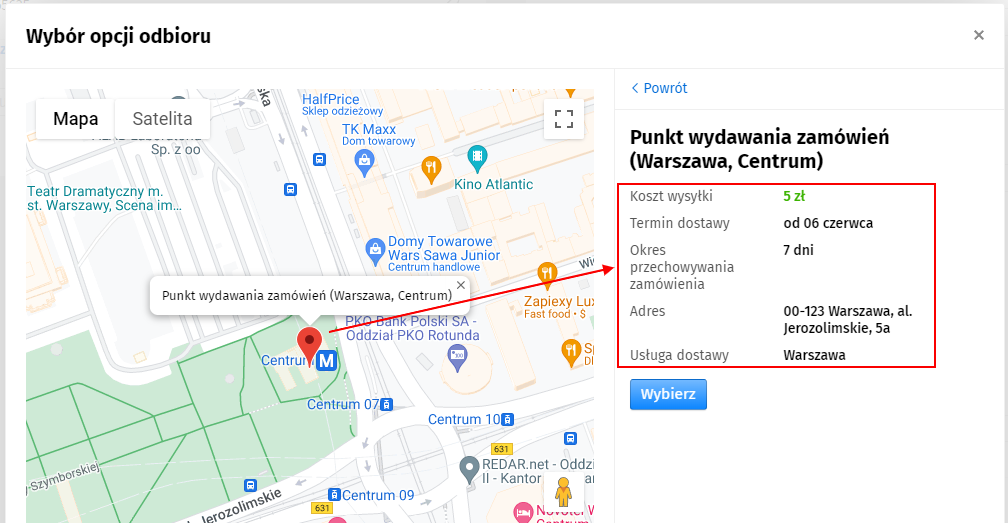
-
After applying the setting:
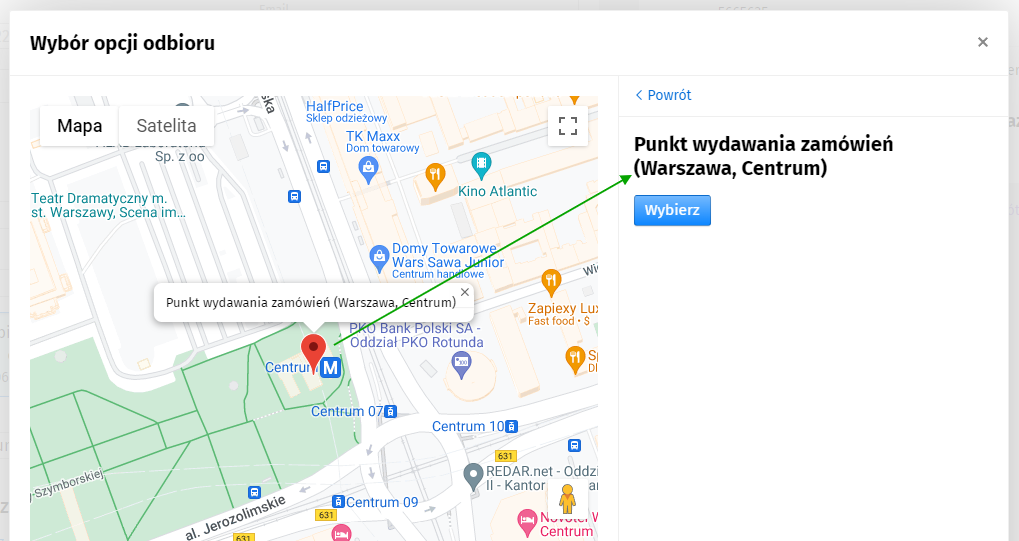
-
Before applying the setting:
Display information about the type of delivery?
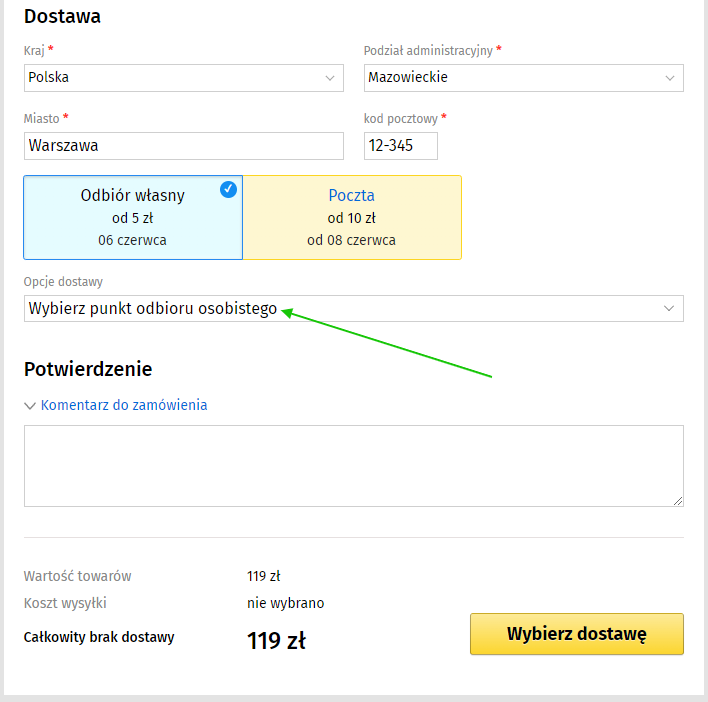
This setting replaces the phrases such as "Delivery option", which are the same for all delivery types, with phrases corresponding to the delivery type. For example: "Select a pickup point" and "Select a courier delivery option").
-
Example:
-
Before applying the setting:
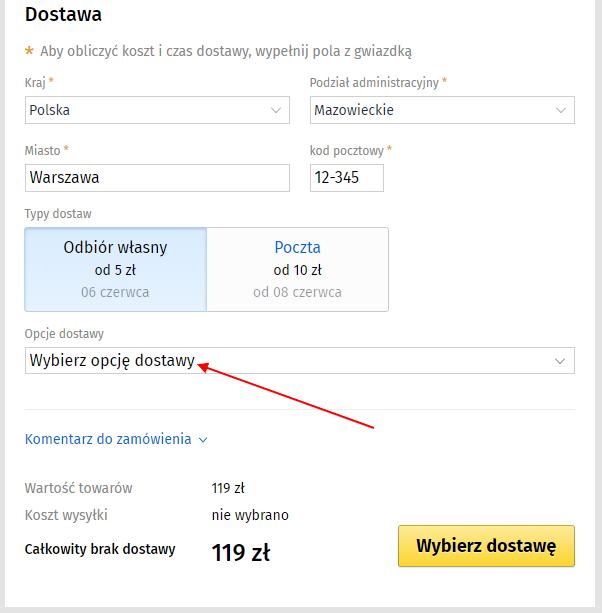
-
After applying the setting:
-
Before applying the setting:
Apply the fix for pickup point images?
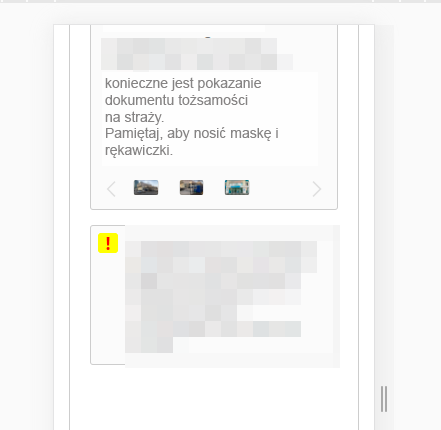
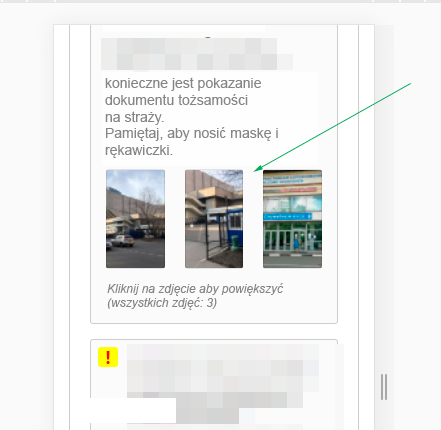
This setting styles the pickup point images displayed by the "Pickup point" plugin. This is especially true for the mobile version of the site, where the pickup point images in the regular cart of the site are displayed as crookedly as possible.
-
Example:
-
Before applying the setting:
-
After applying the setting:
-
Before applying the setting:
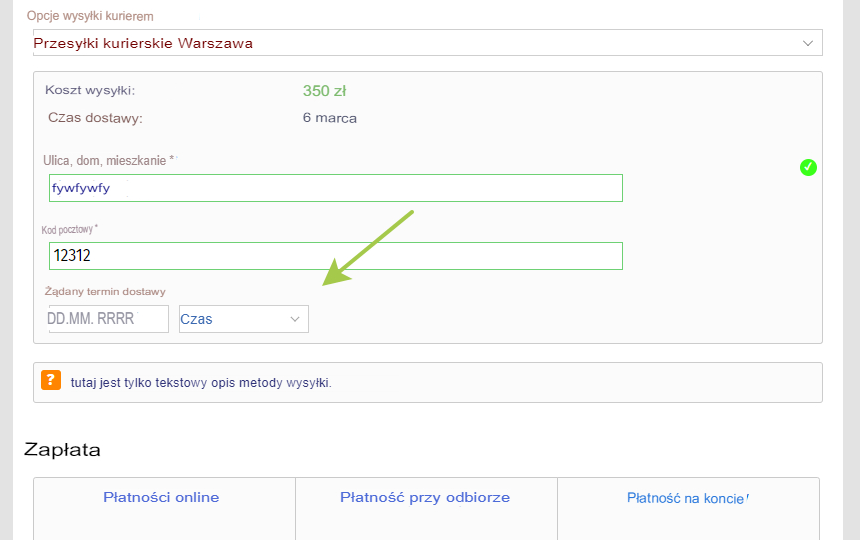
Apply the fields for selecting the desired delivery time and date?
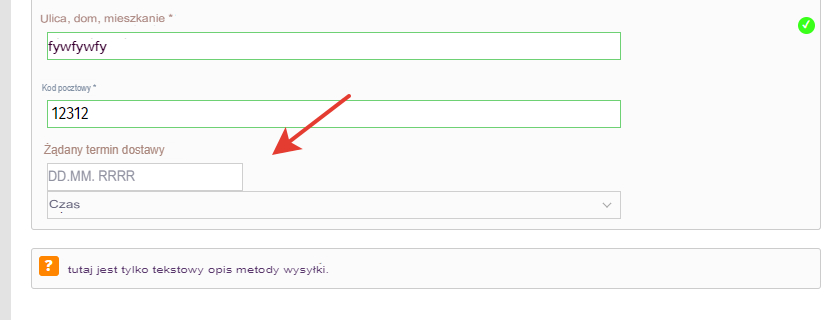
This setting styles the "Desired delivery date" and "Desired delivery time" fields (optionally displayed for some shipping methods).
-
Example:
-
Before applying the setting:
-
After applying the setting:
-
Before applying the setting:
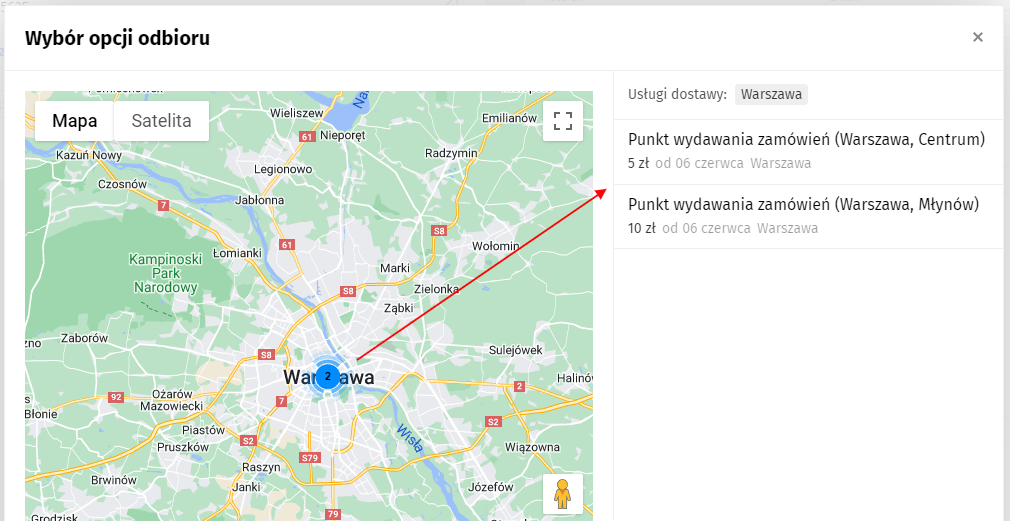
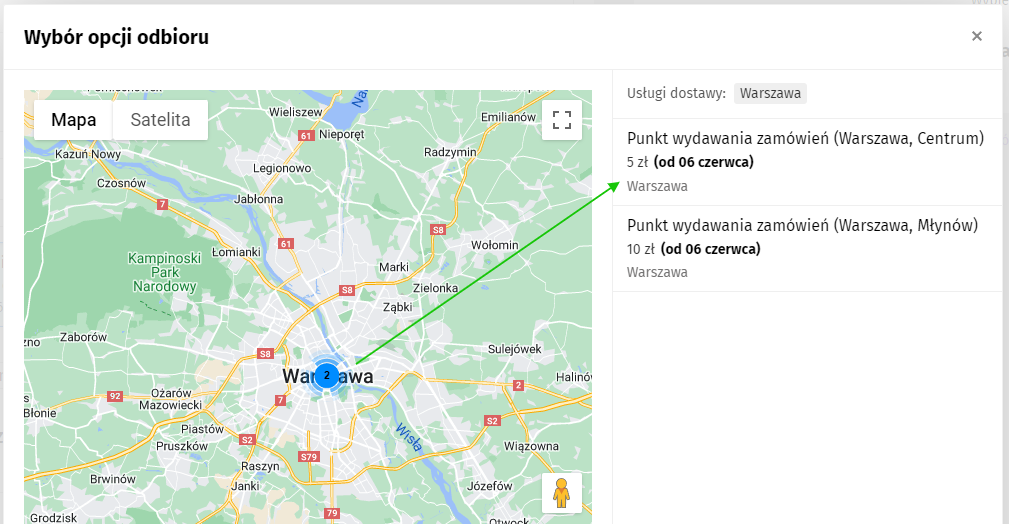
Style pickup point information in the popup?
This setting styles the pickup point information in the pickup point selection popup: it specifies the delivery date, shipping cost, and pickup service name.
-
Example:
-
Before applying the setting:
-
After applying the setting:
-
Before applying the setting:
Move and finalize the shipping method description; finalize the block with detailed shipping method information?
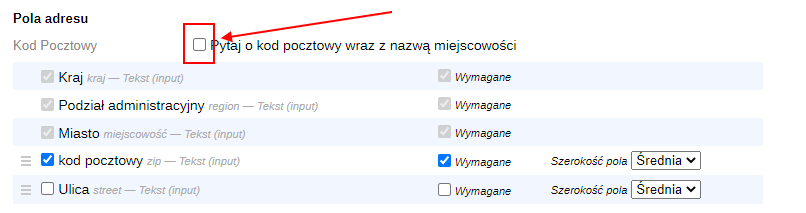
Important! For this setting to work correctly (and in general, for all plugins delivery providers to work correctly, so that they calculate and show the cost and delivery time before the shipping method is selected), it is necessary to correctly configure the order of field requests. It is recommended to make the following settings (Shopy-Script --> "Settings" --> "Place order" --> section "Delivery" --> block "Address fields"):
-
Example:
-
Incorrect field request setting:
-
Also an incorrect field request setting:
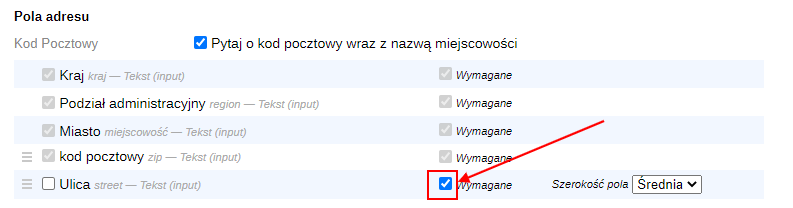
-
And also an incorrect field request setting:
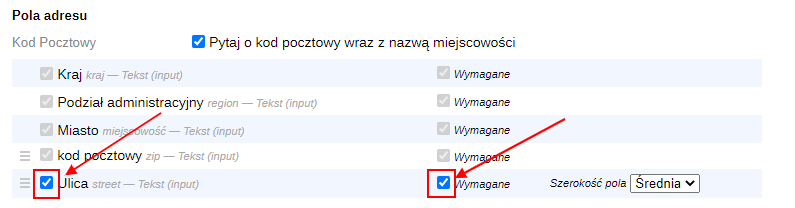
-
Correct field request setting:
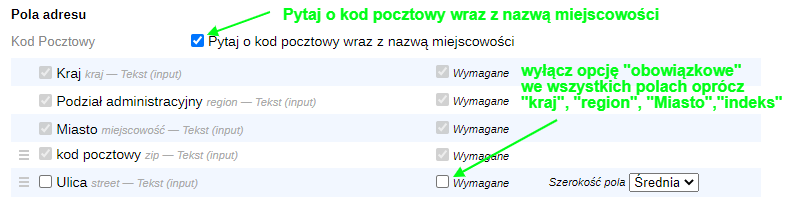
-
Incorrect field request setting:
Don't pay attention to the fact that, judging by the Settings, the "Street house apartment" field will not be required. It will be required, but only when necessary (plugins delivery providers themselves request this field if it is required, ignoring this setting). However, keep in mind that the "postal code" field will be required at the "Customers" step. This is necessary for some delivery plugins to work properly. However, buyers do not always have to fill in the postal code - they may not plan to ship via Poczta Polska, but want to pick up the order themselves. Therefore, the only correct solution to this problem is to visually hide the "postal code" field from the buyer and fill it in automatically, depending on the selected city.
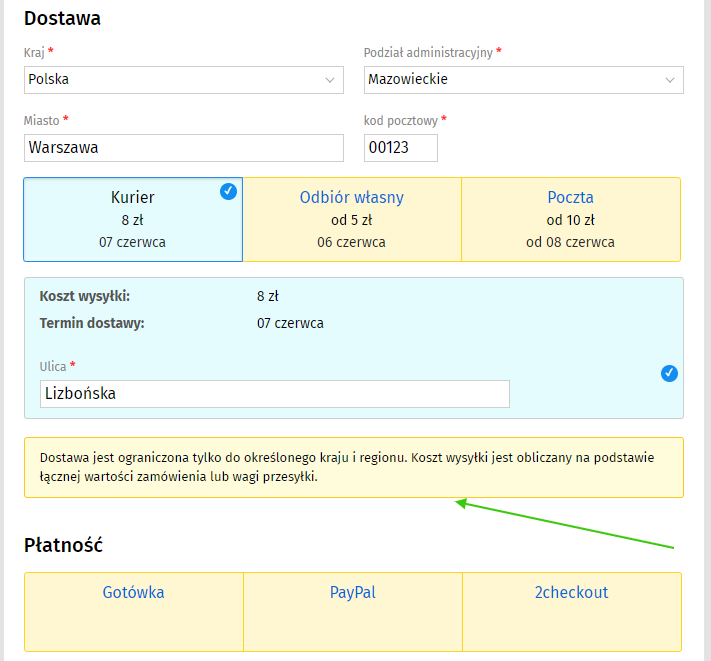
The plugin, in turn, simply finalizes the output of the block containing the shipping description and the block with detailed information about the selected shipping method, and also consolidates all blocks from various shipping calculation plugins into a single visual view and renders them. This is necessary because, in the standard design, the description of shipping methods is poorly designed; as a result, users often do not read the information provided there and do not fill in the “Street, House, Apartment” field for courier shipping methods.
-
Example:
-
Before applying the setting:
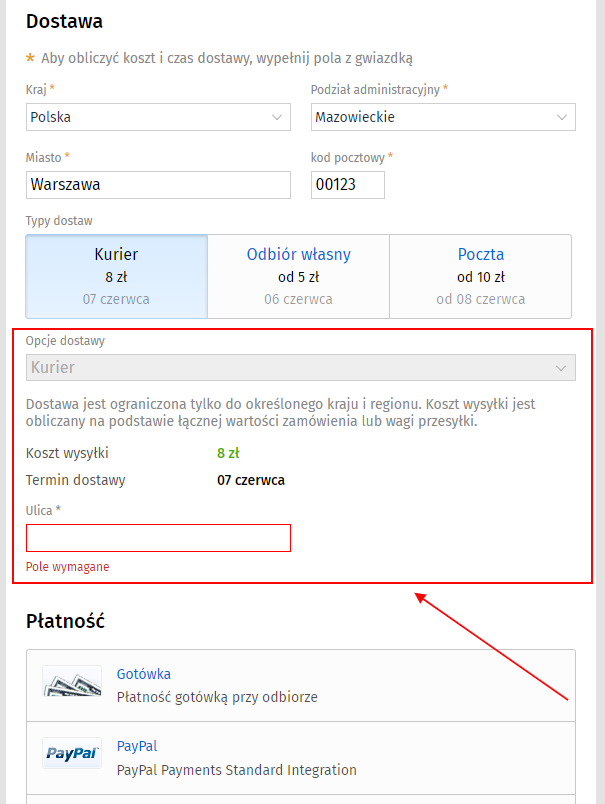
-
After applying the setting:
-
Before applying the setting:
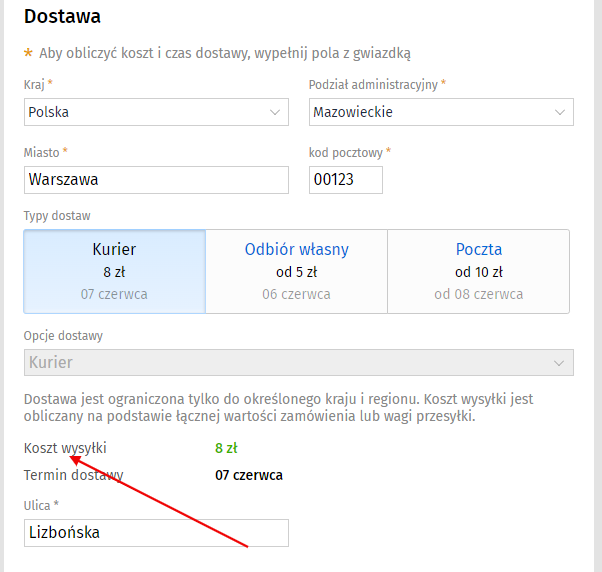
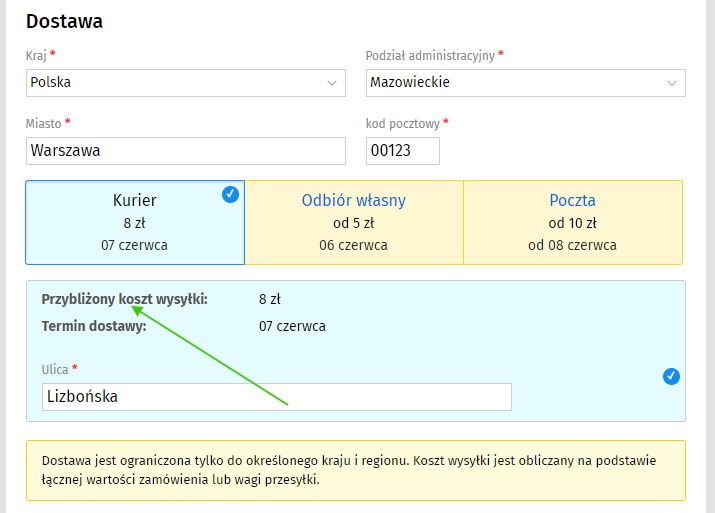
Replace the phrase "Shipping cost"?
Plugin allows you to change the phrase "Shipping cost" to any other phrase set in the plugins settings
-
Example:
-
Before applying the setting:
-
After applying the setting:
-
Before applying the setting:
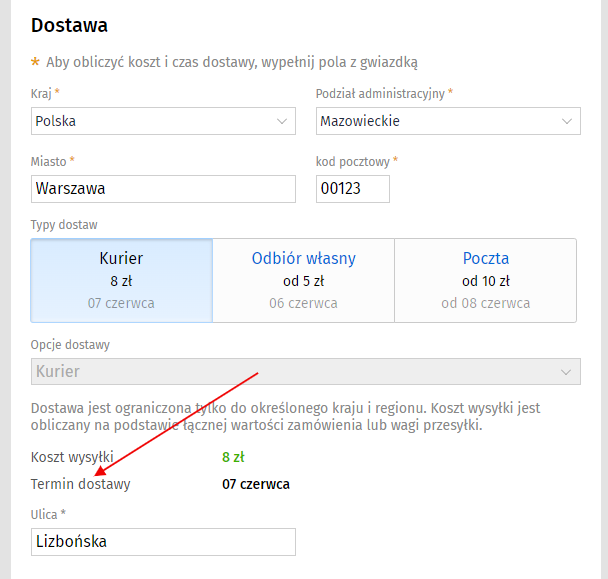
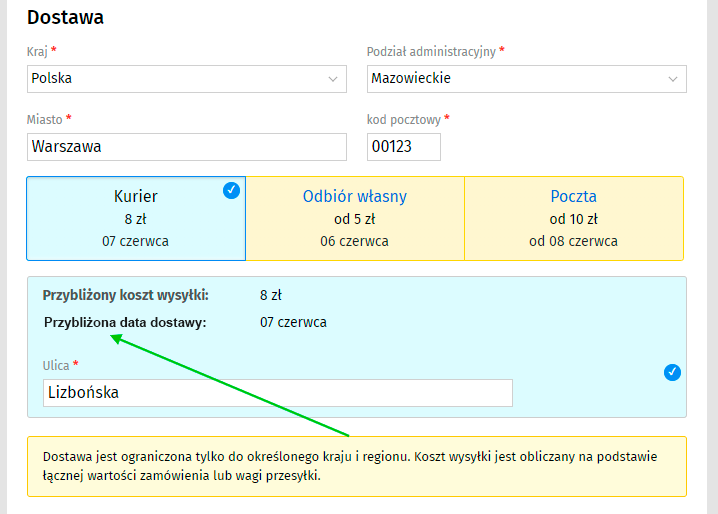
Replace the phrase "Delivery time"?
Plugin allows you to change the phrase "Delivery time" to any other one set in the settings of plugins
-
Example:
-
Before applying the setting:
-
After applying the setting:
-
Before applying the setting:
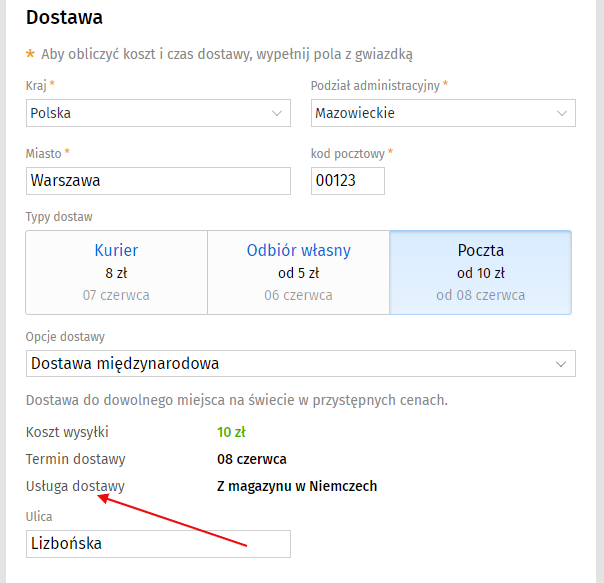
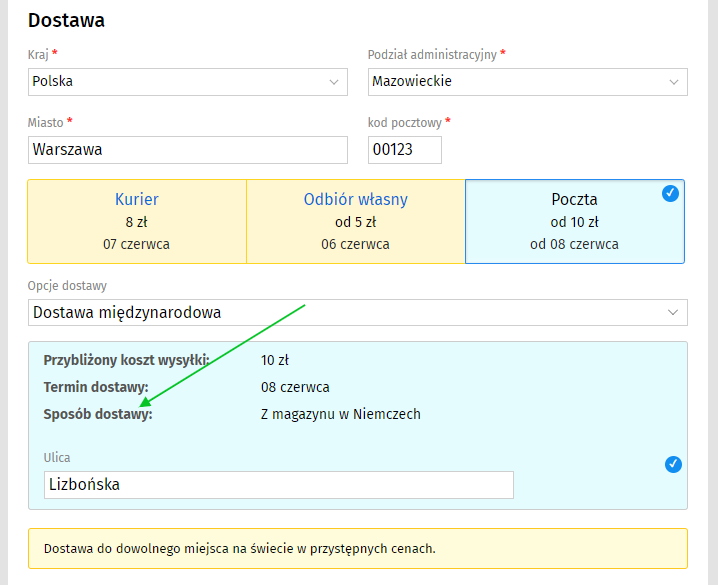
Replace the phrase "Delivery service"?
Plugin allows you to change the phrase "Delivery service" to any other one set in the settings of plugins
-
Example:
-
Before applying the setting:
-
After applying the setting:
-
Before applying the setting:
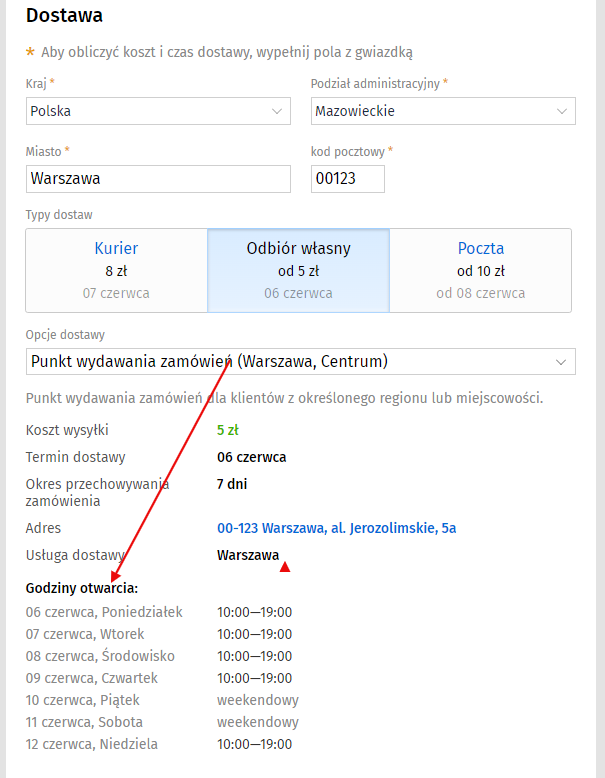
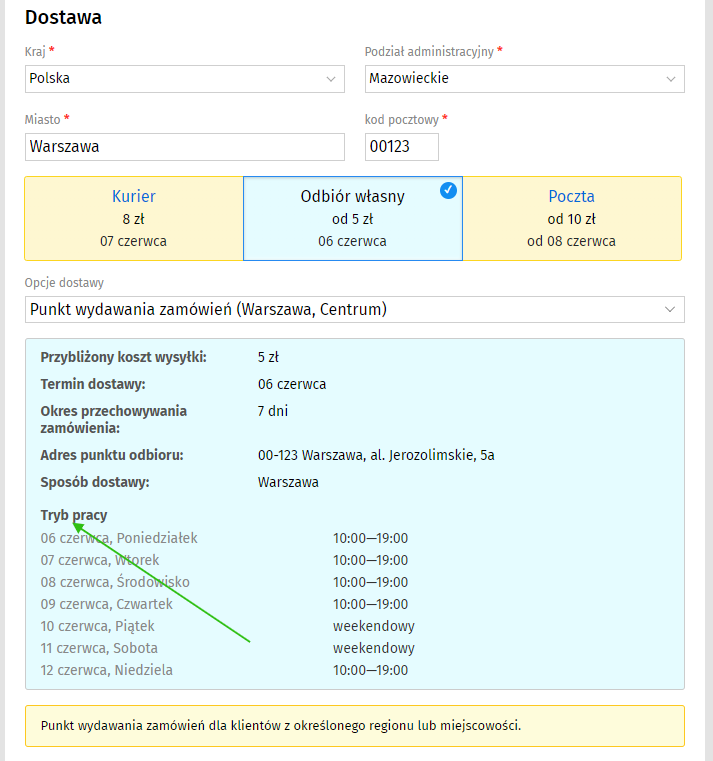
Replace the phrase "Working hours"?
Plugin allows you to change the phrase "Opening hours" to any other phrase set in the plugins settings
-
Example:
-
Before applying the setting:
-
After applying the setting:
-
Before applying the setting:
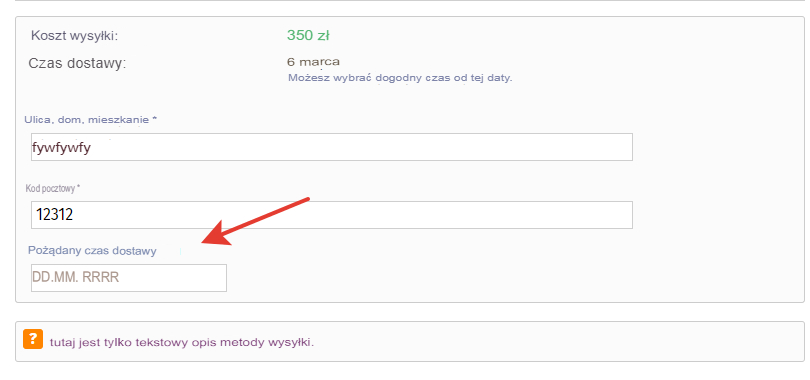
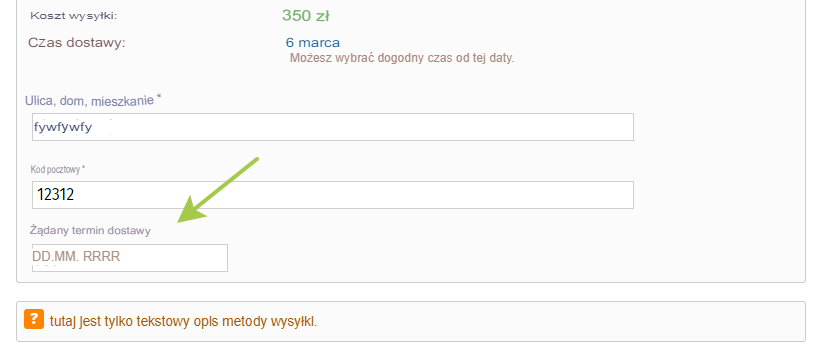
Replace the phrase "Desired delivery time"?
Plugin allows you to change the phrase "Desired delivery time" (shown in those shipping methods where the desired delivery date option is enabled) to any other phrase set in the plugins settings
-
Example:
-
Before applying the setting:
-
After applying the setting:
-
Before applying the setting:
Replace the phrase "Can you choose a convenient time from this date"?
Plugin allows you to change the phrase "Can you choose a convenient time from this date" (displayed in those delivery methods where selection of the desired delivery date is enabled) to any other specified in the settings of plugins
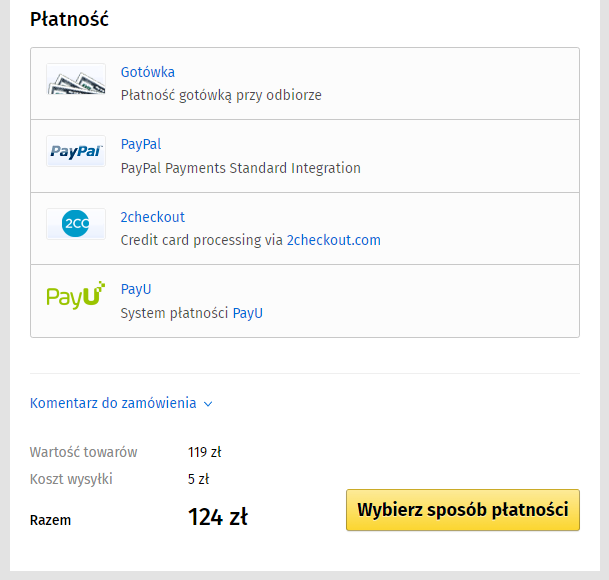
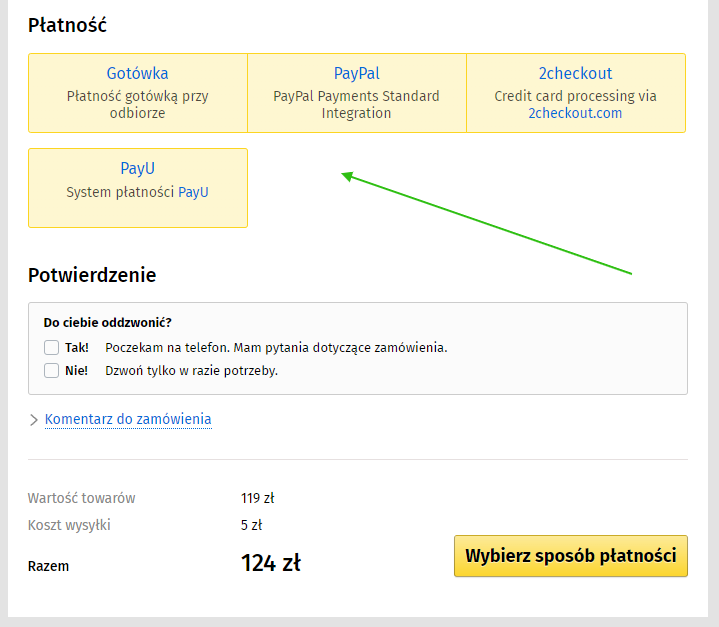
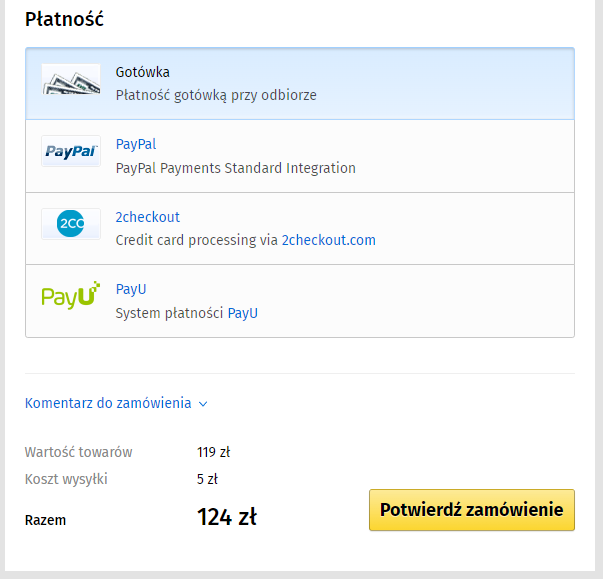
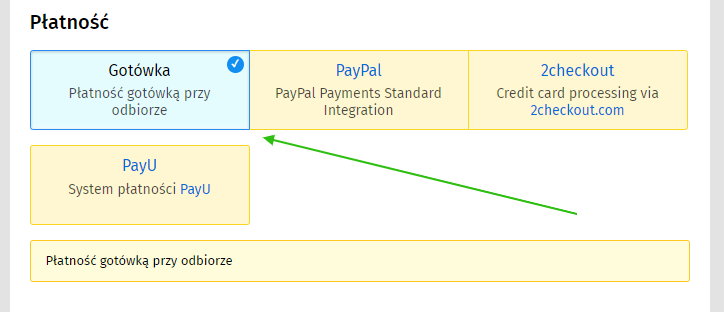
Display payment methods as cards?
Plugin replaces the standard display of payment methods as text strings with a display of payment methods as cards (with the same design as the shipping methods design).
-
Example Example with inactive payment methods:
-
Before applying the setting:
-
After applying the setting:
-
Before applying the setting:
-
Example with one active payment method:
-
Before applying the setting:
-
After applying the setting:
-
Before applying the setting:
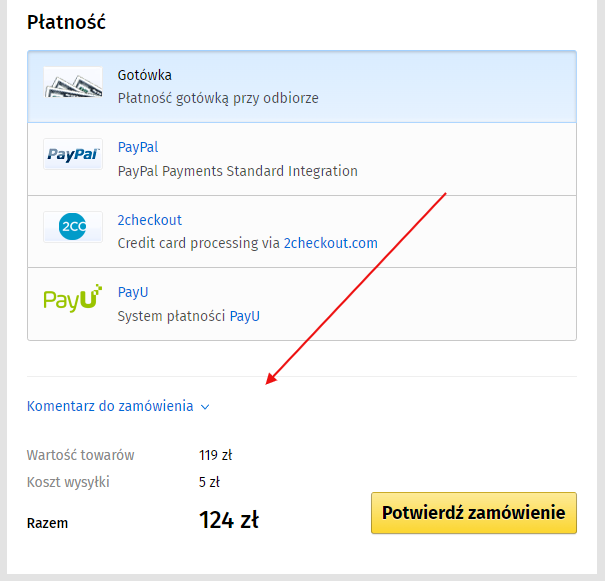
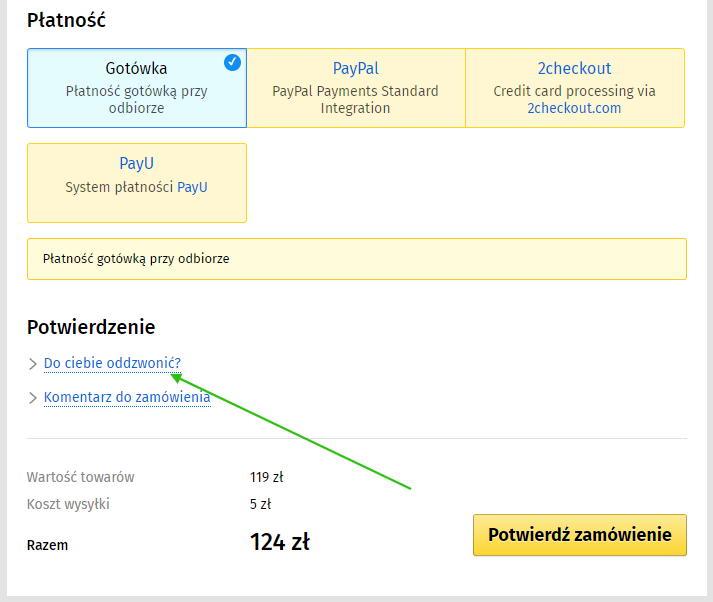
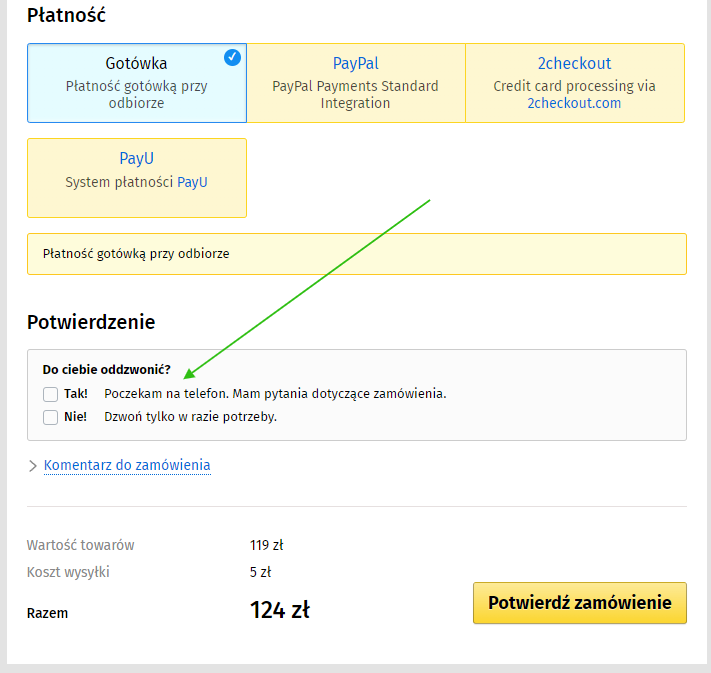
Output of the "Call me back" block at the "Confirmation" stage?
Plugin allows displaying the "Call back?" block in the Cart and transferring the value selected by the buyer to the order page. This module works without the need to integrate with the design theme and has several display options: for example, it can be expanded or collapsed under a spoiler (similarly to the order comment field) and displayed only after clicking the subtitle. Additionally, this block can be displayed immediately after the page loads or only after the payment method is selected. The text displayed in the "Yes" and "No" values is configured in the plugins settings. By default, none of the options are selected on the page. A distinctive feature of the module is that it can be hidden for certain shipping and/or payment methods.
-
Example
-
Before applying the setting:
-
After applying the setting (display under a spoiler):
-
After applying the setting (display in open form):
-
Before applying the setting:
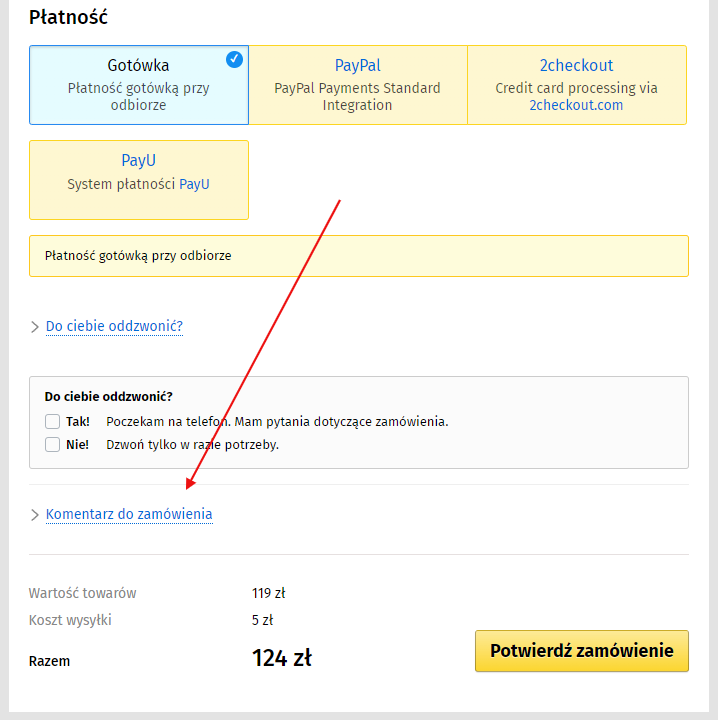
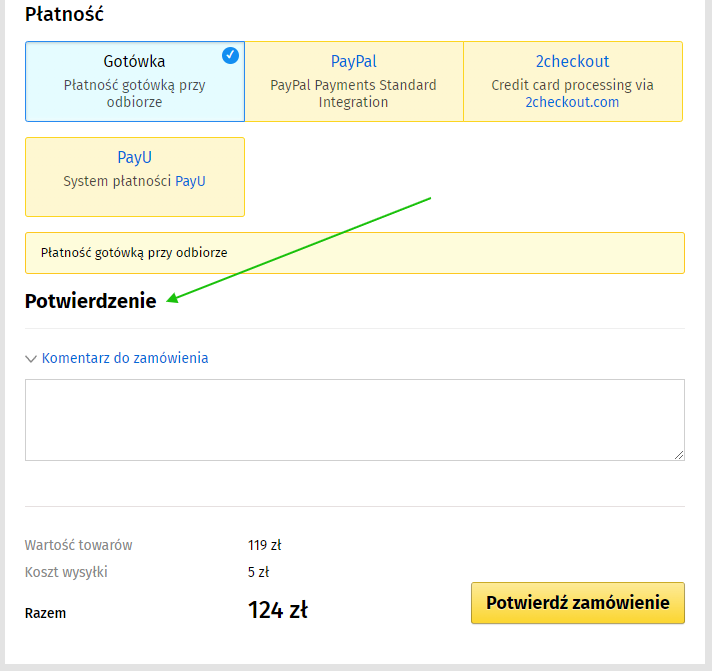
Show the "Confirmation" heading?
Each checkout block in the standard cart of the store is visually highlighted with its corresponding heading, but the "Confirmation" heading for some reason is not displayed. Plugin allows you to output it (and tries to inherit the heading styling from the other headings, but in some themes it may be displayed differently).
-
Example
-
Before applying the setting:
-
After applying the setting:
-
Before applying the setting:
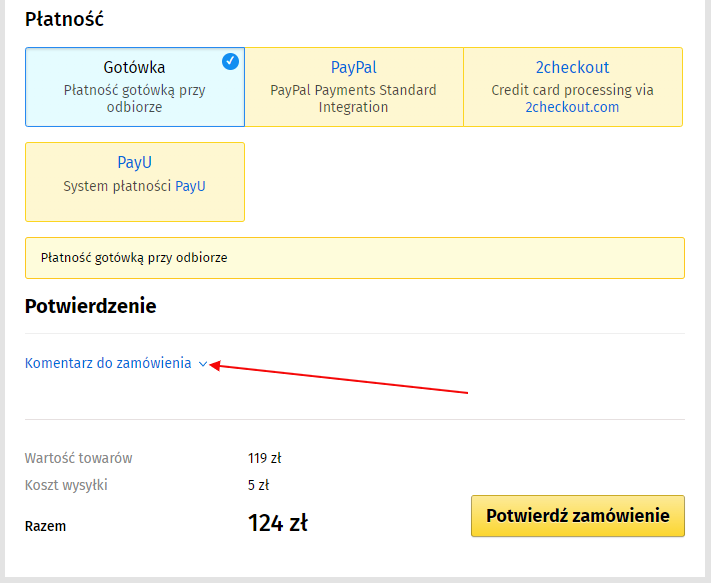
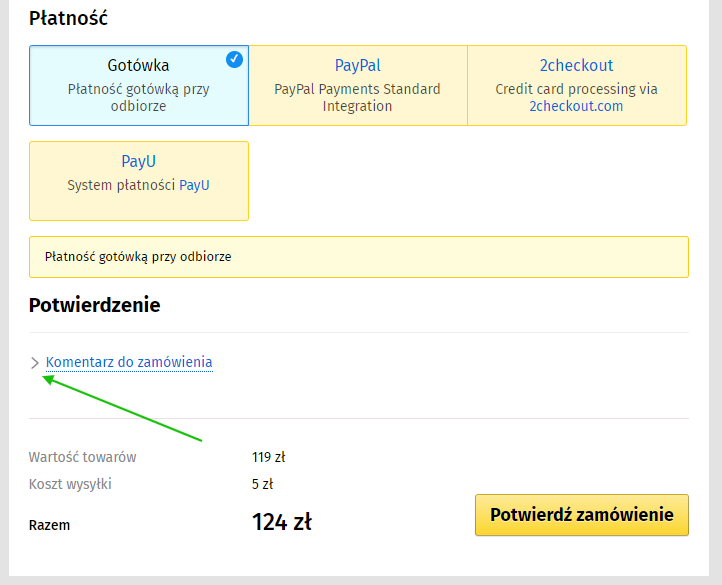
Change the styling of the "Order comment" spoiler?
Plugin creates a slightly different spoiler "Order comment" (as well as the "Call back" spoiler, if available).
-
Example
-
Before applying the setting:
-
After applying the setting:
-
Before applying the setting:
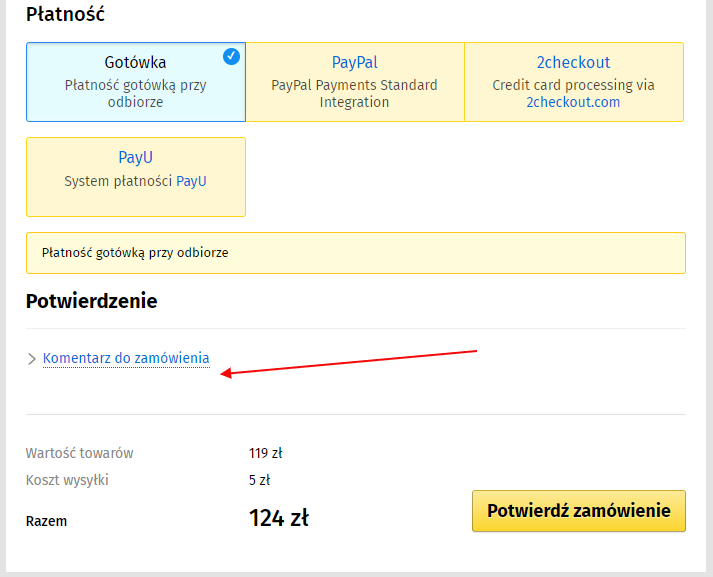
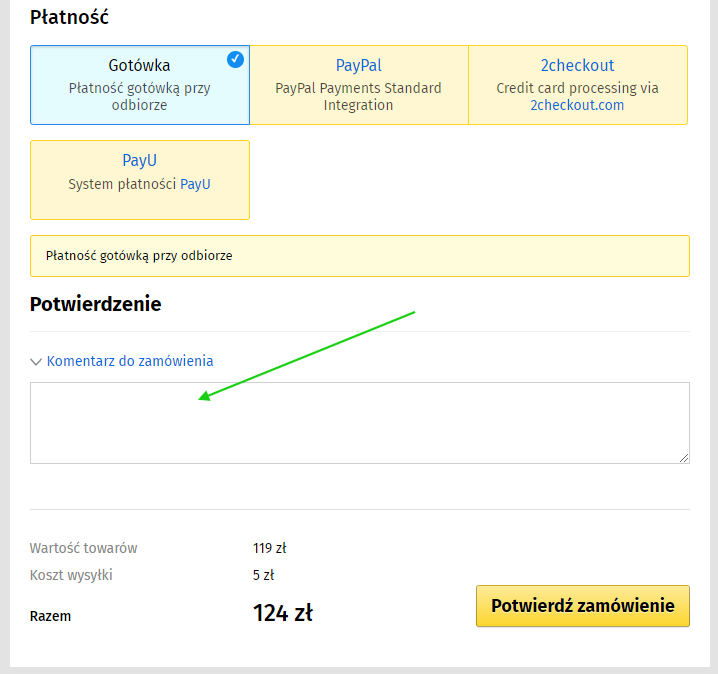
Show the "Order comment" spoiler in open form right away?
Plugin by default opens the "Order comment" spoiler.
-
Example
-
Before applying the setting:
-
After applying the setting:
-
Before applying the setting:
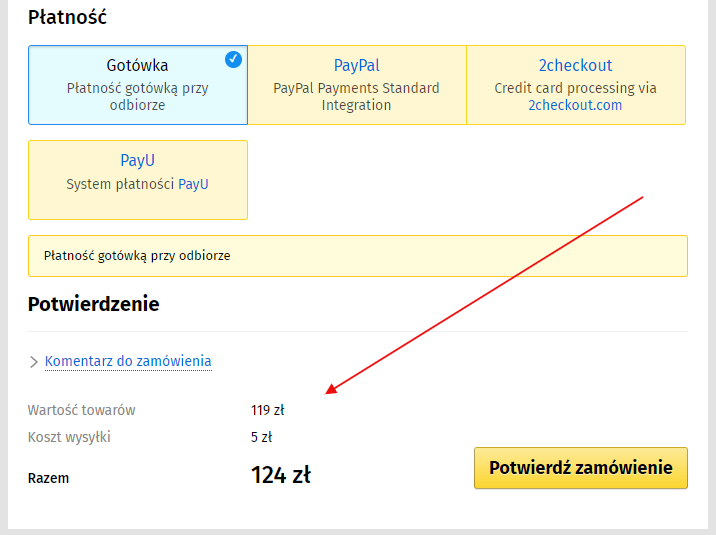
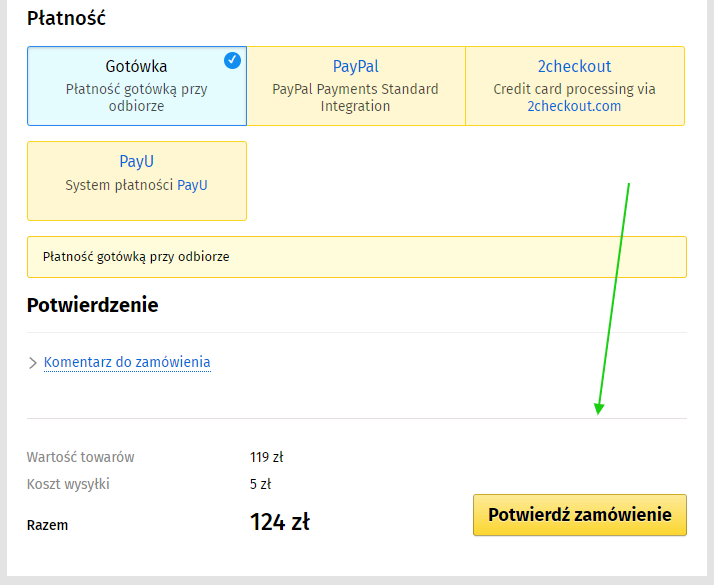
Add a separator line and indentation before the last order confirmation block?
-
Example
-
Before applying the setting:
-
After applying the setting:
-
Before applying the setting:
Fix several minor color bugs in shipping/payment cards, border colors of some elements, etc. minor changes.
Plugin makes minor color changes to some elements of the cart theme: names on shipping and payment cards, border colors of some elements, etc.
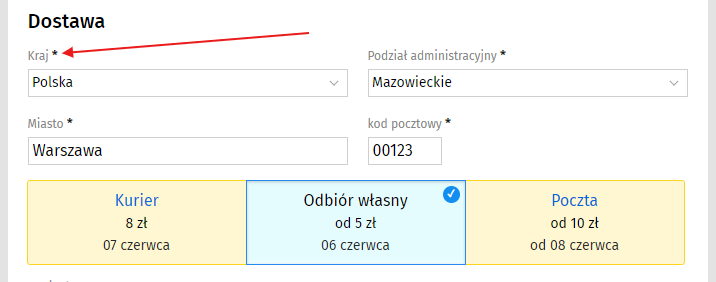
Change the color scheme of fields to enter information?
Plugin lets you apply your own colors to all form fields on the page (input, select, textarea):
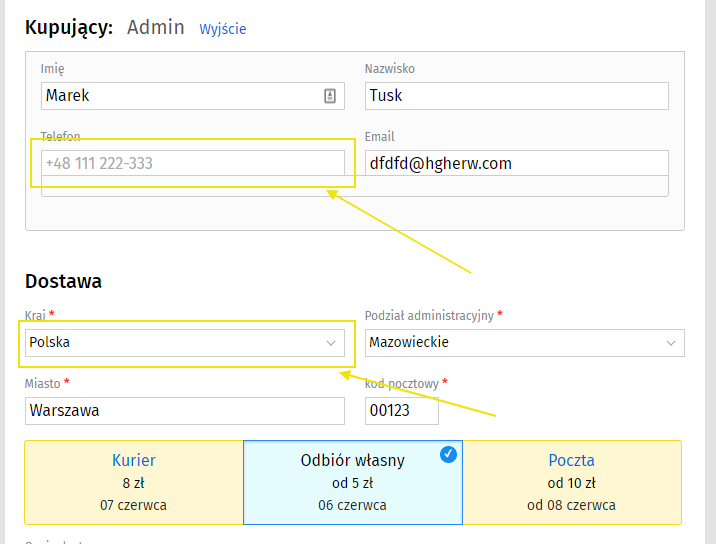
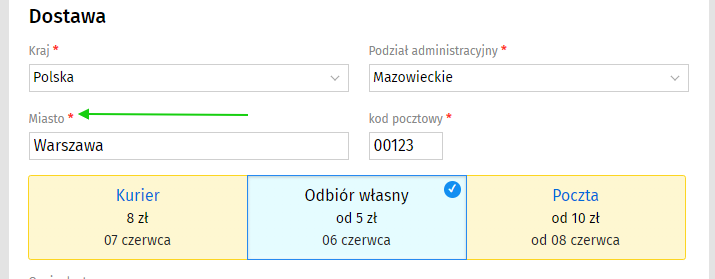
Color of asterisks next to required field labels
In the plugin you can conveniently choose any color.
-
Example
-
Before applying the setting:
-
After applying the setting:
-
Before applying the setting:
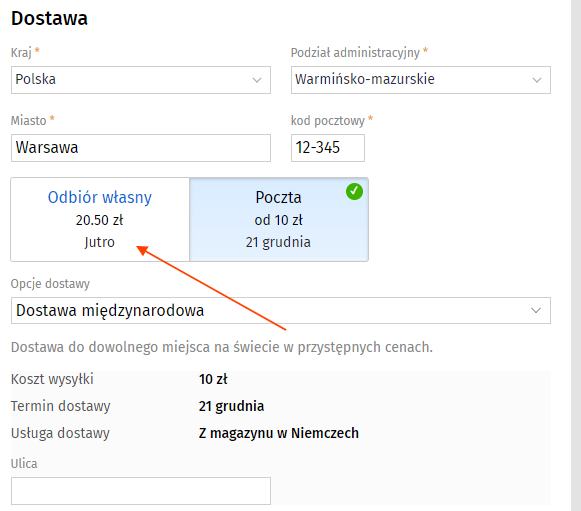
Change the color scheme of inactive shipping and payment cards?
Plugin lets you apply your own color palette to the element shown in the screenshot:
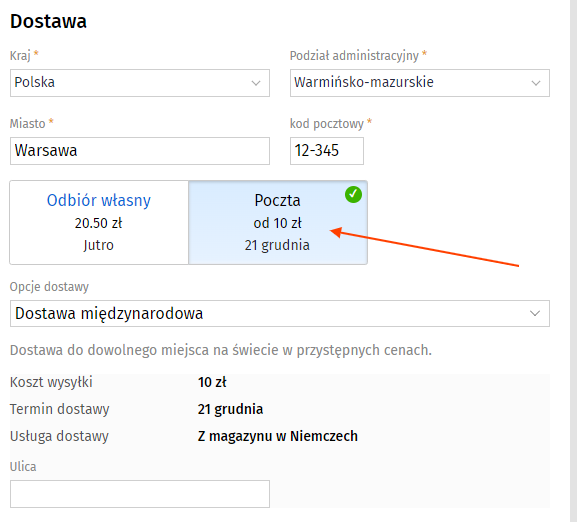
Change the colors of active shipping and payment cards?
Plugin lets you apply your own color palette to the element shown in the screenshot:
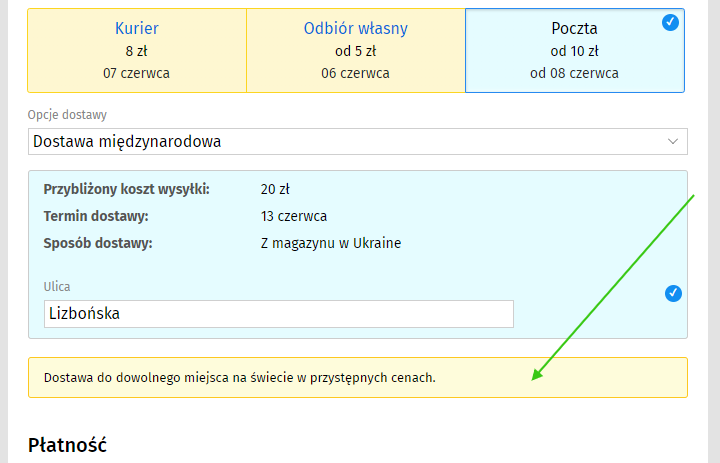
Change the colors of shipping and payment method descriptions?
Plugin lets you apply your own color palette to the element shown in the screenshot:
Change the color scheme of the block with detailed information about the shipping method?
Plugin lets you apply your own color palette to the element shown in the screenshot:
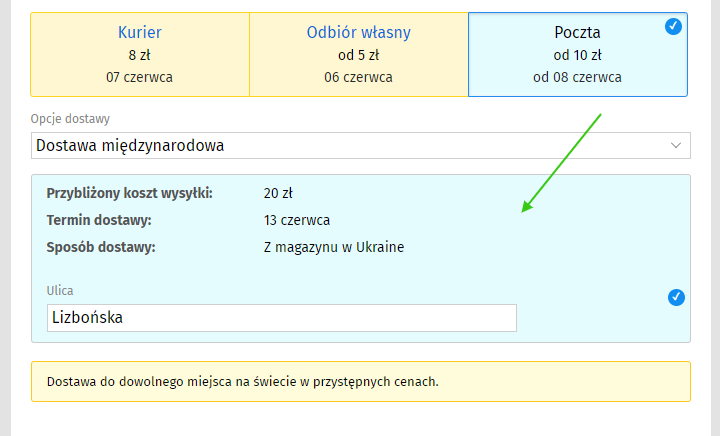
Displays an icon on the active (selected) shipping and payment method tabs?
-
Example
-
Before applying the setting:
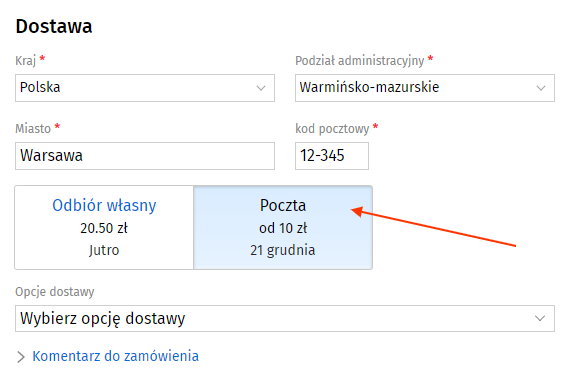
-
After applying the setting:
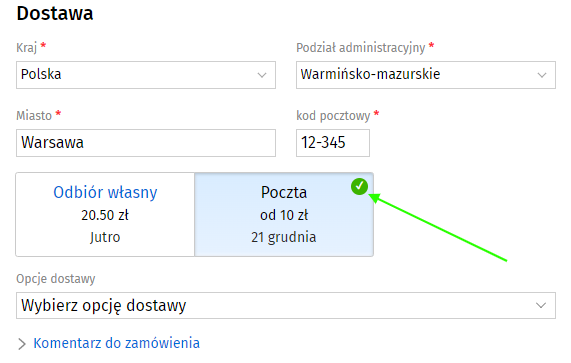
-
Before applying the setting:
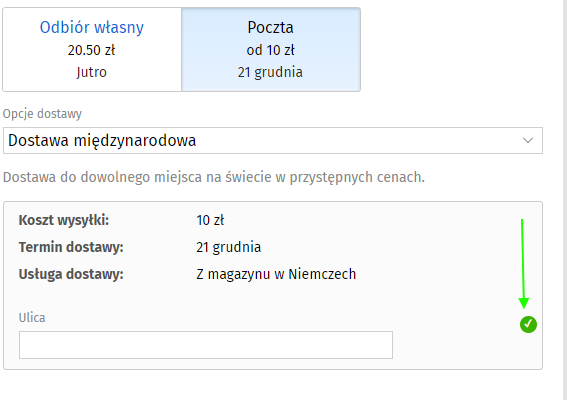
Displays an icon on the block with detailed information about the shipping method?
Plugin allows you to display an icon that signals to the user whether they have filled in all the fields required by the shipping method or not. The icon changes depending on whether the fields are filled in (a cross - if at least one of the fields is not filled in, a checkmark - if all fields are filled in).
-
Example
-
Before applying the setting:
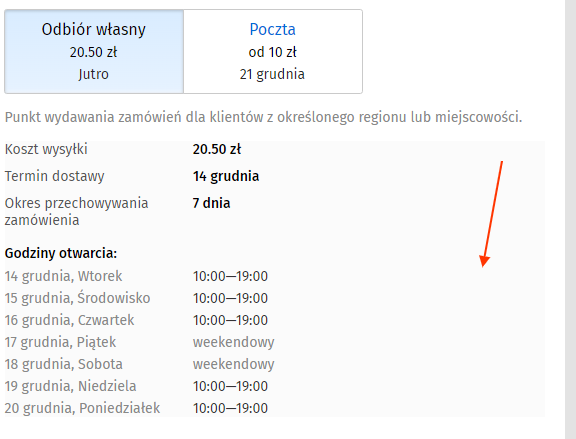
-
After applying the setting:
-
Before applying the setting:
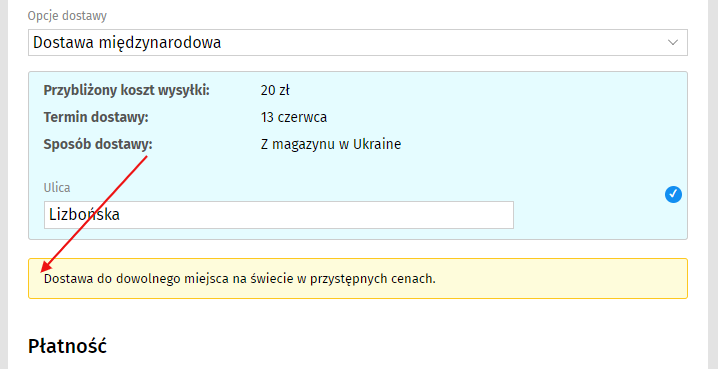
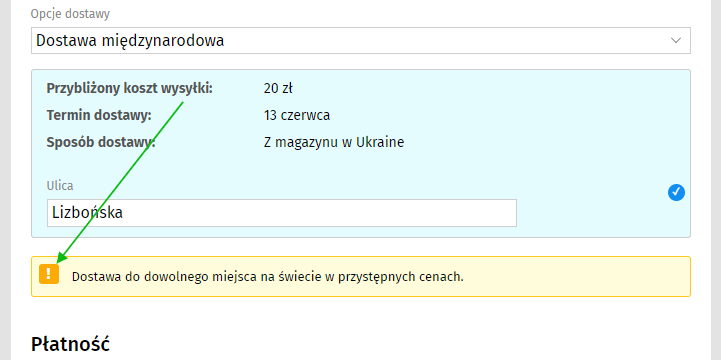
Displays an icon in the description of shipping and payment methods?
-
Example
-
Before applying the setting:
-
After applying the setting:
-
Before applying the setting:
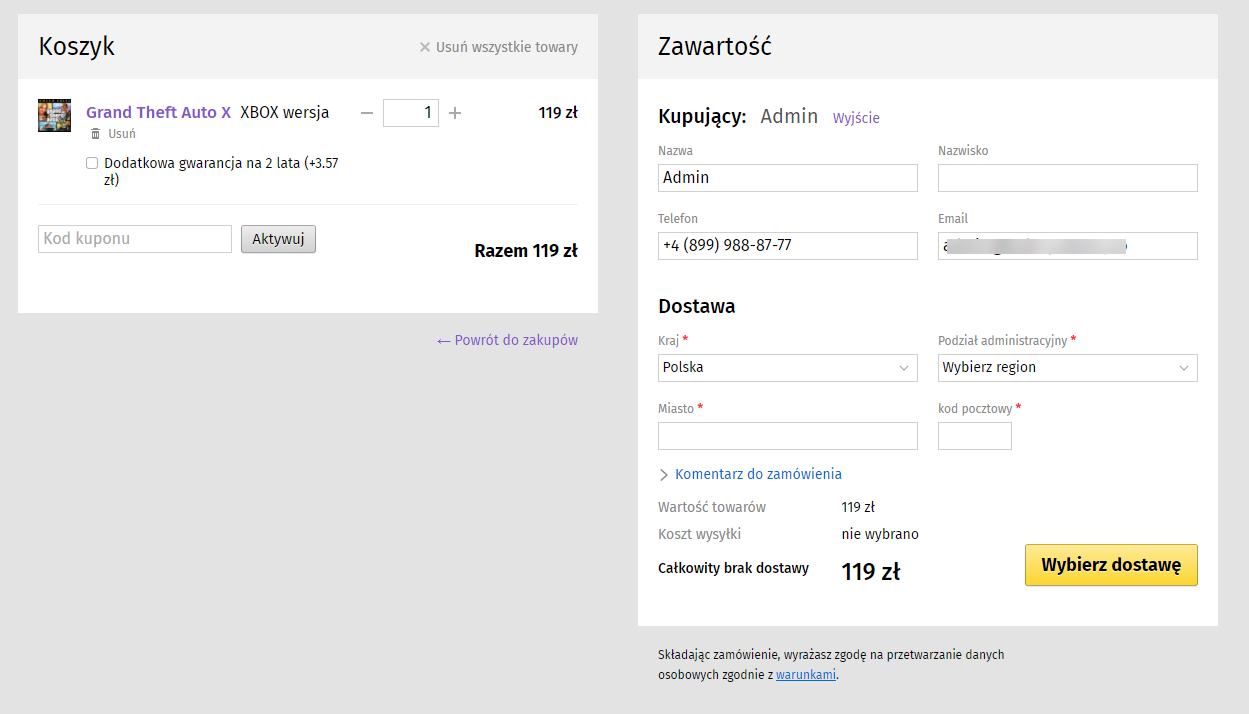
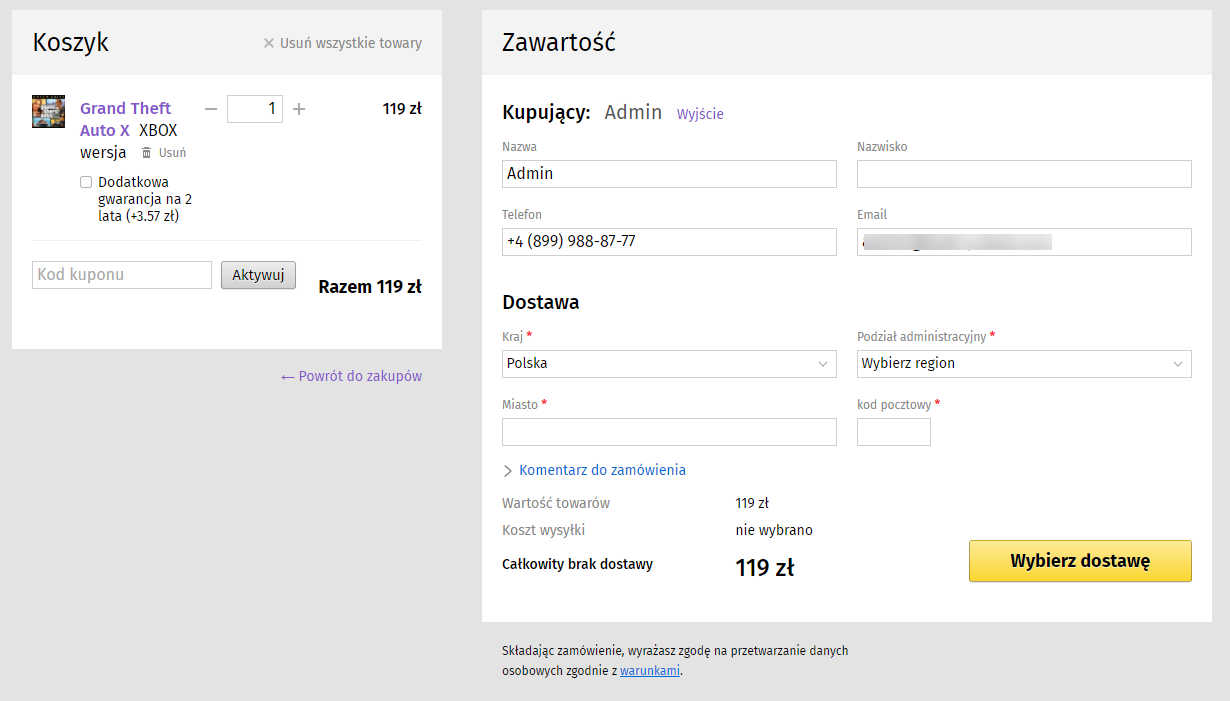
Limit the width of the "Cart" block?
-
Example
-
Before applying the setting:
-
After applying the setting:
-
Before applying the setting:
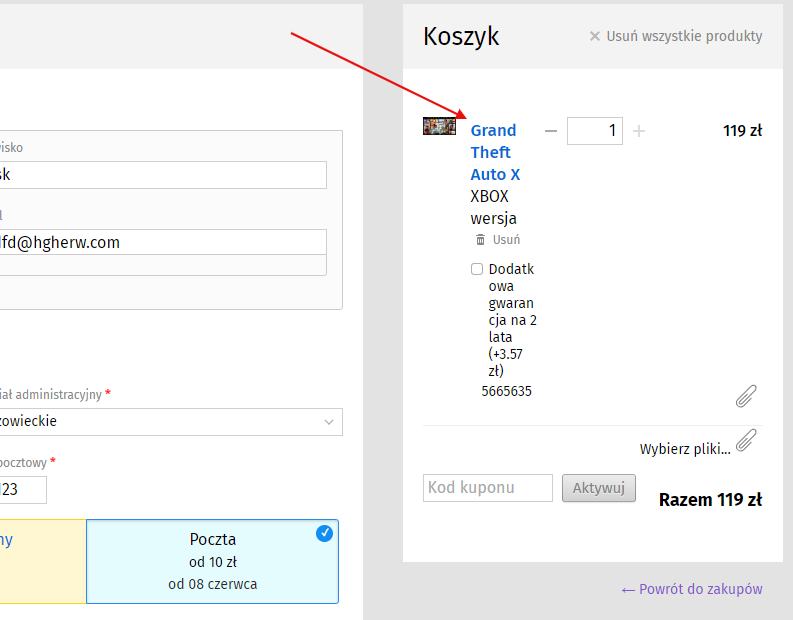
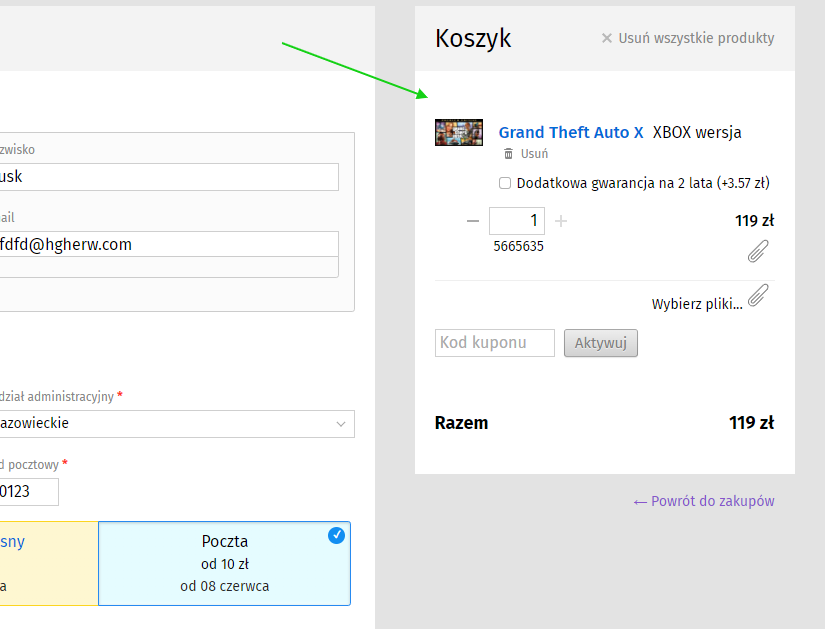
Enable standard display styles for the "Cart" block in a narrow format for devices with a width of >1300px?
-
Example
-
Before applying the setting:
-
After applying the setting:
-
Before applying the setting:
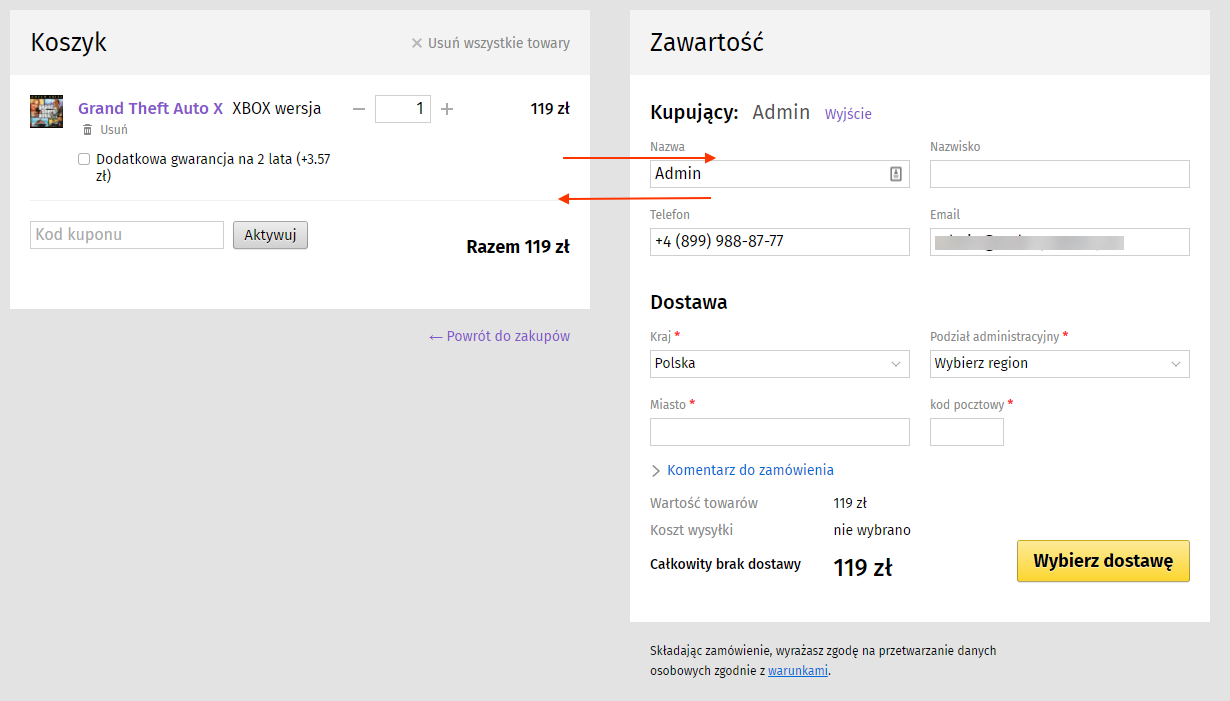
Move the "Ordering" block to the left side, and the "Cart" block to the right.
-
Example
-
Before applying the setting:
-
After applying the setting:
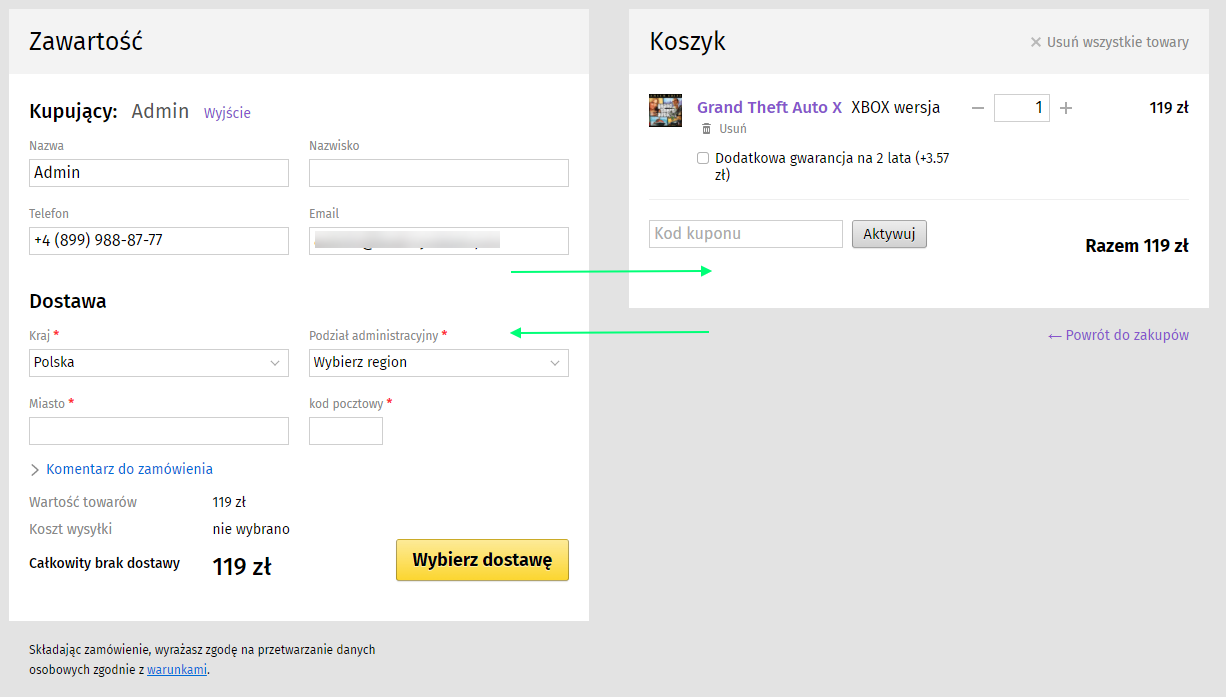
-
Before applying the setting:
Process special code in shipping method descriptions?
This configuration is intended only for developers and/or advanced users!
Plugin allows you to make point changes to the Cart of the site depending on the selected shipping method. For example:
- hide all elements of the site cart
- hide the "Call back?" module block (in a separate function, for convenience)
- replace any text fragments in the site footer with any text
Several settings analyzed in detail in the "Advanced settings plugins (sample tasks with solutions)" block.
Process special code in payment method descriptions?
This configuration is intended only for developers and/or advanced users!
Plugin allows you to make point changes to the Cart of the site depending on the selected shipping method. For example:
- displaying any text on payment method cards as a separate line
- displaying any text on payment method cards in another, separate line
- hide any elements of the site cart
- hide the "Call back?" module block (in a separate function, for convenience)
- replace any text fragments in the site footer with any text
Several settings analyzed in detail in the "Advanced settings plugins (sample tasks with solutions)" block.
Advanced plugins settings (sample tasks with solutions)
Task: configure the display of the "Call you back?" block only when you select specific payment methods (using the special code "hidecallme")
Let's assume the task is to hide the "Call you back?" block when the payment method "Cash" is selected.
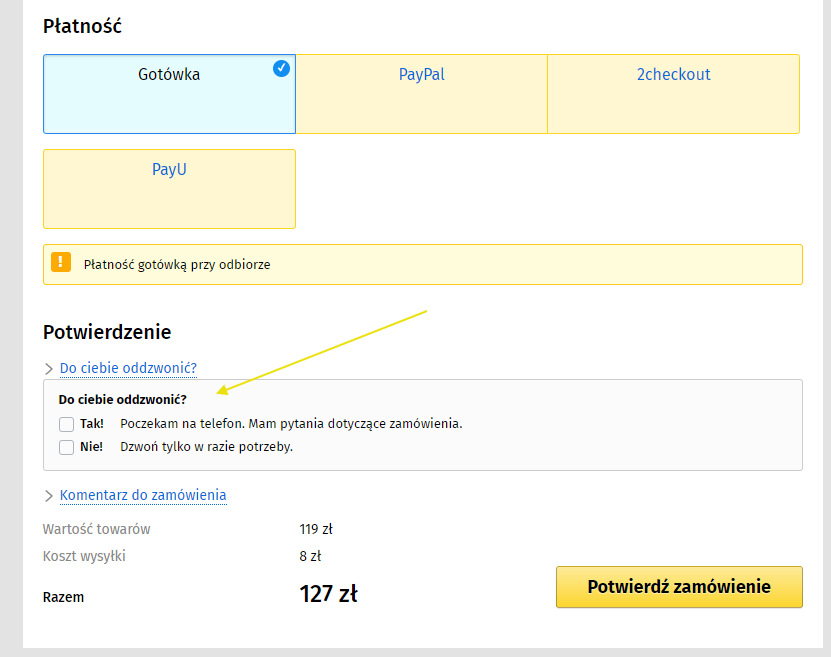
To solve the problem:
1. Enable the option "Display payment methods as cards?" in the plugins configuration (the special code will only be processed with this configuration)
2. Enable the option "Process the special code in payment method descriptions?" in the plugins settings.
3. Copy the required code from the plugins settings:
4. Place the code in the payment method description:
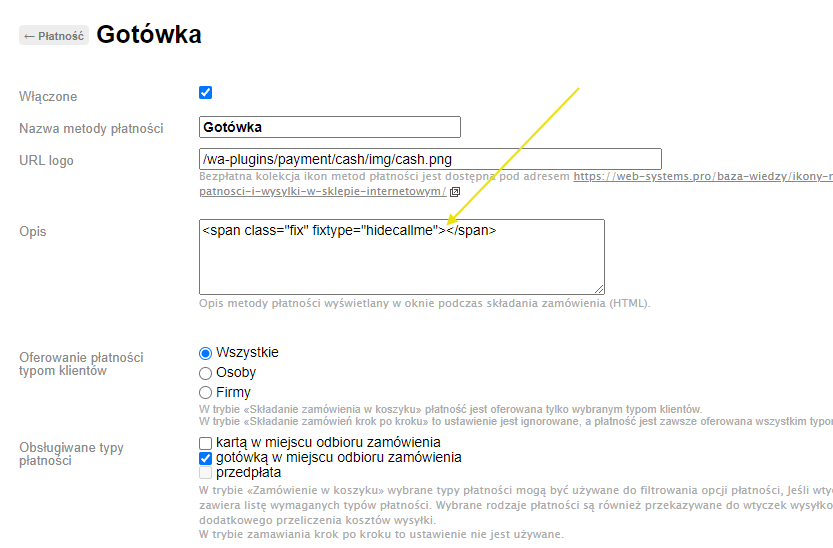
5. Checking:
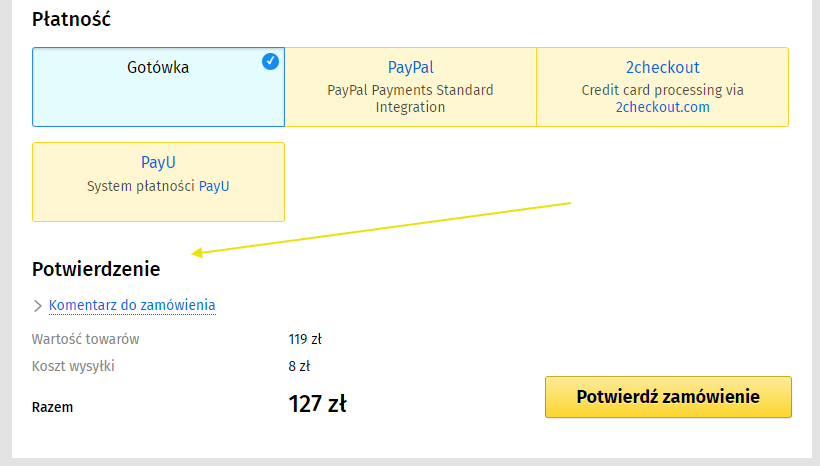
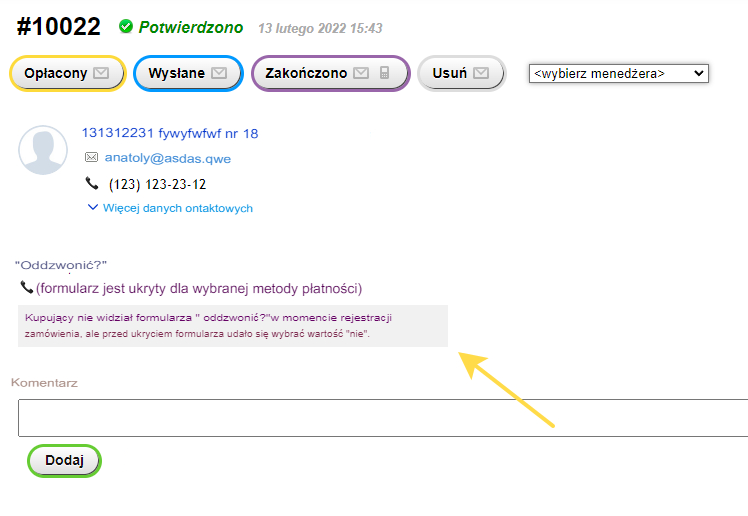
6. Place a few test orders and check what information is displayed in the admin panel. When using this special code, plugin not only hides the "Call back?" block, but also shows whether the customer interacted with this field during checkout or not. For example, if the customer first selected "No, do not call me" and then changed the payment method to "Cash" (where the block is hidden) and placed the order, this information will be displayed in the order:
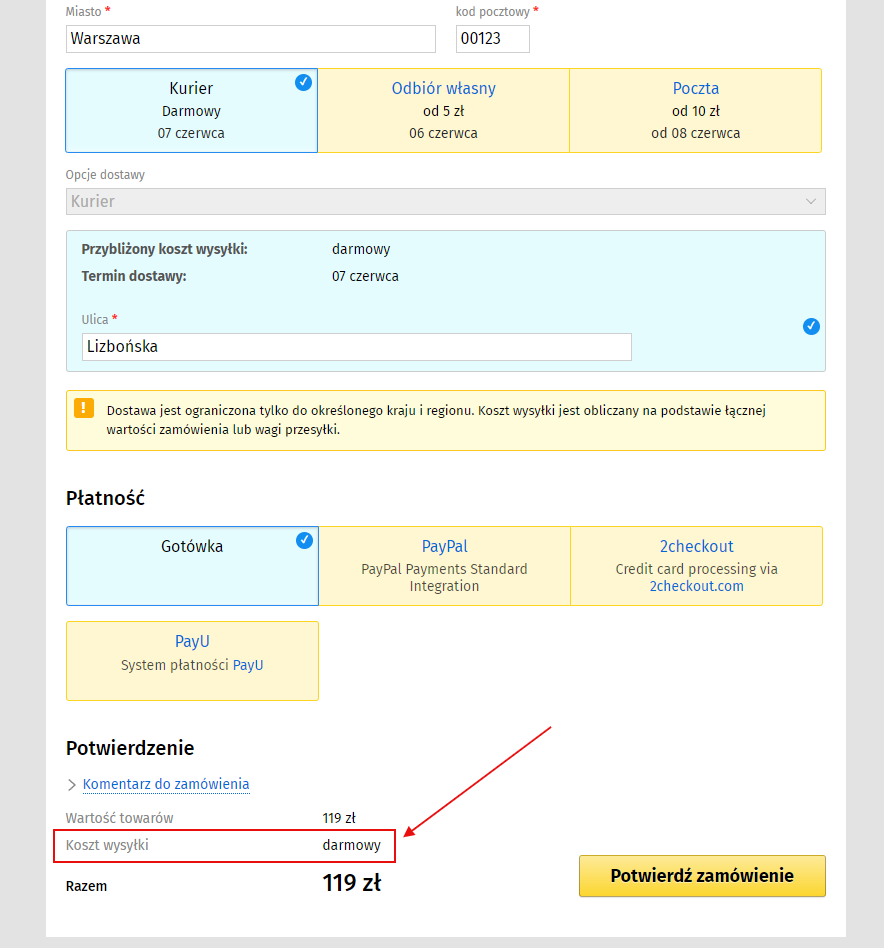
Task: hide a specific element on the page after a specific shipping method is selected (using the special code "hide")
Suppose the task is to hide the element "Delivery: free" at the last stage of placing an order (see screenshot) when the shipping method "Courier delivery in Warsaw" is selected.
Solving the problem:
1. Enable the option "Support special code in shipping method descriptions?" in the plugins settings.
2. Copy the required code from the plugins settings:
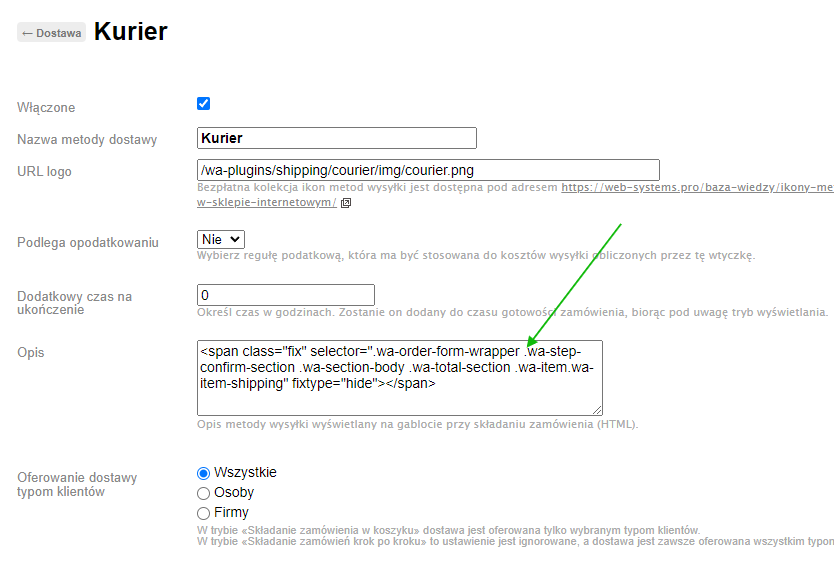
3. Define the selector of the element we want to hide (knowledge of HTML and CSS is required). In this case, the following selector is suitable: ".wa-order-form-wrapper .wa-step-confirm-section .wa-section-body .wa-total-section .wa-item.wa-item-shipping"
4. Replace the selector in the code. The result is as follows:
5. Place the resulting code in the shipping method description:
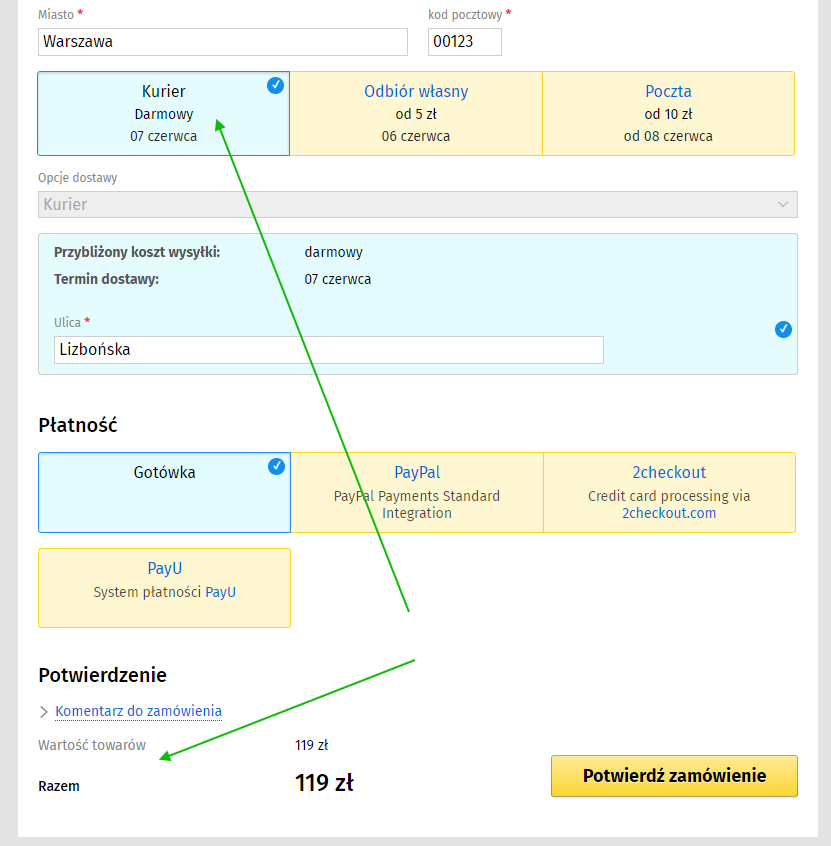
6. Checking:
Task: replace specific text on the page after a specific shipping method is selected (using the special code "replace")
Let's assume the task is to replace the text "Delivery date" with "Courier will arrive:" when the shipping method "Delivery courier in Warsaw" is selected.
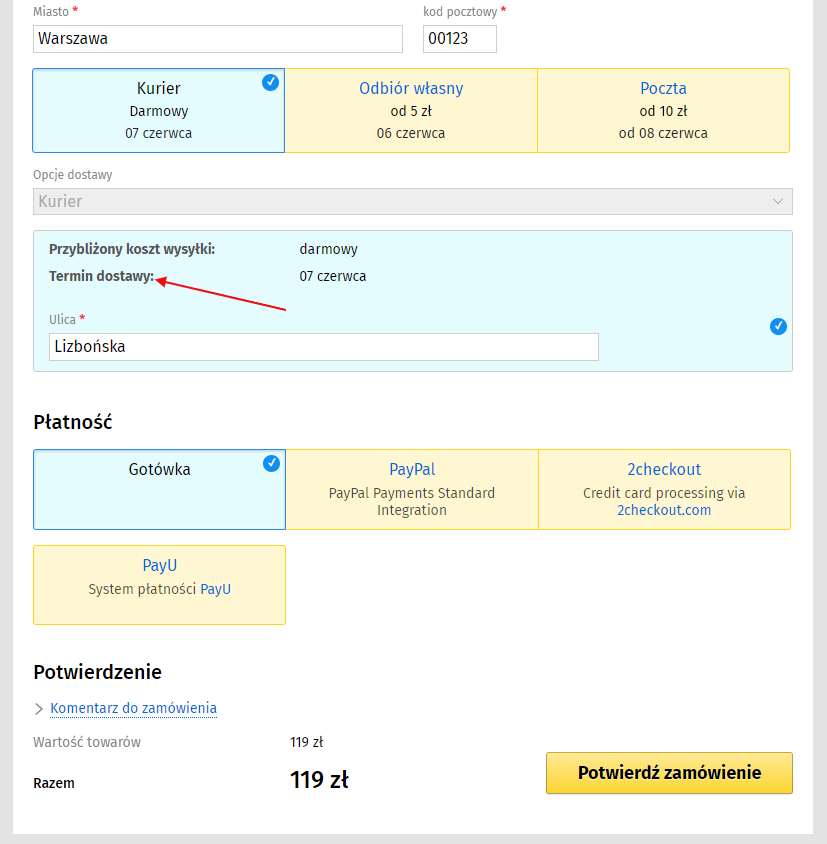
Solving the problem:
1. Enable the option "Support special code in shipping method descriptions?" in the settings of plugins.
2. Copy the appropriate code from the plugins settings::
3. Define the selector of the element you want to hide (knowledge of HTML and CSS is required). In this case, the appropriate selector is ".wa-order-form-wrapper .wa-step-details-section .wa-details-rates-section .wa-table .wa-row:last-child .wa-cell-name"
4. In the "search" attribute, specify the text you want to remove. In our case, it is "Delivery date".
5. In the "replace" attribute, specify the text you want to insert. In our case, it is "Courier will arrive:".
6. Insert the required values into the code. The result is as follows:
7. Place the resulting code in the shipping method description:
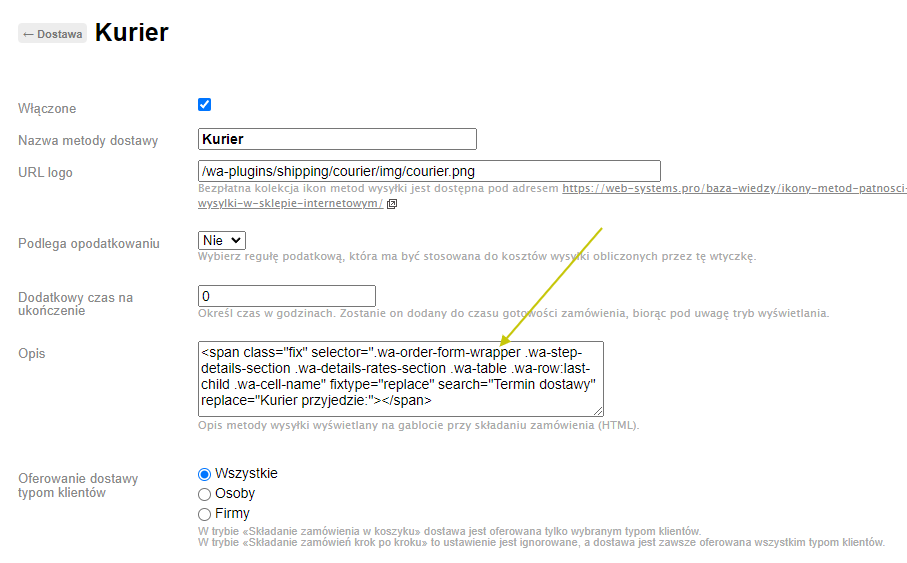
8. Verification:
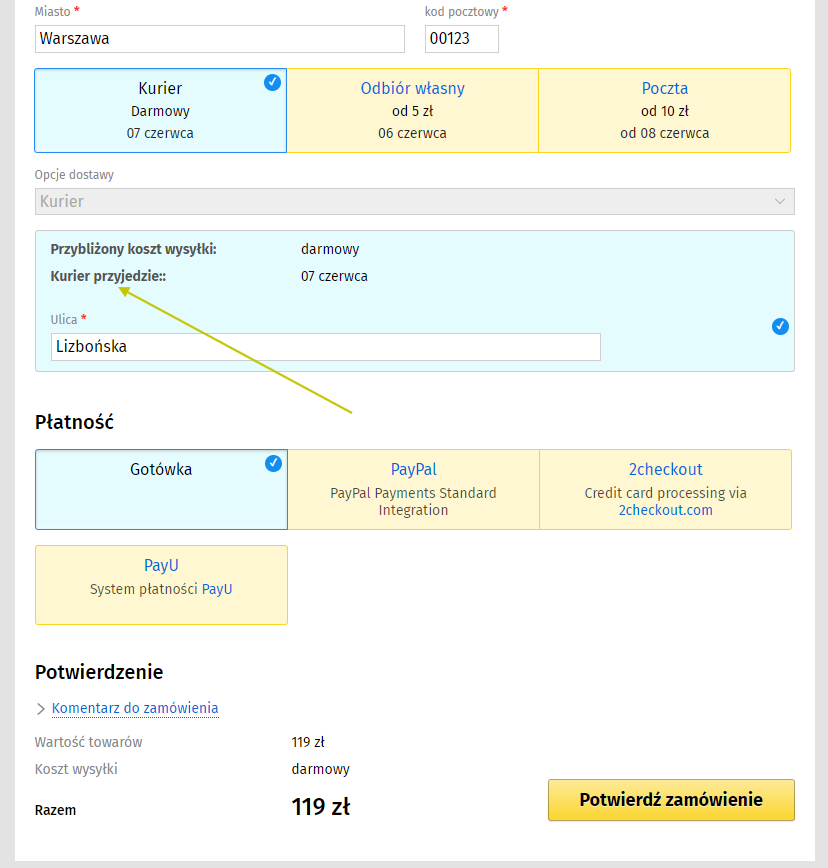
Important! The special code "replace" may not work in some themes! Try to use it only when absolutely necessary and check that it works correctly after deployment..
Task: creating payment method cards (using the special code "info1", "info2")
Let's assume the task is to place information on payment cards in this form:
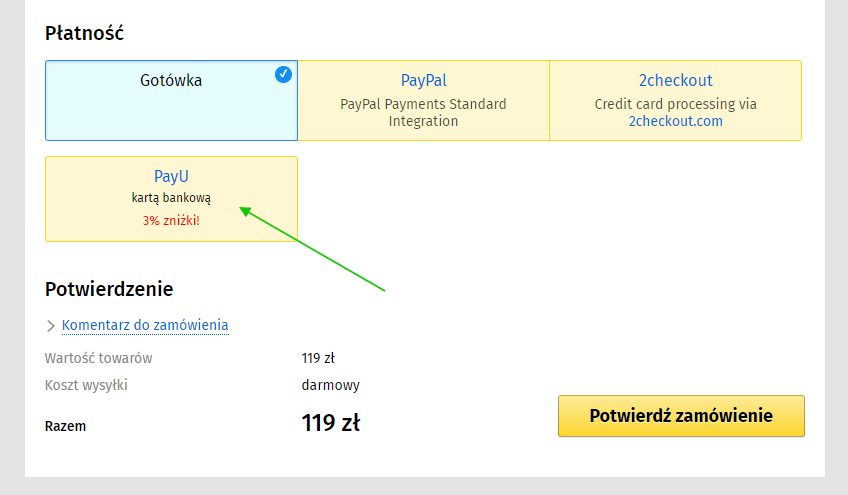
We solve the problem:
1. We enable the option "Display payment methods as cards?" in the configuration of plugins (the special code will be processed only with this configuration)
2. We enable the option "Process special code in payment method descriptions?" in the settings of plugins.
3. Copy the required code from the plugins settings:
4. We place the text that should appear on the payment method card in the span tag. For example: "bank card".
5. If you want to place another line of text (slightly decorated), copy the required code from the plugins settings:
6. Similarly, we place the text in the span tag that should appear on the payment method card on another separate line. For example: "3% discount!".
7. The resulting code will look like this:
8. We place the obtained code in the payment method description:
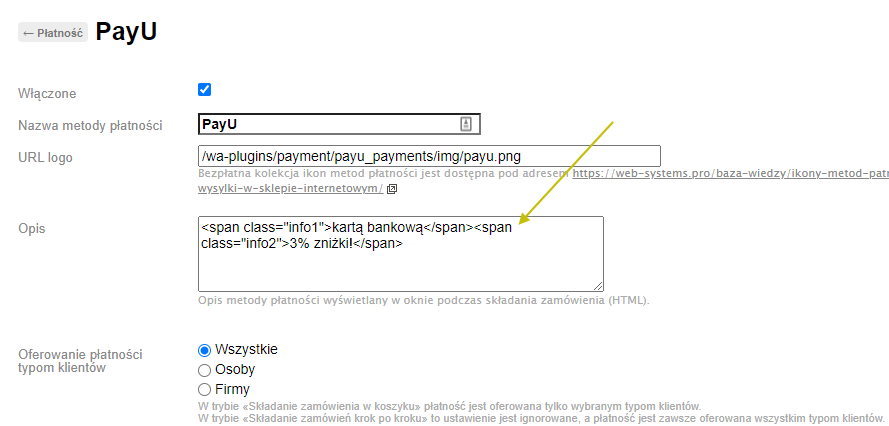
9. If necessary, we do the same for other payment methods.
10. We check and make corrections.
FAQ. Replies on frequently asked questions
Plugin problem. After selecting a shipping method, the "Address" field is not displayed
Check the "order settings in cart". For shipping methods configured using some plugins, this error may occur if the field output is enabled and made optional.
-
Make the necessary changes:
- Incorrect configuration:
- Correct configuration:
- Incorrect configuration:
Plugins that must display the address field will always display it, regardless of this order setting in cart. Spare customers who want to pick up their order from having to enter a home address.