WEB SYSTEMS PRO
E-commerce platform
€79.80

* Net price, 23% VAT must be added

SKU:WSP-386-PL
License
Web Systems Pro
Version
2024.3.0.1.wsp
Update
10/29/2024


Documentation for the plugins "Automated Product Management"

The Plugin "Automated Product Management" is designed for store managers who, in their daily work, must perform many routine tasks, spending a significant amount of time on them, while these tasks can be strictly formalized and automated. This is exactly the type of automation provided by the plugin "Automated Product Management".

Working with the plugin takes place in the section "Shop -> Settings -> Automatic product management". Below, the main features of the plugins will be discussed.

Settings plugins

The Settings plugins are located in the tab "Shop -> Plugins -> Automated Product Management".

In the settings window, the user has only two options available: Exception List and the ability to choose the location of new rules.
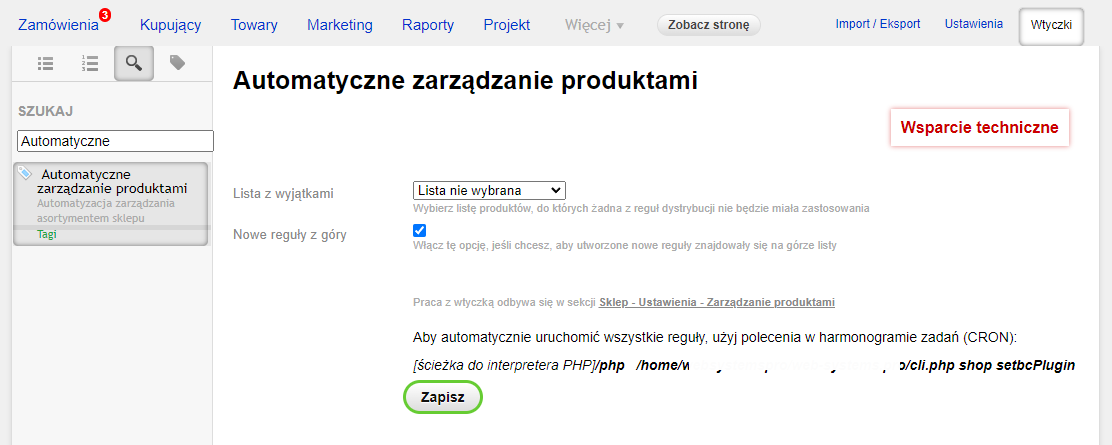
Settings plugins

Exception List. In this field, you can select one of the predefined product lists that will not be processed by the created rules. If you need to exclude certain products from processing by specific rules, you can simply place them on the list specified in this setting, and the plugin will exclude such products from processing when executing the rules. This option applies to all rules, regardless of their operating mode and individual exclusion settings.

New rules at the top. A purely interface setting that allows you to specify whether new rules should be placed at the beginning or at the end of the rules list.

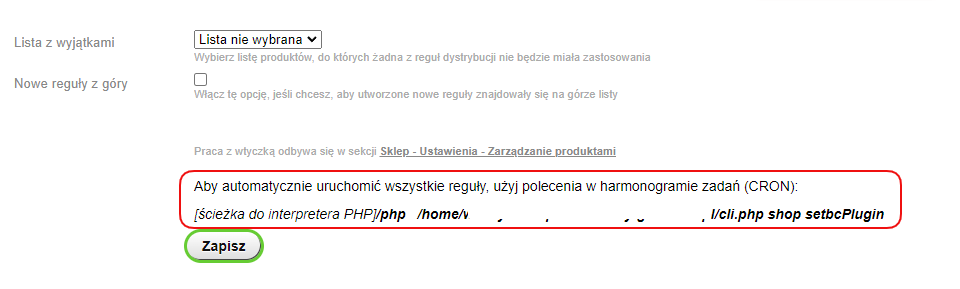
Additionally, on the settings page, there is a command for CRON that triggers the execution of all created rules. More information about the operation modes of the plugins can be found in the corresponding article.

Main interface. Page with the list of rule groups

The main interface for working with the plugin is located in the section "Shop -> Settings -> Automatic product management".
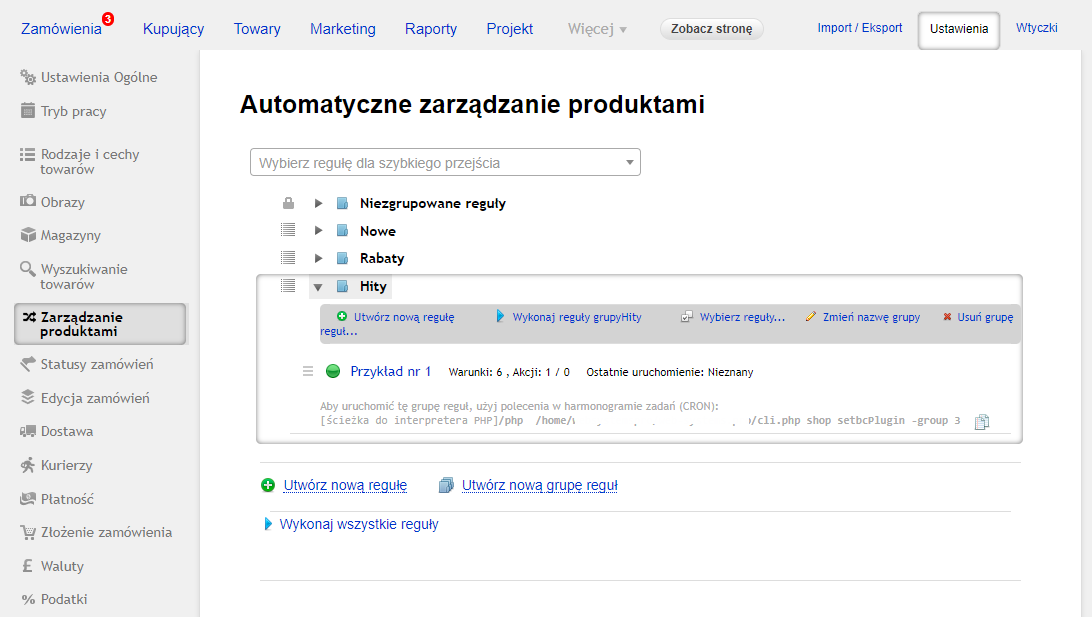
Main interface. Page with the list of rule groups

This section contains a list of rules created by the user. All rules are grouped into user-created groups. Rules not assigned to any group are grouped under "Unassigned rules".

If the user runs all rules (via the Execute all rules link), they will be executed in the order they are displayed on the screen: from top to bottom. Using the above screenshot as an example, first all rules from the "Unassigned rules" group will be executed, then all rules from the "New" group, followed by the "Discounts" group, and finally the "Bestsellers" group. Since there may be certain hidden dependencies between rules (for example, a rule should only run after another rule has completed), you can drag and drop rules within groups, as well as the groups themselves, to build the necessary execution sequence. The following actions are also available in this section:

  • Create new rule. Will be discussed in a separate article.
  • Execute group rules... Allows manual execution of all rules in the selected group.
  • Select rule. This option is intended for bulk operations on rules. Often, a single group contains 10-20 or more rules that need to be either moved to another group or deleted. To avoid performing this operation individually for each rule, you can use this option to move/delete them by selecting the appropriate rules from the group.
  • Page with the list of rule groups
  • Create new rule group. Creates a new empty rule group with a name defined by the user.
  • Execute all rules. Launches all rules from all groups for execution.

Creating/editing a rule

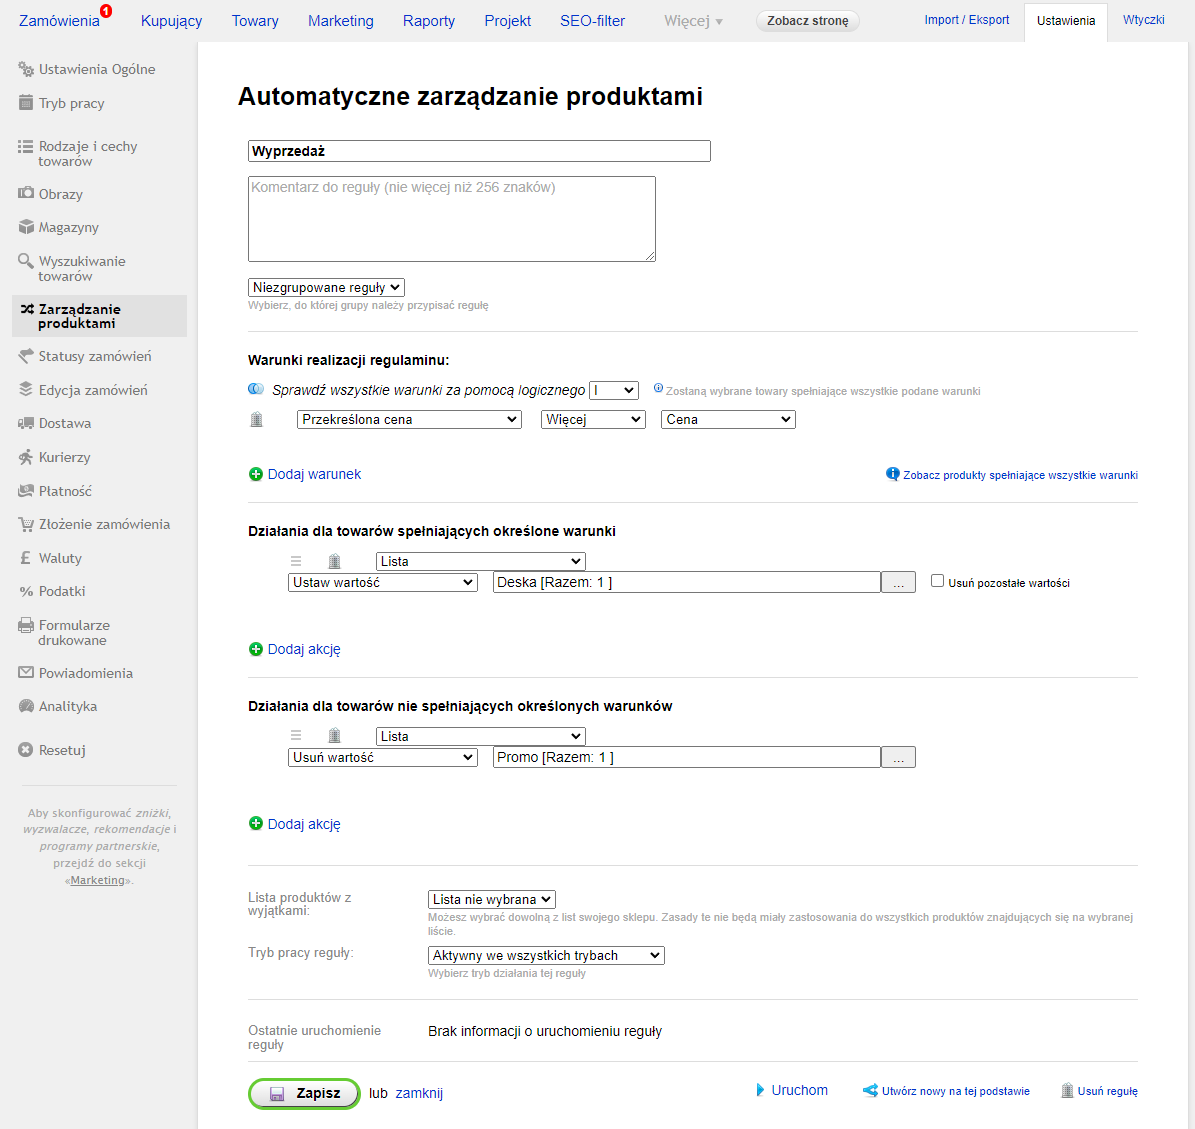
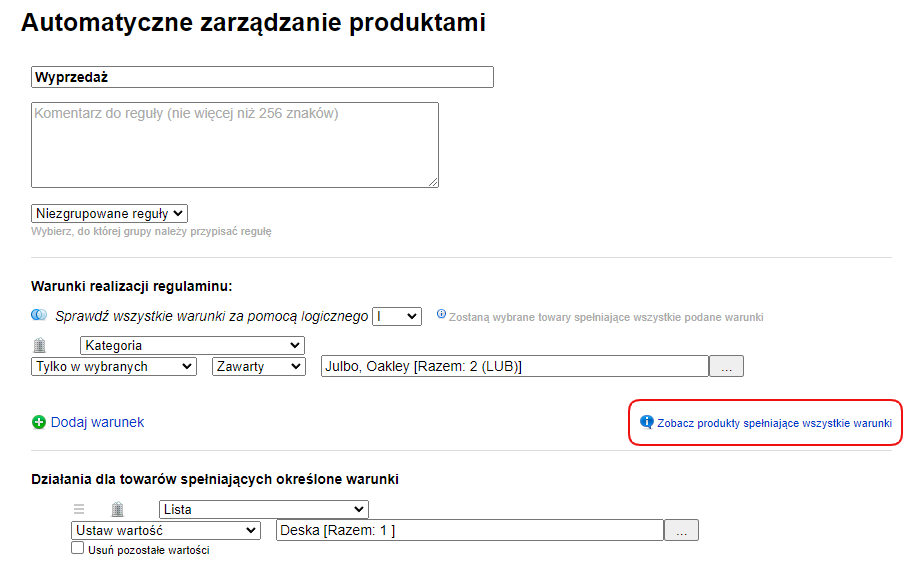
The rule creation/editing window is presented in a single interface and, for clarity, will be discussed using the example of the plugins editing section.

Creating and editing a rule

List of fields available for filling in:

  • Rule name
  • Rule description. Can be helpful for explaining any details and specifics when working in a team
  • Rule group
  • Execution conditions (will be discussed below)
  • Actions (will be discussed below)
  • Product exception list. The Default product list in the Shopy-Script application contains products that will be skipped when executing this rule. The list selected in this setting supplements the list selected in the main plugins settings.
  • Rule operation mode (will be discussed below)
  • Run. Manual execution of the rule
  • Create new based on this. It is often necessary to create several rules of the same type. To avoid filling in identical conditions and actions for each such rule, you can use this command to create a copy of the current rule.
  • Delete rule

The purpose of most of the listed properties is intuitive, so let's focus only on the most important ones.


Logs logic of each rule

Conceptually, the logic of each rule is as follows: plugin selects products that meet all conditions specified in the rule and performs the actions defined in the rule on the selected products. This is a sequence of actions that occurs when each rule is executed, regardless of whether the rule is triggered manually, via CRON, or whether it is a single rule, a rule group, or all created rules. If all rules or all rules from a specific group are executed, they will run in the order they appear on the rule list page.


Conditions

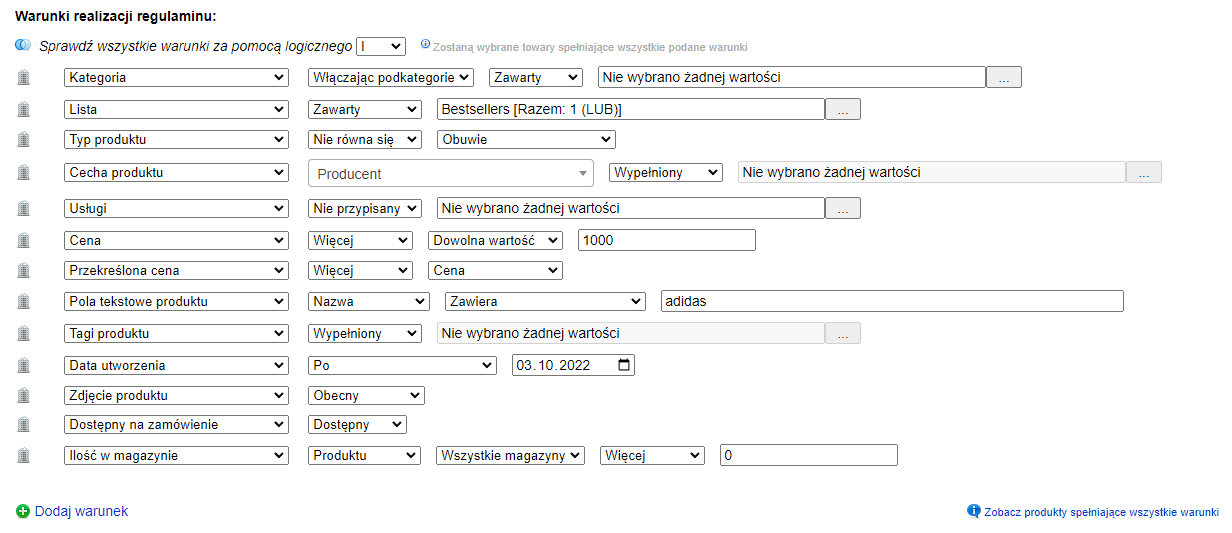
The Plugin "Automatically manage products" feature enables product selection based on over 30 parameters, with more than 110 types of conditions that can be combined in any order, providing very broad and highly flexible options for selecting desired products.

Each condition row is a set of controls that change depending on the selected option. The screenshot shows some of the condition options available in the plugin.

Conditions

Please note! All conditions specified in a rule are combined using logical "AND". Therefore, if you set two conditions such as "Product is in category X" and "Product price is more than 1000 PLN", plugin will select only those products that are in category X "AND" have a price greater than 1000 PLN.

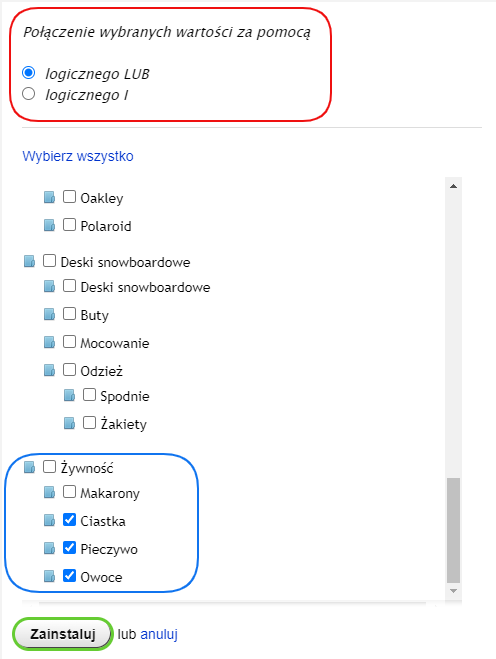
At the same time, within each classifier selection condition (categories, lists, features, etc.), it is possible to apply a logical "OR" for selected values. To do this, specify the appropriate option in the classifier value selection dialog.

Conditions

This example shows product category selection. If the OR option is selected in this dialog, all products located OR in the "Cookies" category, OR in the "Bakery" category, OR in the "Fruits" category will be selected. If you select the logical AND option in this dialog, plugin will select only those products that are included in all three categories.

The user interface with controls in the "Conditions" section is intuitive and easy to use.


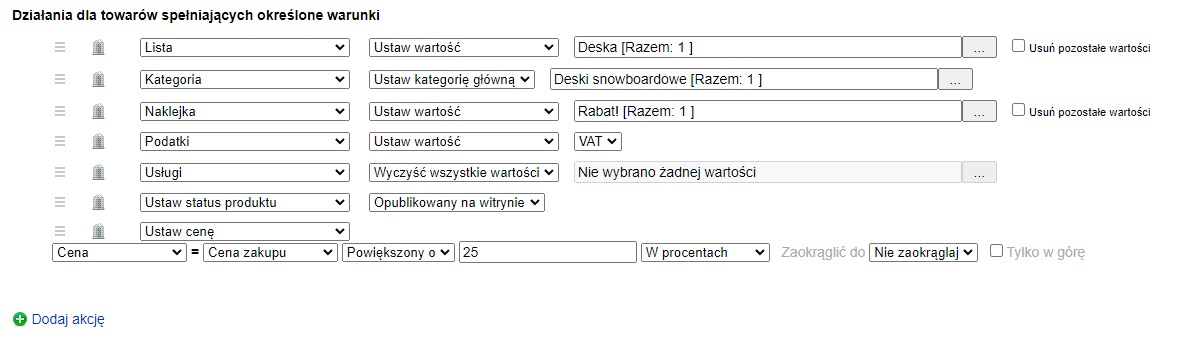
Actions

After filling in the "Conditions" section, you need to define what actions should be performed on products that do or do not meet the specified conditions. Each rule can contain two action lists: for products meeting the specified conditions and for products not meeting the specified conditions. These sections are very similar to the "Conditions" section: you can set an unlimited number of actions, and the same controls are used. The screenshot shows some of the possible actions available in the plugin with selected products.

Actions


Other capabilities

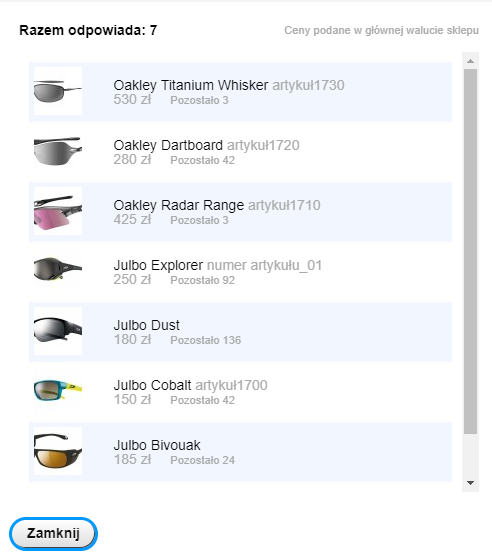
View products meeting all conditions

When setting product selection conditions, you have the option to see which products will be selected according to the specified conditions. To do this, use the link "View products meeting all conditions".

View products meeting all conditions

Please note! If any changes have been made to the set of conditions, you must save the changes before using the "View products meeting all conditions" link. Otherwise, plugin will show those items that will be selected according to the previously saved conditions. The same applies to manually triggering the rule from the edit section.

View products meeting all conditions


Rule execution modes

Plugin provides several rule execution modes.

Manual mode

To run rules in manual mode, simply use the appropriate link on the main plugins page or on the plugins edit page.

To run a rule from the edit page, use the "Run" link and wait for the rule to complete. This link may not be available if the rule's settings have "Rule operation mode" set to "Run only via CRON".

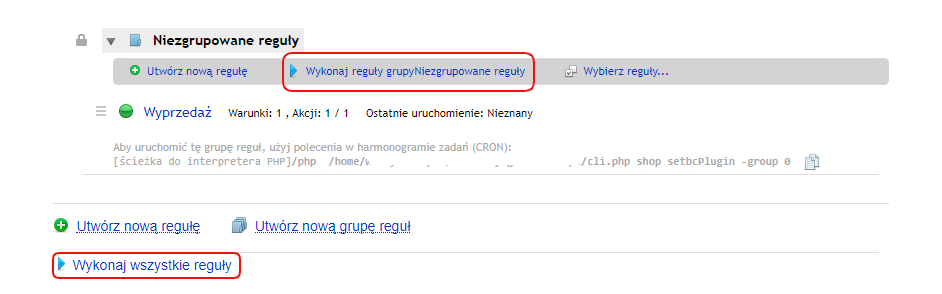
On the main plugins page, the user can manually trigger execution of all rules or rules from a selected group.

Manual mode

This will execute the rules in the order they appear on screen. Only rules whose operation mode allows manual triggering ("Manual only", "Active in all modes") will be executed.


Automatic mode

Automatic rule triggering relies on a task scheduler (CRON, etc.). Adding tasks to the scheduler is done via the "Cloud" application.

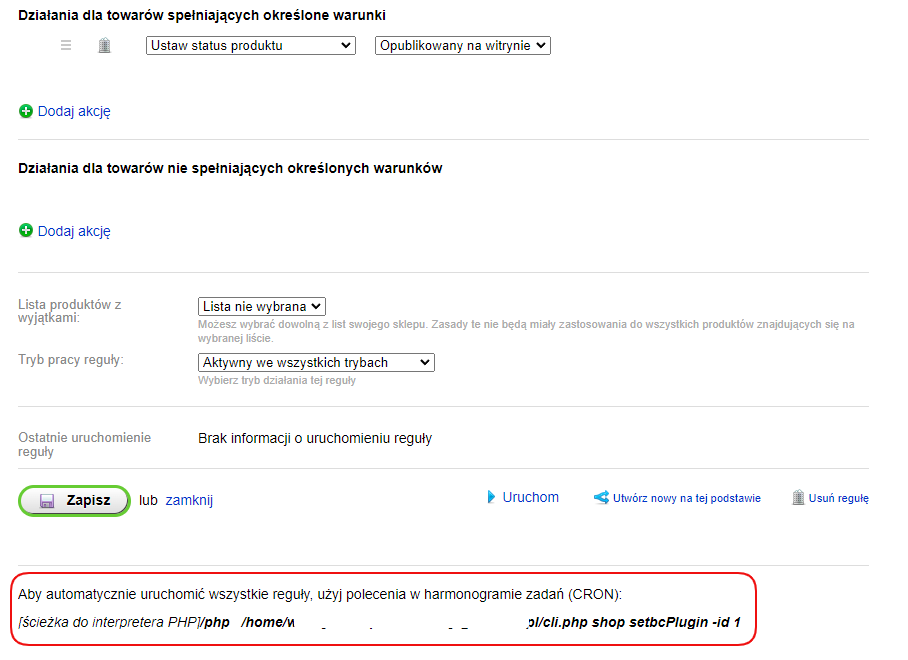
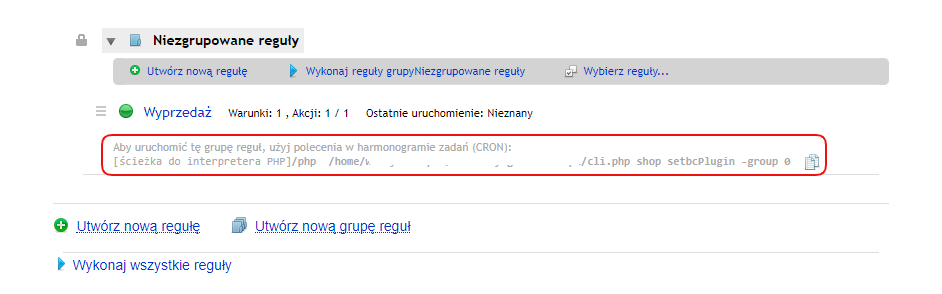
Several commands are available for running rules in automatic mode: run a specific rule, run a group of rules, run all rules. The command for each of the above options is displayed on the respective page: for running a specific rule - on the rule's own page.

Automatic mode

to run all group rules - in the appropriate group

Automatic mode

to run all rules - on the plugins settings page

Automatic mode

When using the automatic rule execution mode, only rules that have the appropriate mode selected in their settings ("Manual only", "Active in all modes") will be executed.

Some aspects

Below are several special aspects to consider when working with the "Automatic Product Management" plugin:

  • Before viewing products that meet all specified selection conditions on the plugins edit page, you must save any changes made to the rule. Otherwise, the previously saved conditions will be used for selection.
  • Before executing the "Run" command on the rule edit page, save all changes made. Otherwise, the last saved rule settings will be used.
  • Manual rule commands ("Run", "Run rule groups", "Run all rules") will only trigger rules whose operation mode allows manual triggering ("Manual only", "Active in all modes").
  • Only rules that can be triggered via task scheduler (CRON, etc.) ("Active in all modes", "Run only via CRON") can be triggered this way.