WEB SYSTEMS PRO
E-commerce platform
€99.80€139.80

* Net price, 23% VAT must be added

SKU:WSP-189-PL
License
Web Systems Pro
Version
2.44.0.1.wsp
Update
12/04/2024


Documentation by configuration for plugins "SEO-filter"

1. General settings of plugins

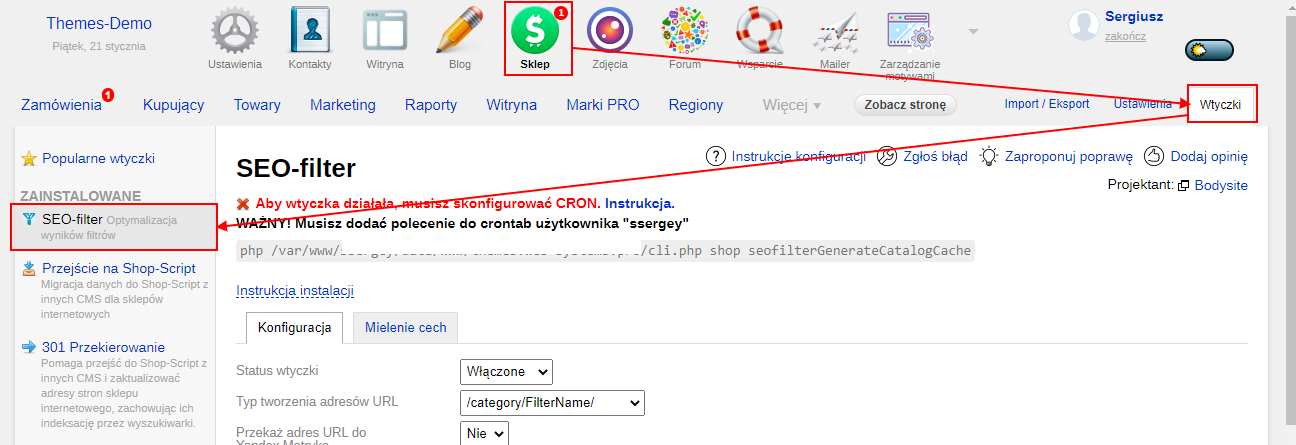
Settings plugins are located in 2 places:

  • Shop -> Plugins -> SEO-filter (general settings and templates are located here)
  • Shop -> "SEO-filter" tab (settings for specific features)
1.1. General settings of plugins

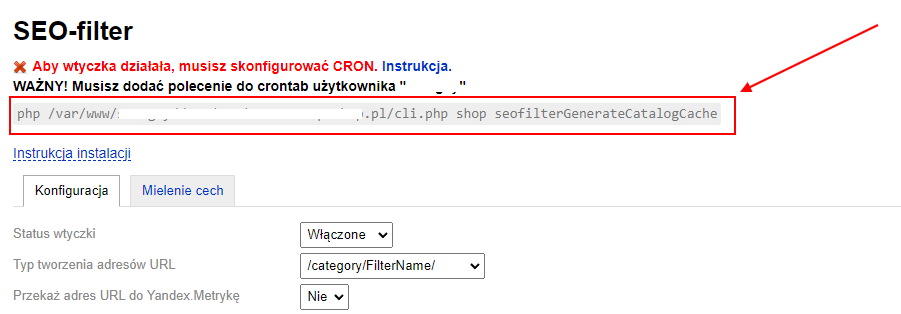
plugins status – plugin is enabled or disabled. To enable, select the appropriate status and save changes.

URL address generation type – select the type of URL for filter pages. Two options are available: short and simple. Short - the URL is generated based on feature names, with no additional elements added. Simple - the URL is generated based on the feature name, with the prefix "filter" added before the feature name.

Examples:

  • Short URL https://site.com/category/shiny/simmetrichnyy/
  • Simple URL https://site.com/category/shiny/filter/simmetrichnyy/

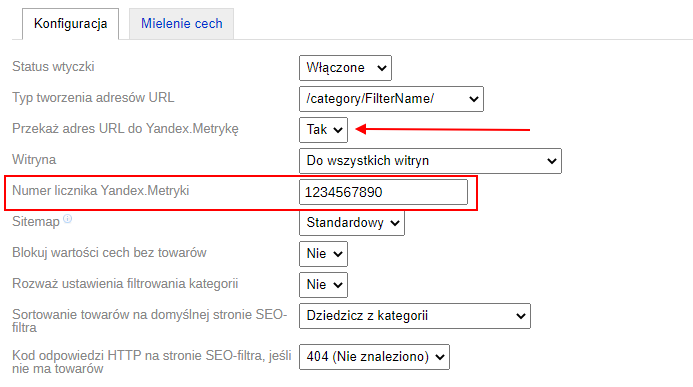
Pass URL to Yandex.Metrica – plugin enables Yandex.Metrica tracking for pages created by SEO-filter. If you want to send data about filter pages, select "Yes" from the list. A field "Yandex.Metrica counter number" will appear. You must enter the metric counter number here; otherwise, data will not be sent. You can add a counter number for all Sites or for each Site separately (if different Sites have different counters).
Sitemap – option to add links to the site map for robots.

2 options:

  • Standard (links to filter pages are added to the standard sitemap.xml generated by the engine);
  • Separate (links to filter pages are added to a separate sitemap located at /filter-sitemap.xml).

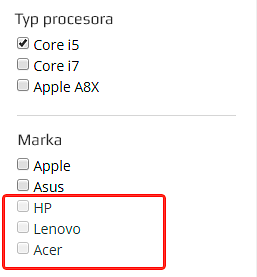
Block feature values without products – if there are no products, plugin makes these features inactive.
Consider category filtering settings - If "Yes" is selected, category filtering settings are taken into account. This means filters will only be available for features displayed on the front end. Remaining filters will be hidden on the page.

Product sorting on the default SEO-filter page - defines the product sorting that will be displayed when the filter page loads. It can be inherited from the category or set individually.

HTTP response code on the SEO-filter page if there are no products - select the response in the HTTP headers of the page. This code is primarily useful for proper indexing of pages by search engine robots.

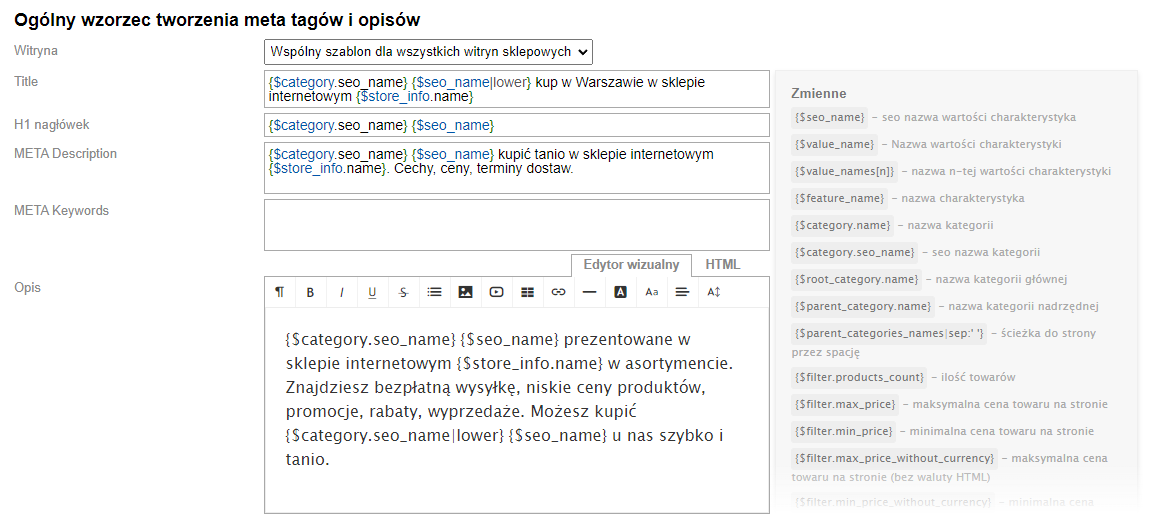
1.2. Common template for meta tags and descriptions

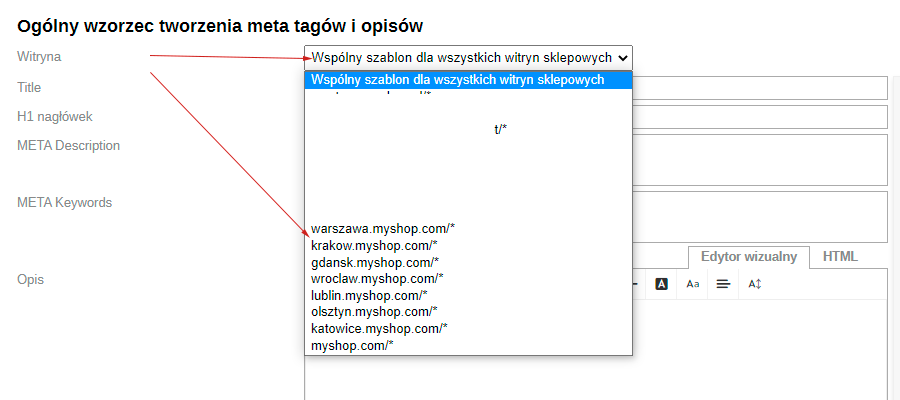
— Site – select the store site for which you want to save rules.

You can set templates for all store sites or for each one individually. If any store site has specific templates, they will override the settings of "Common template for all store sites". 

Site with specified individual templates is highlighted in red.
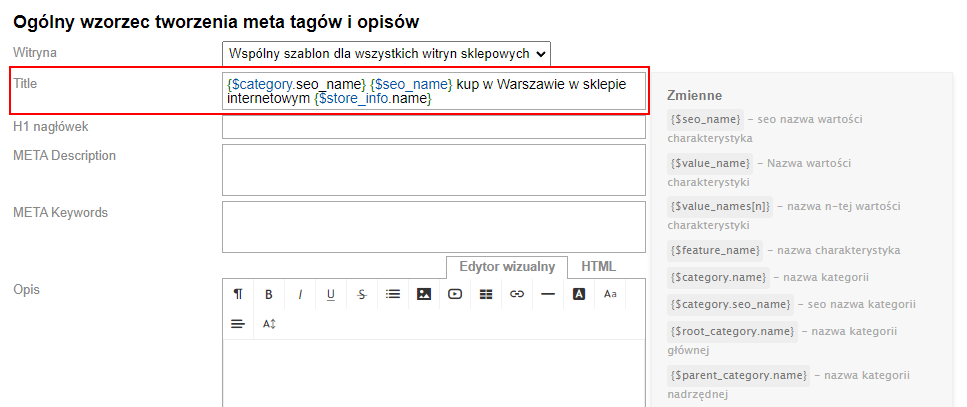
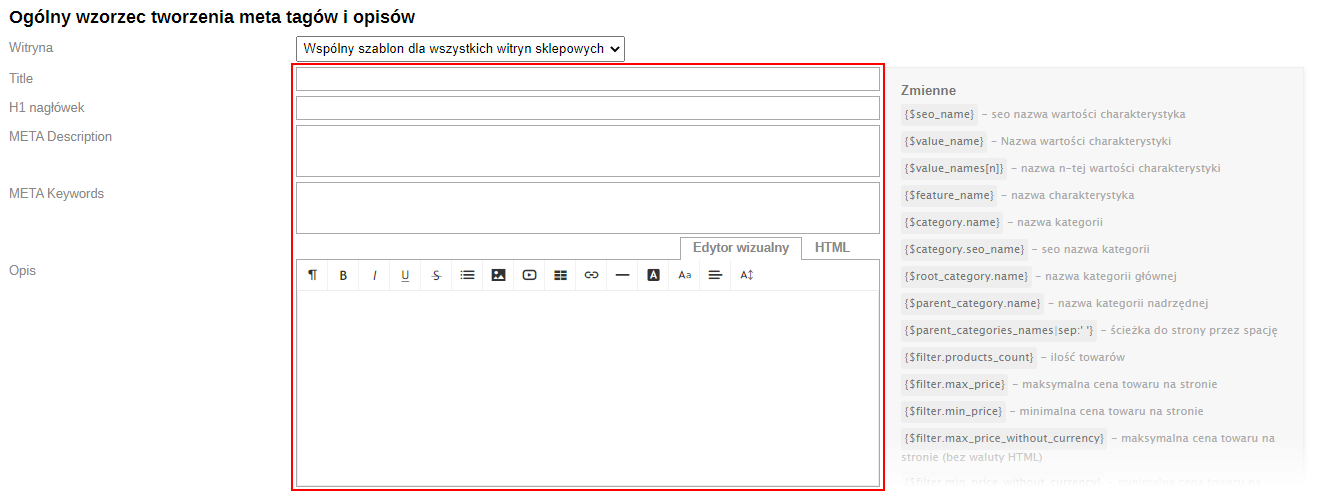
— Title – field for creating a template for the <title> tag.

— META Description – field for creating a template for the meta description tag.

— META Keywords – field for creating a template for the meta keywords tag.

— H1 header – field for creating a template for the <h1> header.

— Description – field for creating a template for the description.
1.3. Additional fields for store sites

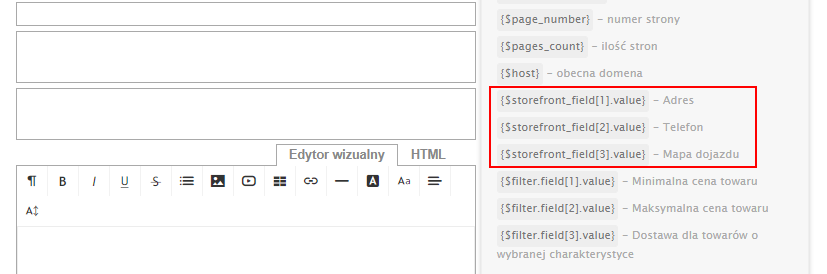
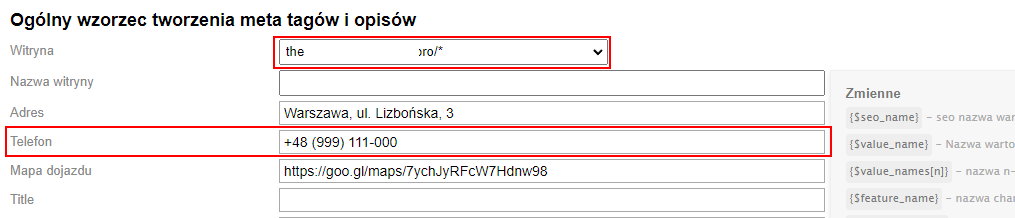
In this settings section, you can create additional fields for store sites. This is necessary when multiple store sites are used and there are not enough variables for creating templates. The field appears when switching between store sites in the plugins settings.

1.4. Additional fields of filters

In this settings section, you can create additional filter fields. This is necessary if variables other than the SEO-name need to be used.

1.5. Theme plugins options

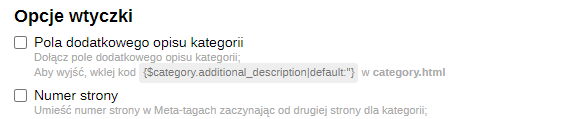
Additional category description fields – this option includes an additional category description field (you need to add the field to the page template; insert the code {$category.additional_description|default:''} into category.html to display it)

Page number – this option places the page number in meta-tags starting from the second page (for categories).

2. Configuring buffer creation in CRON schedule

Warning! This element is mandatory! Without CRON nothing will work.

The plugins "SEO-filter" buffer contains product availability data for filters across all combinations of [product types]+[category]+[filter]. The plugin buffer is generated using the CRON schedule.

In one command run, the buffer is collected for the entire plugins "SEO-filter". Only one process can run in CRON at the same time. Running multiple instances simultaneously will not speed things up, but will only double the server load. If the command hangs during execution, it will remain inactive for several minutes. If the command hangs during execution, it will resume from where it stopped on the next run.

To configure the CRON schedule, use the command provided in the general settings of plugins:


Recommended refresh frequency:

  • Once per day — if products are added or removed daily and/or new pages are created in the plugin;
  • Once per week — if the site does not frequently add or remove products and/or create new plugin pages.

You do not need to set it to run every minute - the commands will not have time to complete.

After correct installation and successful first execution of the command, the warning about the need to configure CRON will disappear from the plugins interface. If the warning is still present, it means the command has not yet run or is not properly configured..

If everything is set up but nothing works, possible reasons are:

1) There have been no runs yet. Try running the CRON command manually or reduce the frequency for testing.

2) The command was copied incorrectly. Check whether the command is correct and whether there are extra characters in the command URL copied from the settings.

3) Check whether CRON is running under the user specified in the warning. If in doubt, contact technical support.

4) Provide the full path to PHP. To do this, contact technical support and ask for the exact path to your PHP interpreter version. Example path: "/usr/local/php-cgi/5.6/bin/php"

5) Make sure CRON runs using the PHP version on which the site operates.

As soon as CRON runs correctly, the warning will disappear from plugins. While the warning is present, you must investigate the CRON execution issue.

3. Creating a shared theme. Using variables

Variables are displayed in a block with a gray background on the right side. Example of using variables in the title field:

{$category.seo_name} {$seo_name} buy in Warsaw at the online store {$store_info.name}


3.1. Variable examples

{$seo_name} – SEO name of the feature value

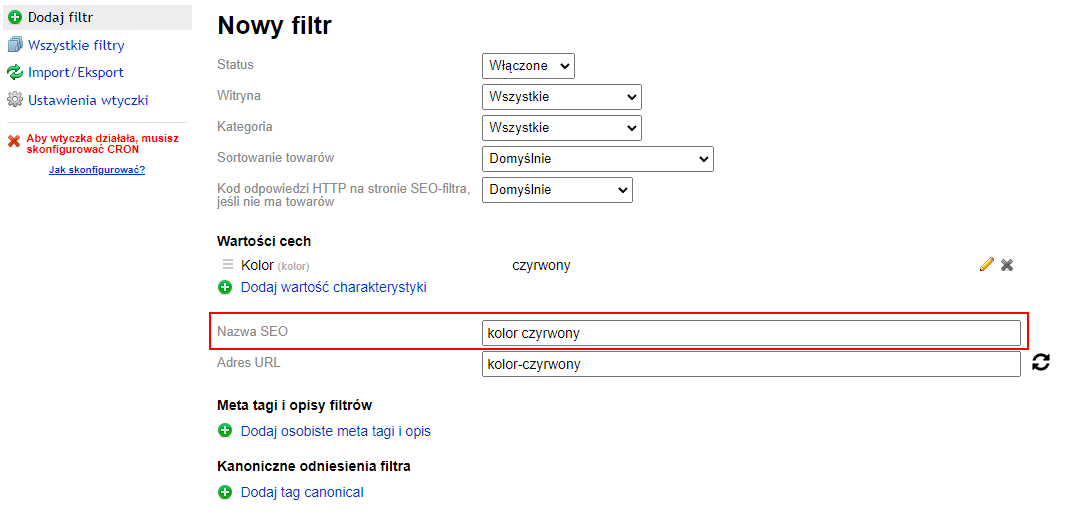
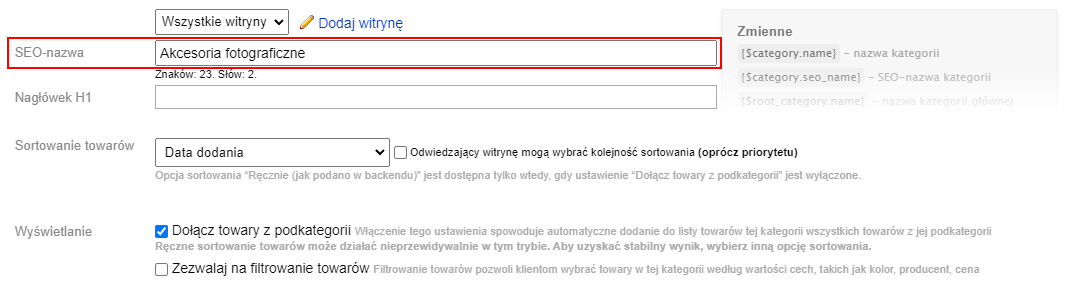
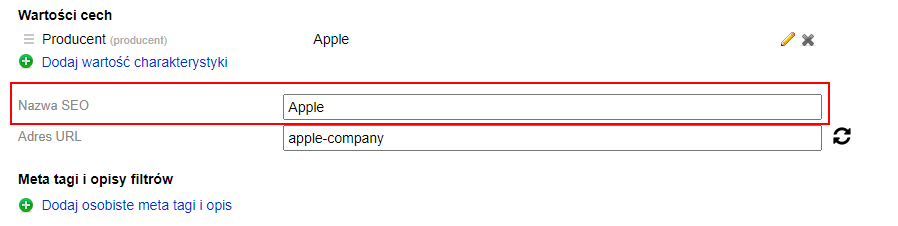
The SEO name is specified for each feature in the settings of the plugins "SEO-filter".


{$value_name} – feature value name


{$value_names[n]} – name of the n-th feature

Replace n with id. Example of use in a theme: {$value_names[1]}

{$feature_name} – feature name


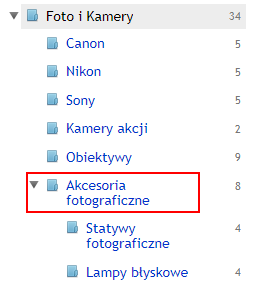
{$category.name} – category name


{$category.seo_name} – category SEO name

Displays the "SEO-name" of the category, which is generated by the "SEO-optimization" plugin.


{$root_category.name} – main category name

Displays the feature name specified in the site administration.


{$parent_category.name} – parent category name


{$parent_categories_names|sep:' '} – page path with space separator

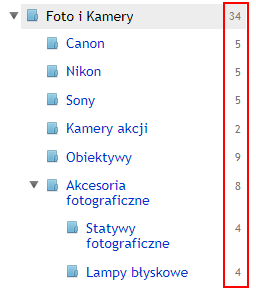
{$filter.products_count} – number of products


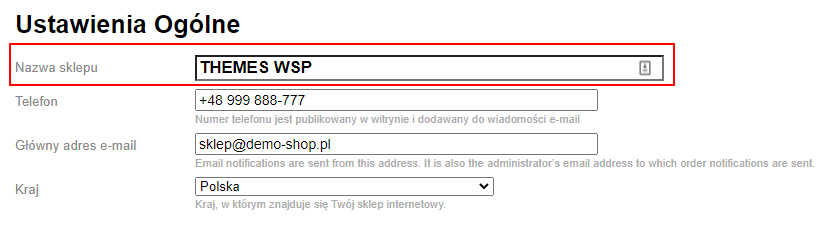
{$store_info.name} – store name


{$store_info.phone} – store phone number


3.2. Creating additional fields for storefronts

Click the "Add field" button


Enter the field name


Save changes. The variable appears in the list of variables.


Now it can be used in the shared theme.


The variable value should be set in the site's Settings.


4. Using modifiers

Plugin supports the use of 3 modifiers:

  • |lower - converts to lowercase
  • |ucfirst - converts the first character to uppercase
  • |lcfirst - converts the first character to lowercase

Modifiers should be appended to the variable before the closing curly brace without spaces.

Example: {$category.seo_name|lower}

Examples of using modifiers:

  • |lower – converts the word "ADIDAS" to "adidas"
  • |ucfirst – converts the word "adidas" to "Adidas"
  • |lcfirst – converts the word "Adidas" to "adidas"

Writing themes using modifiers

Example of writing an SEO name for a feature:


Example of using a modifier in a theme:


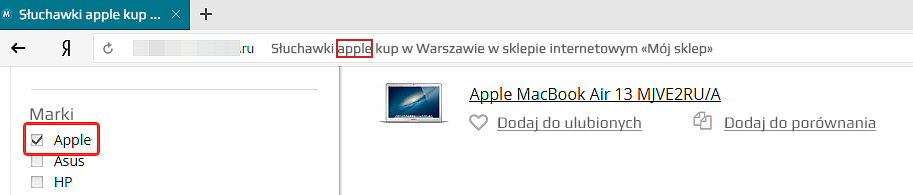
Display on the website:


5. Adding filters

The list of all filters is available at: https://yousite.com/wsp-panel/shop/?plugin=seofilter

After installing and enabling the plugins, filters are not created automatically - you need to add them manually.

All new filters will not start working immediately, but only after the CRON command you set in step 2 is executed.

5.1. Adding a new filter

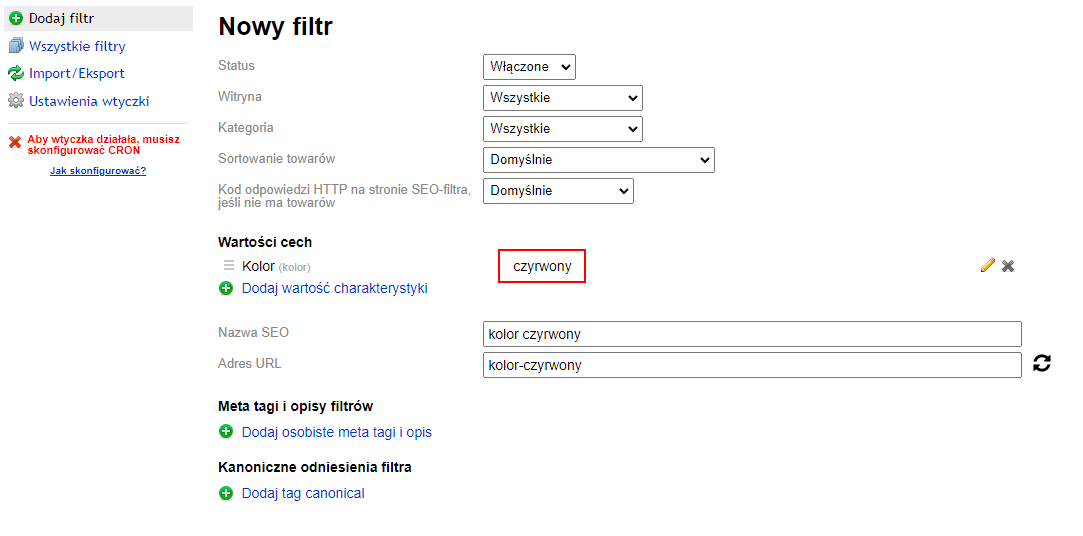
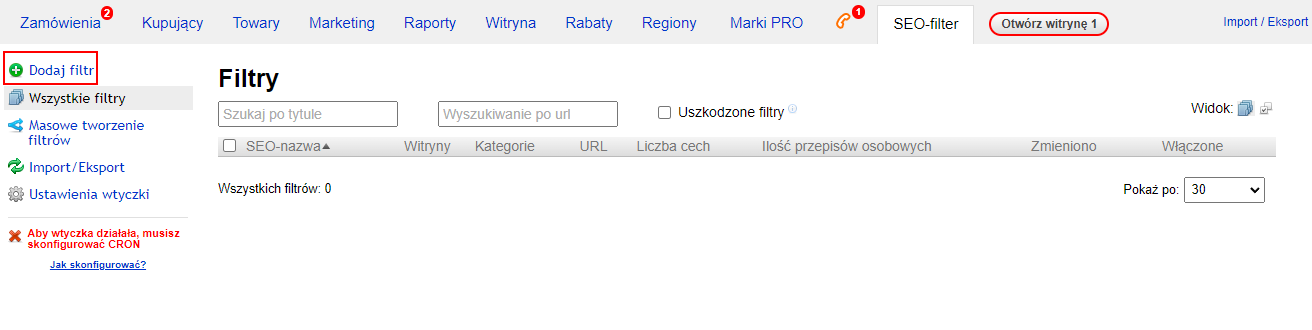
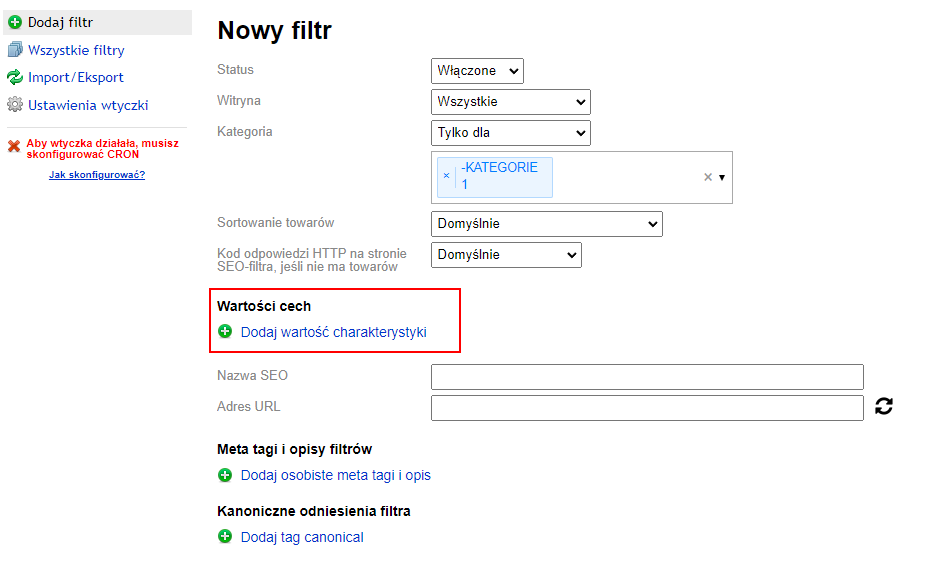
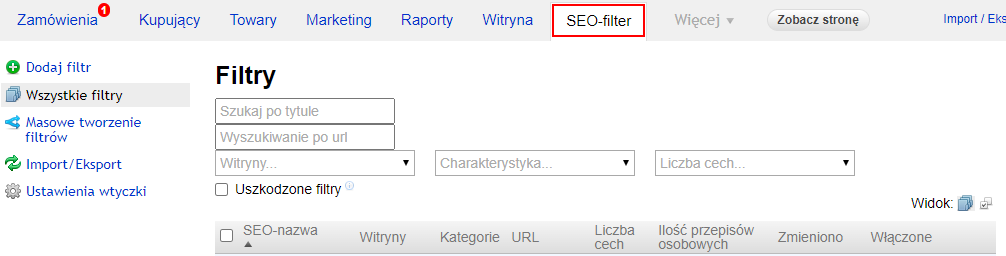
Go to the "SEO-filter" tab. Click the "Add filter" button.


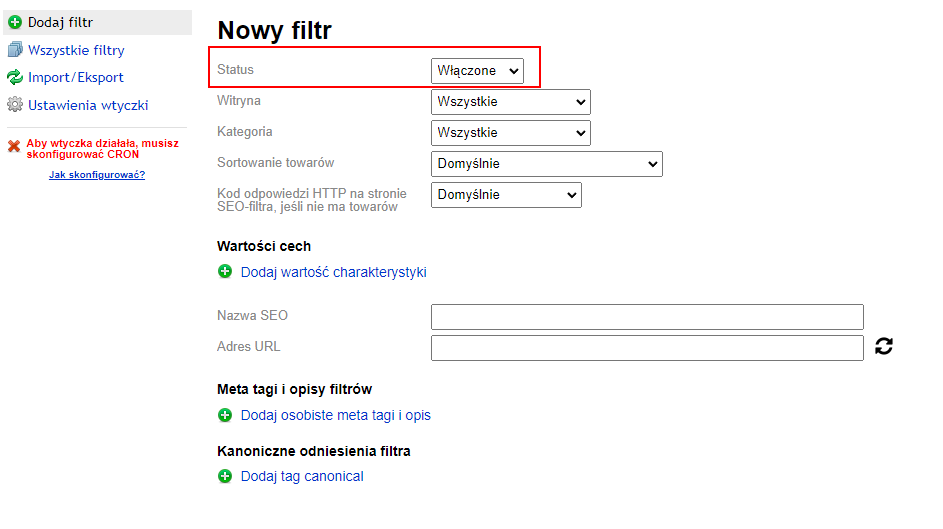
Check "Enabled" if the option is not already selected.


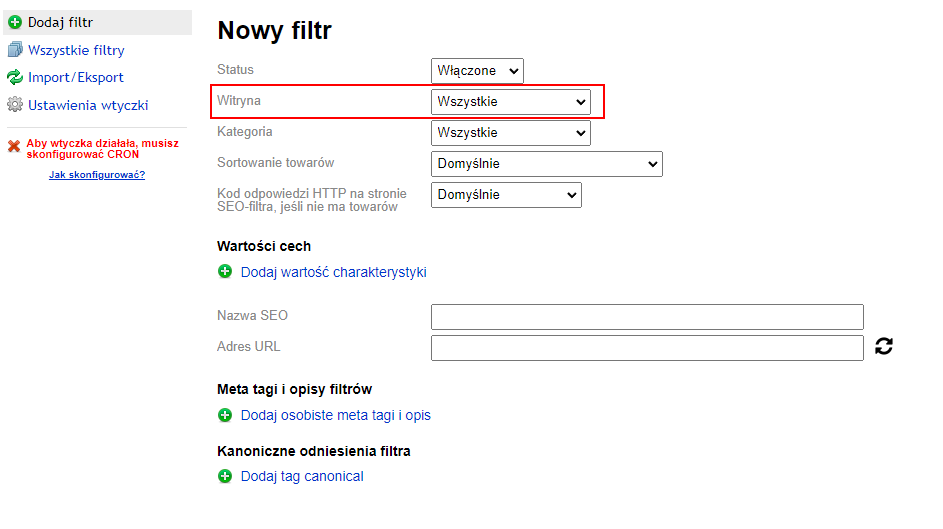
Select the storefront. If you are using a single storefront or want to set properties for all storefronts, leave this set to "All".
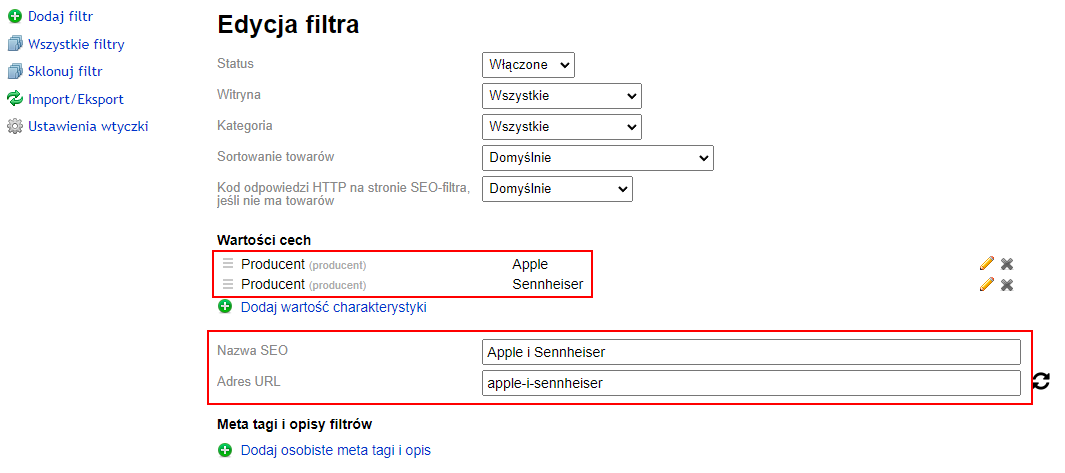

If you want to selectively specify the Storefronts to which the rules should apply, you can select these storefronts by choosing the "Only for" option, or exclude storefronts by choosing the "For all except" option.

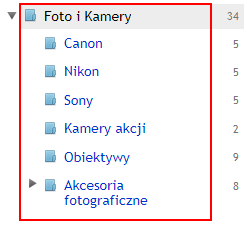
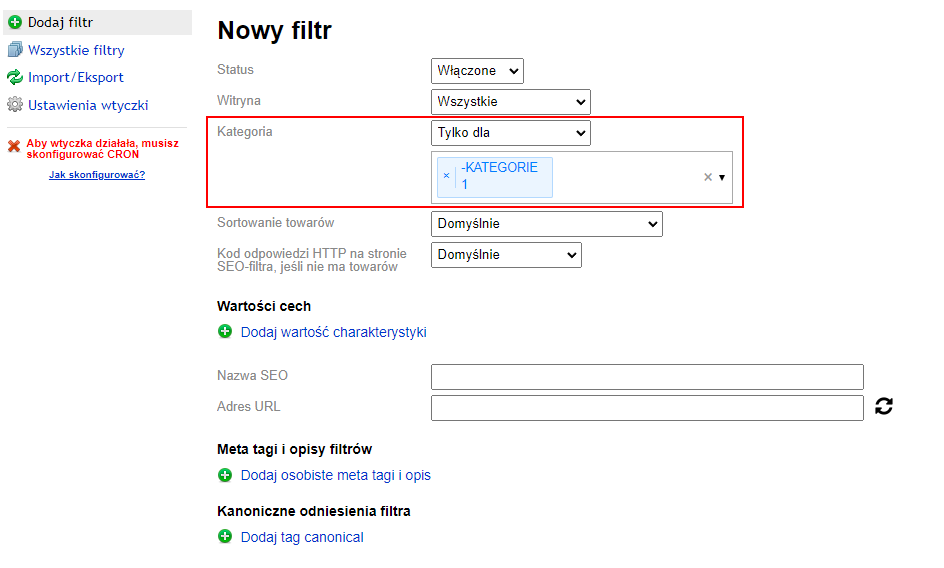
Specify the categories for which you want to add filters. As with storefronts, there are two options:

  • Only for;
  • For all except.


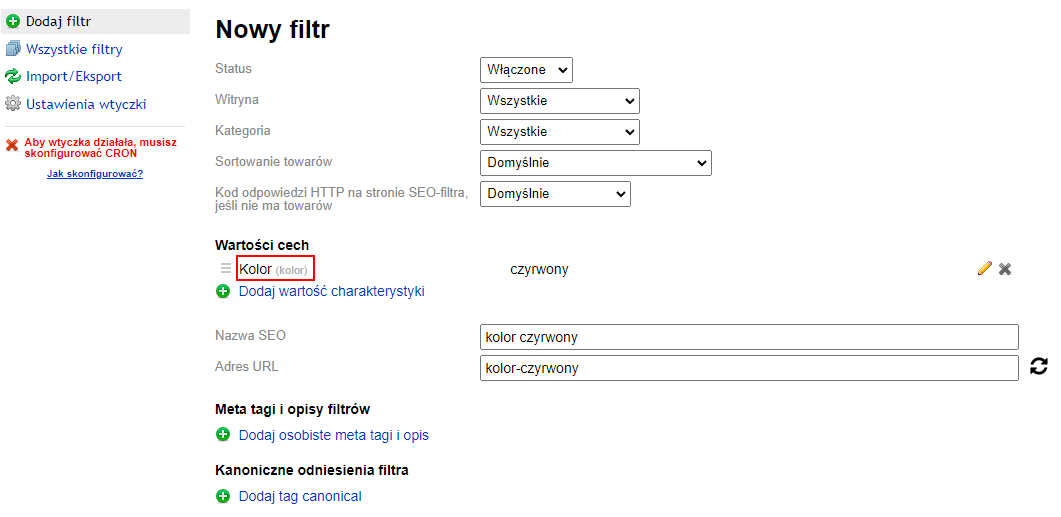
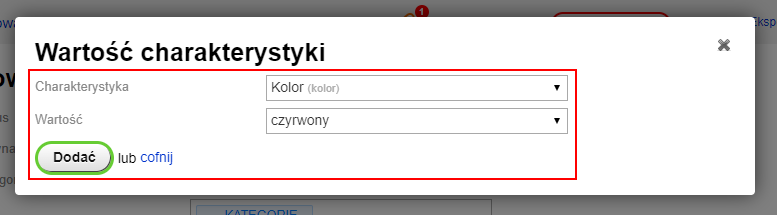
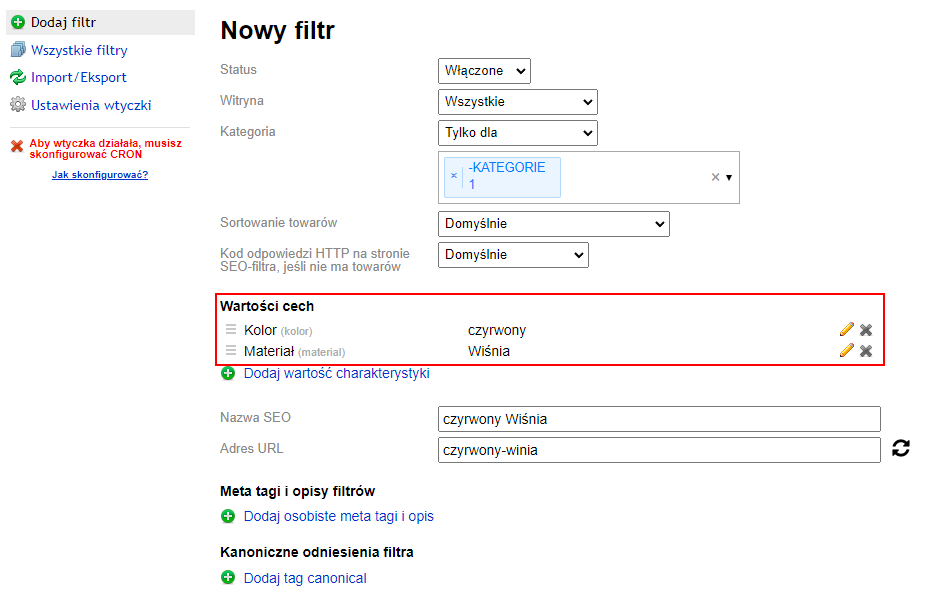
Add feature values.


You can add multiple values.


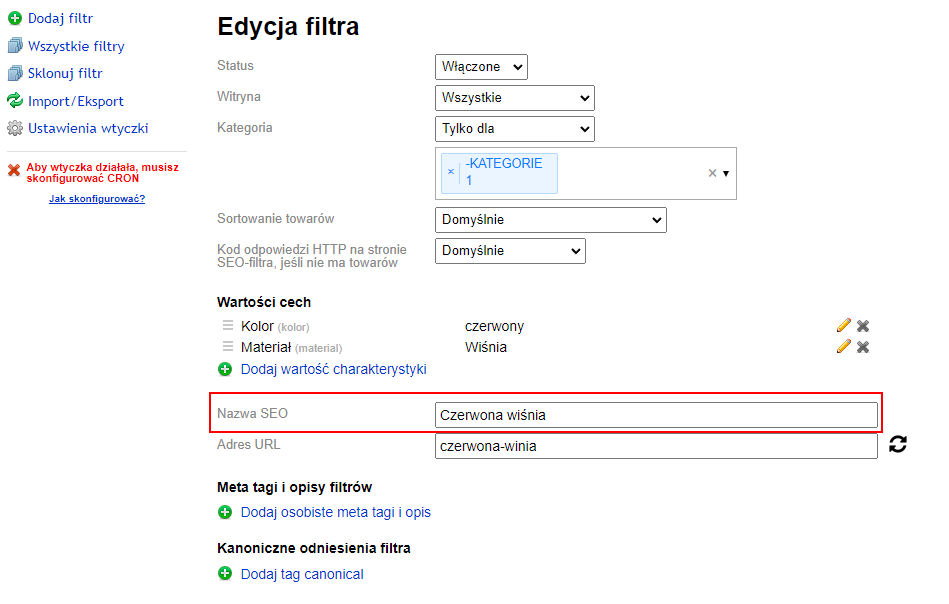
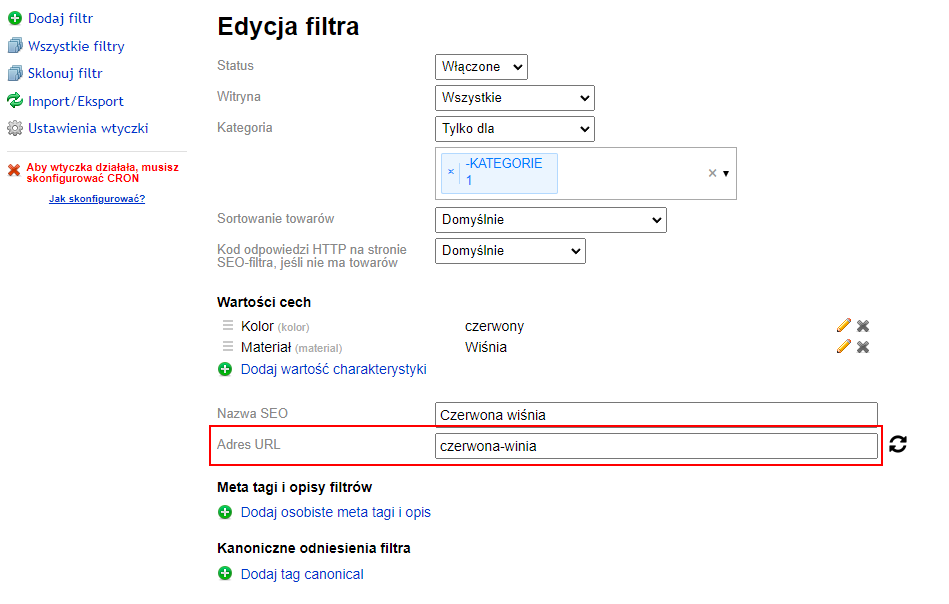
Edit the "SEO Name" field value. By default, feature values are entered here.


Edit the URL if necessary.


Add custom filtering rules if needed.

5.2. Adding personal rules for the filter

Plugin "SEO-filter" allows flexible customization of filter results optimization.

For each filter, you can set several personal value rule options. For example, you may need to set a personal value for all categories and storefronts because the general theme is not suitable, and for one specific category, you need to set meta tag settings.

In the plugins settings, create themes:


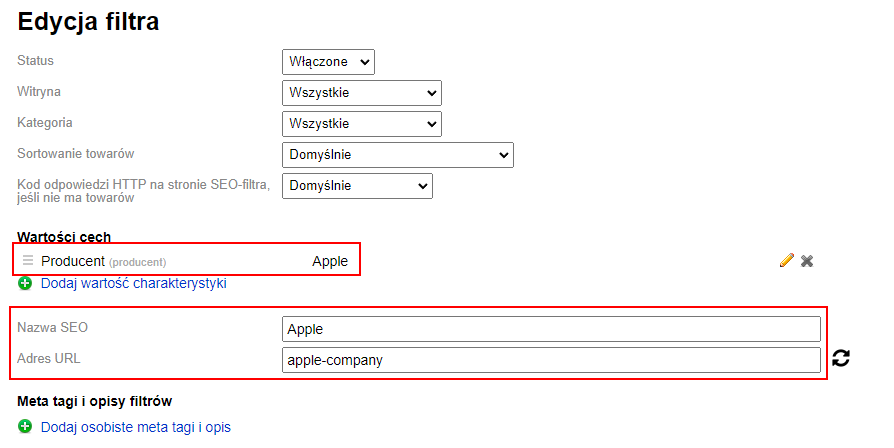
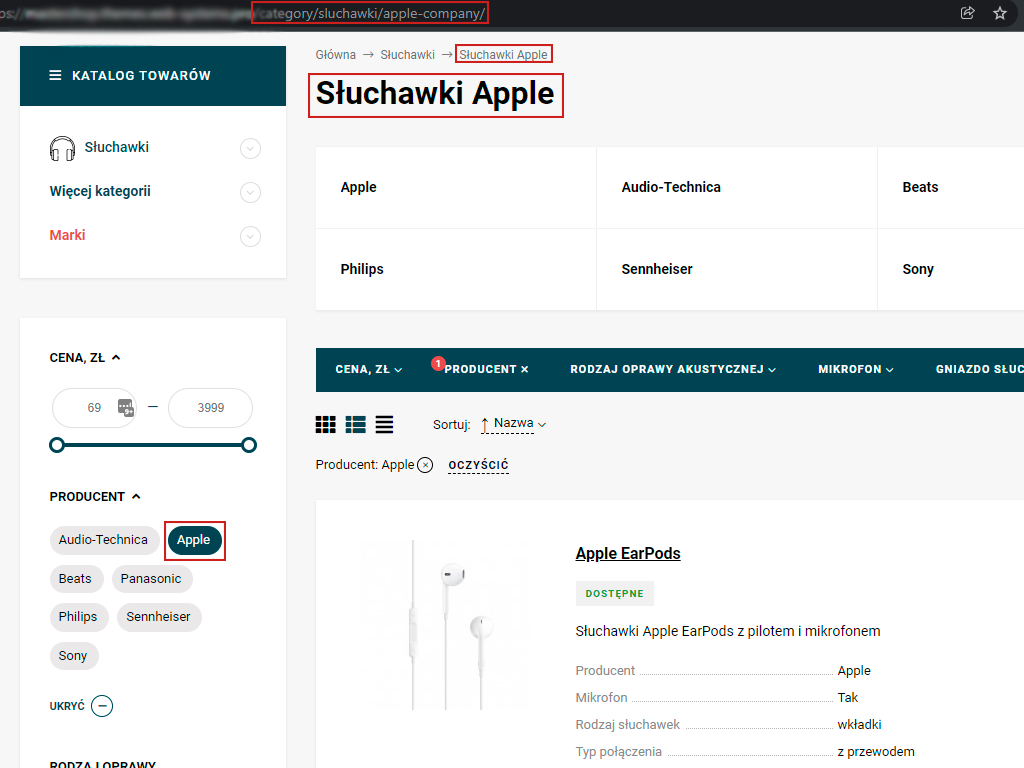
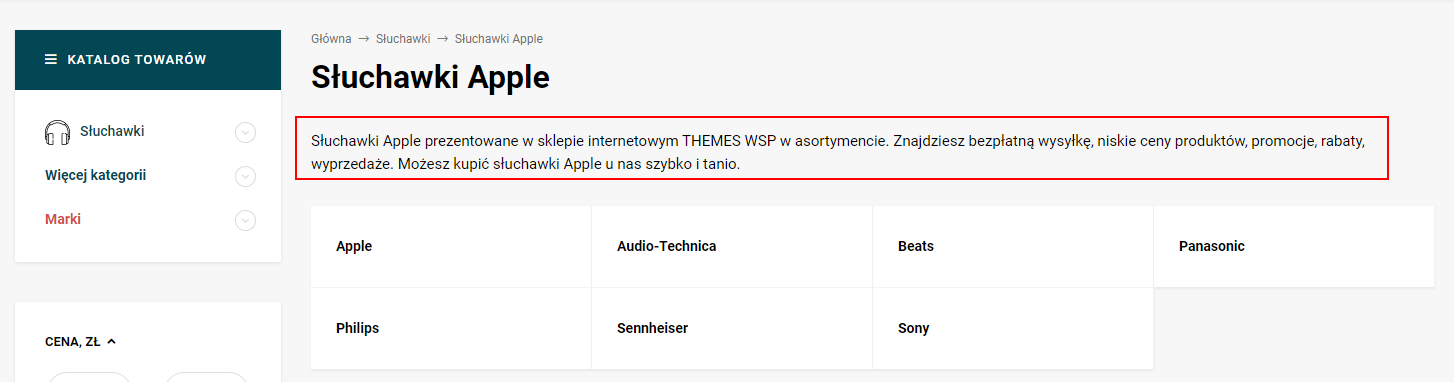
Example 1. You need to create 1 feature for the Apple brand so that in every category, when Apple is selected, the brand appears in the title, description, <h1>, and description, and parameters in the link are changed to "Human-readable URL".

Copy the templates to the feature:


Go to the category page (where settings are now located):


If you select "Apple", "Title" and <h1> will be generated according to the theme.


Title, Keywords, and Description have also changed:


Description has changed:


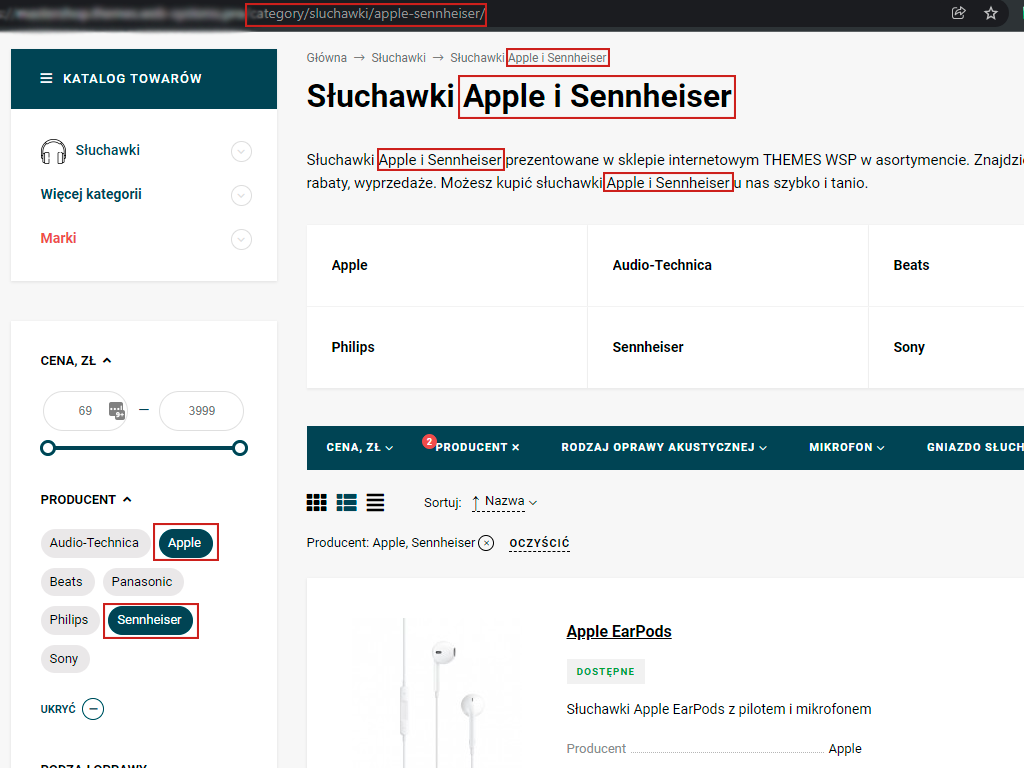
Example 2. You need to add a filter for two values - Apple and Sennheiser.

Enter characteristic templates and save the result. The following image appears in the storefront:


Example 3. For the Apple feature, you need to write a different "Title" that starts with the word "Buy".

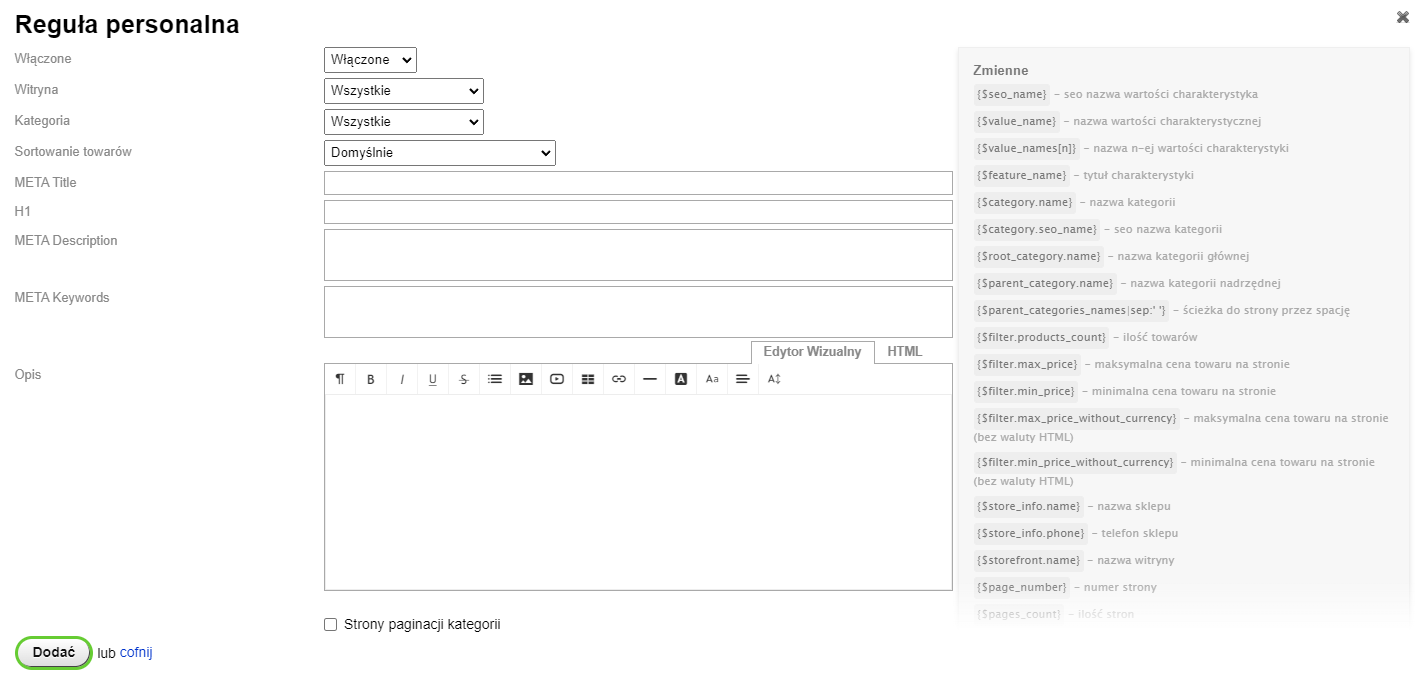
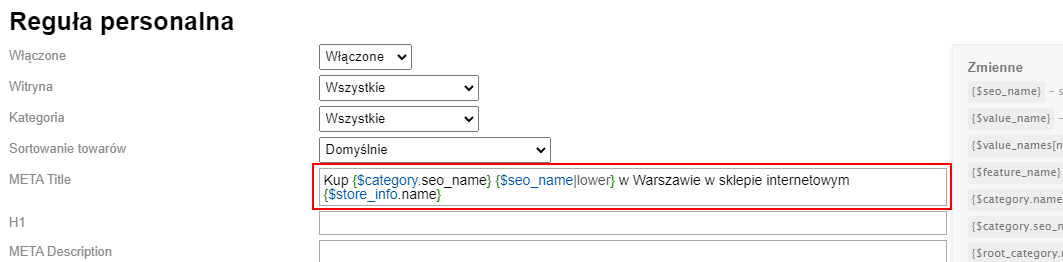
Edit the template for the Apple feature. Open the form for personal rules and fill in the "META Title" field (since a personal rule is needed only for "Title"):


Save the personal rule and filter options.

On the page it will look like this:


But if you select other added filters, general themes will be applied:


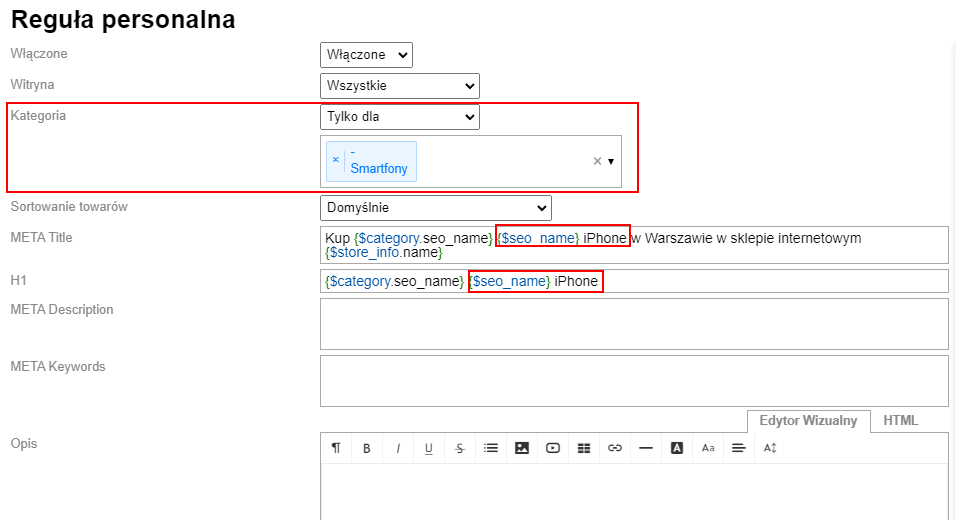
Example 4. In all categories, when the Apple feature is selected, the title should appear as in Example 3. But for the "Smartphones" category, the "Title" and <h1> should include the additional name "iPhone".

Go to the «SEO-filter» tab.


Open the filter settings for editing. An individual rule has already been set that applies to all categories. Add another one for the "Smartphones" category:


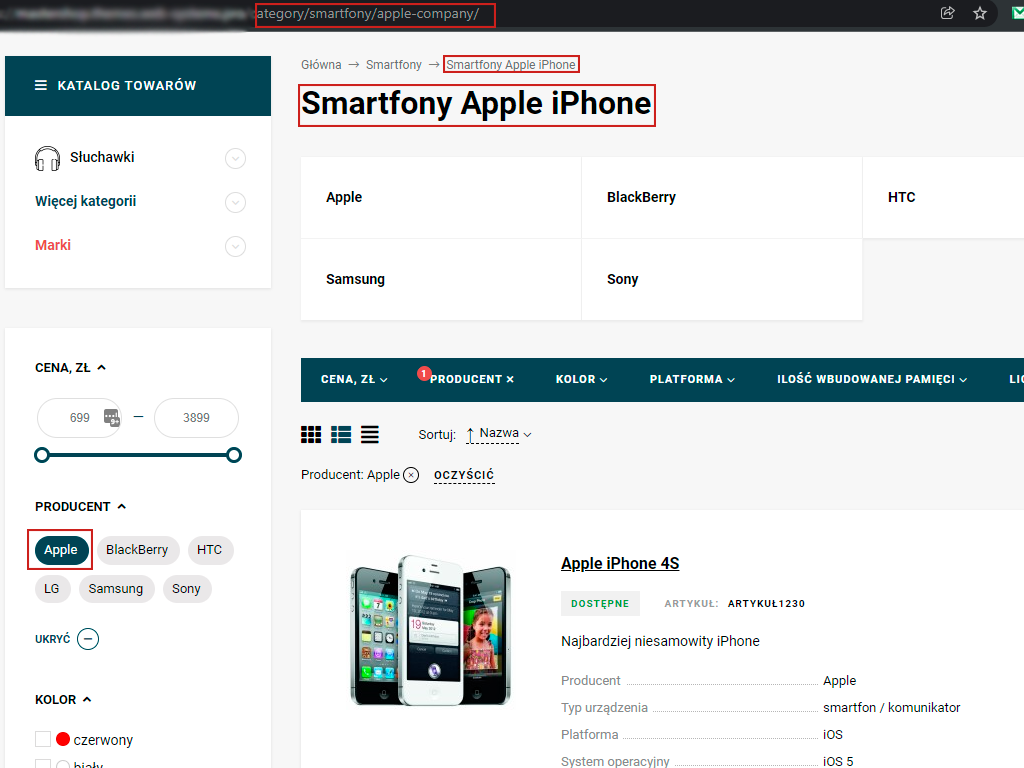
In the "Smartphones" category, Title and <h1> will be formed according to the individual theme:


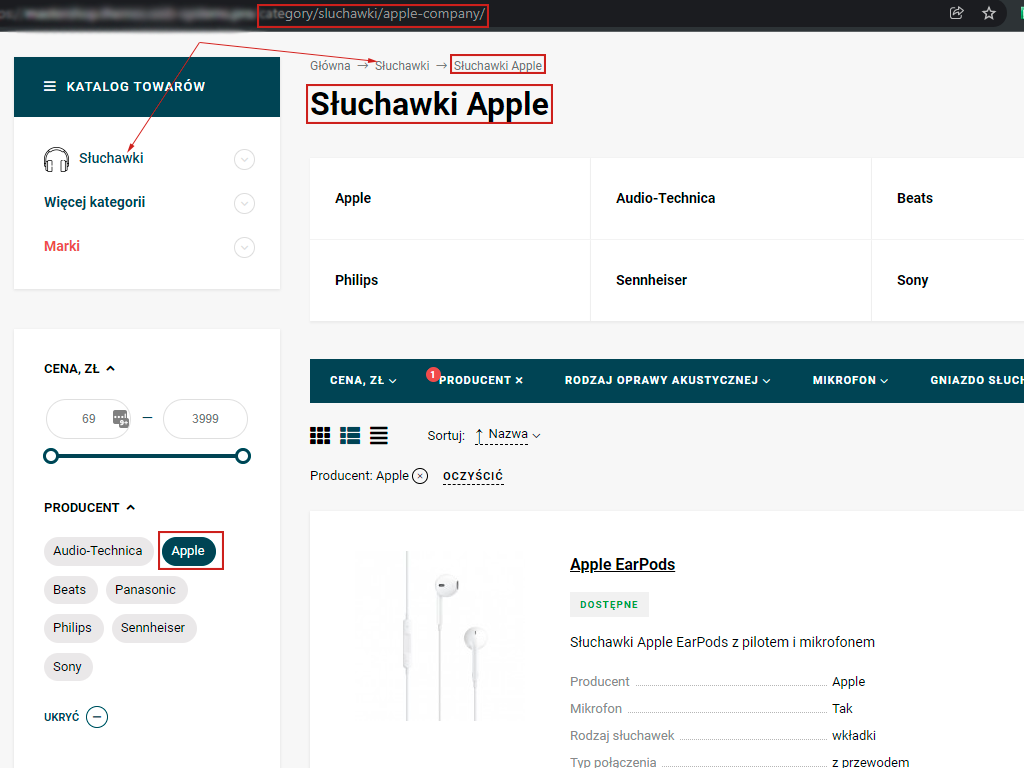
In other categories, everything will remain unchanged:


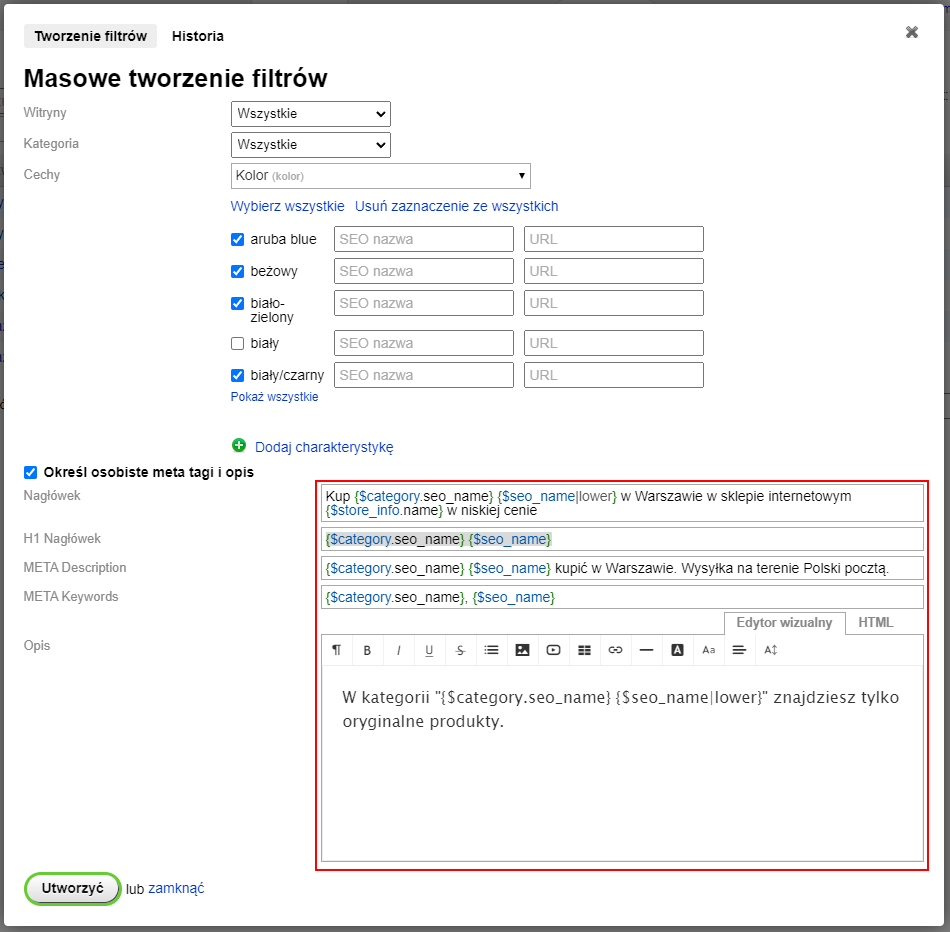
5.3. Bulk filter creation

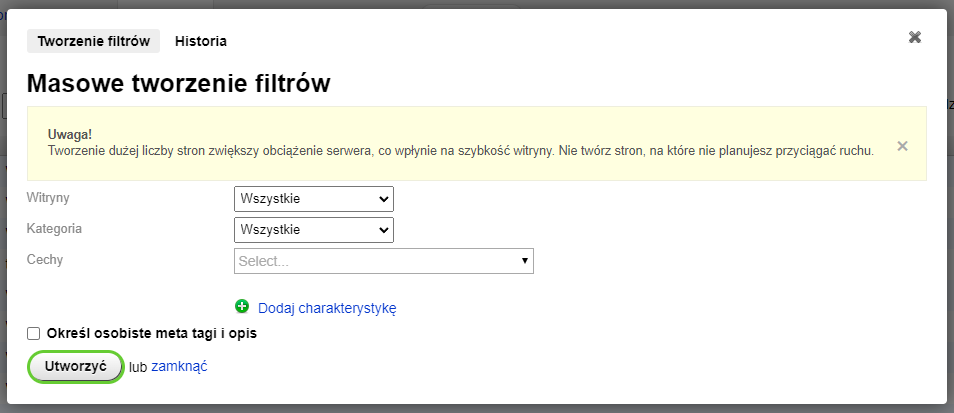
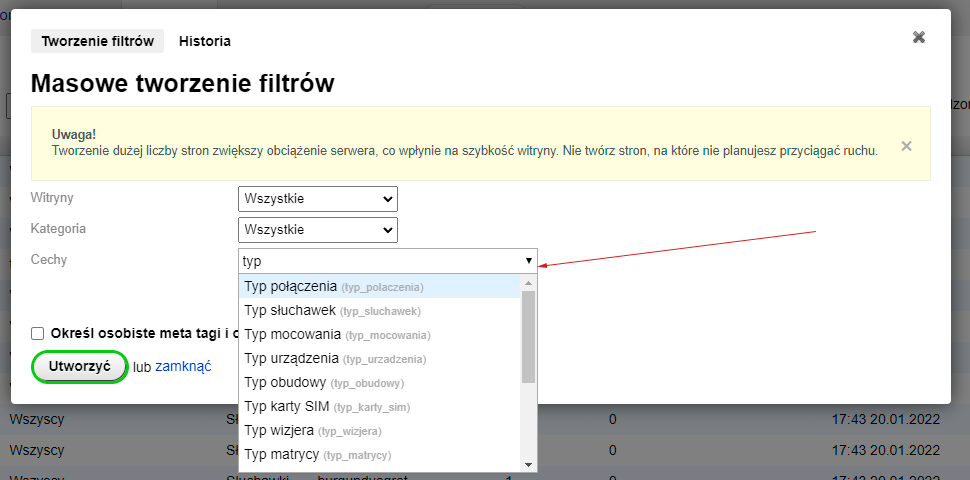
Click the "Bulk filter creation" button. A filter generation window will open.

Available options:

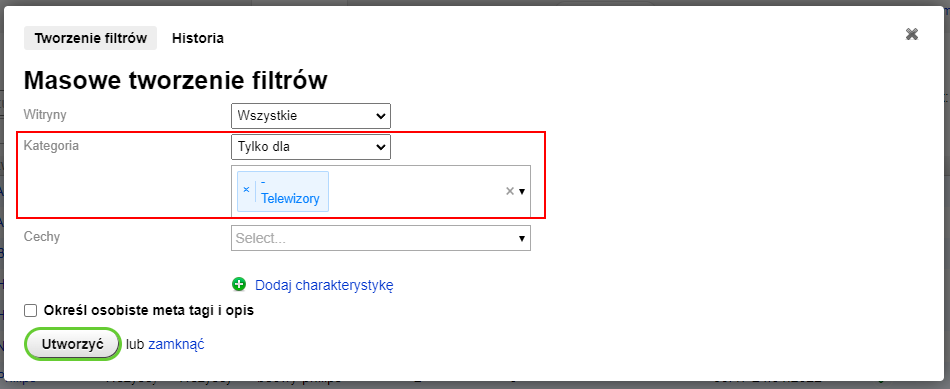
  • Select categories for which filters should or should not be generated;
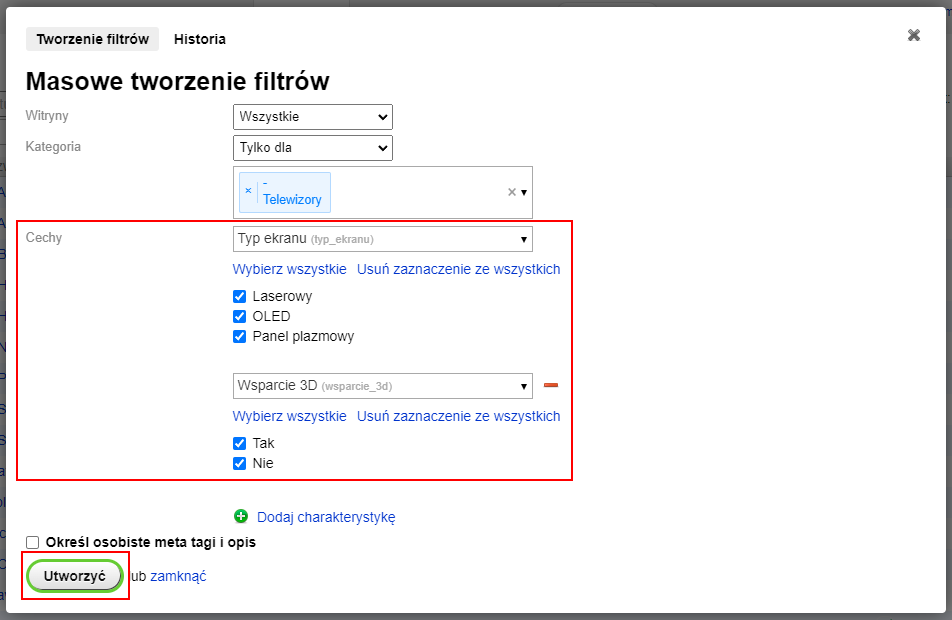
  • Select characteristics for which you want to generate filters (including any combinations);
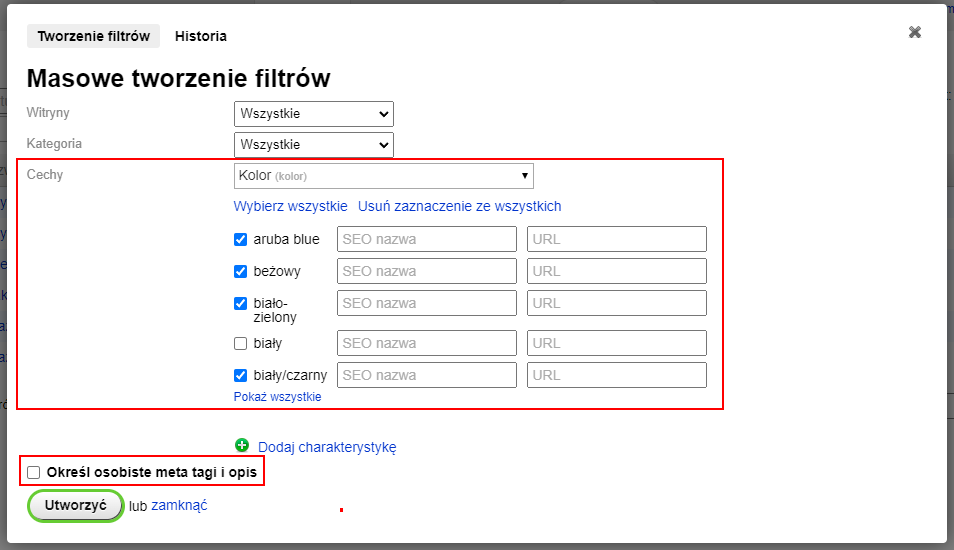
  • You can set personal tags (title, description, keywords), H1 title, and description;
  • View submission history;
  • Ability to remove generated filters.

Example: generating filters by one characteristic for all categories

Open the "Bulk filter creation" window.


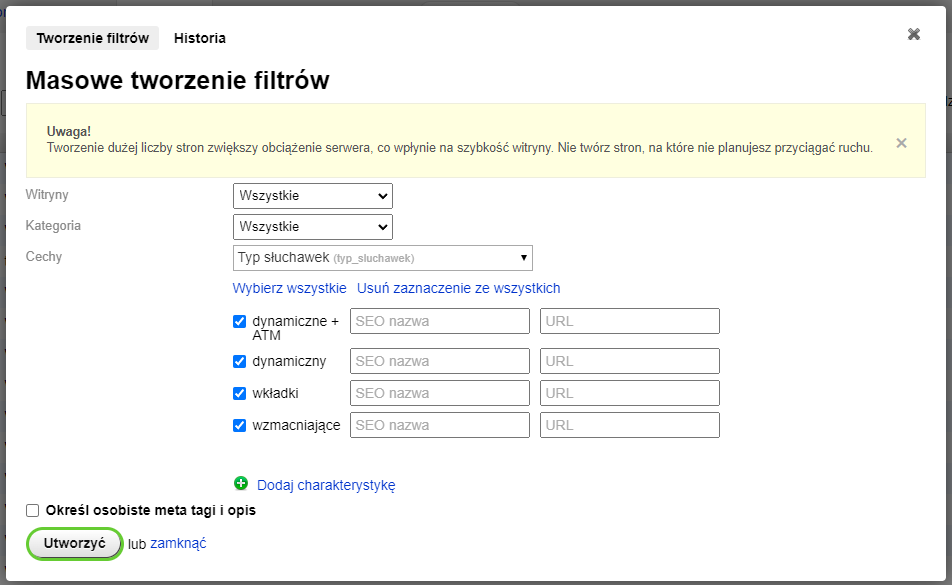
Select a characteristic.


Here you can customize the filter SEO name and URL. Leaving fields empty will result in automatic data population.


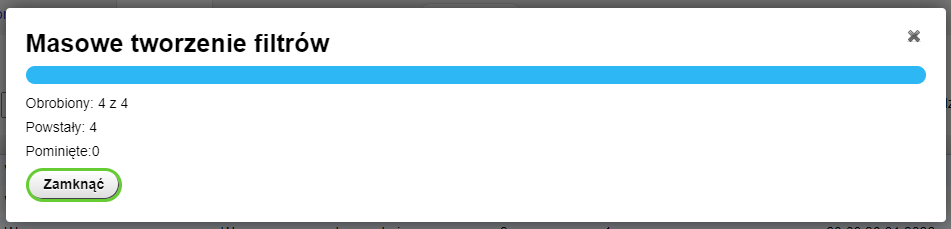
Click the "Create" button.


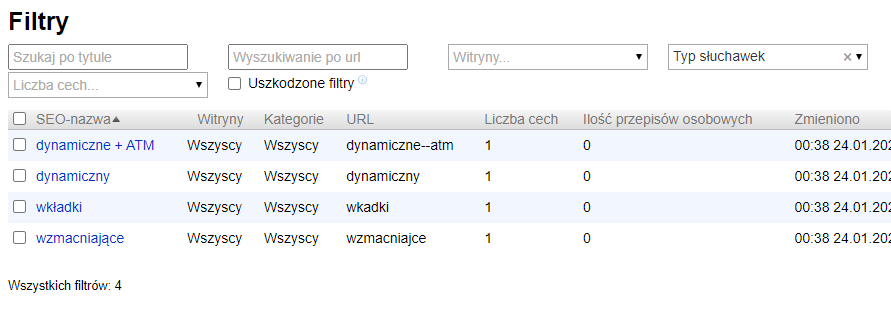
Result:


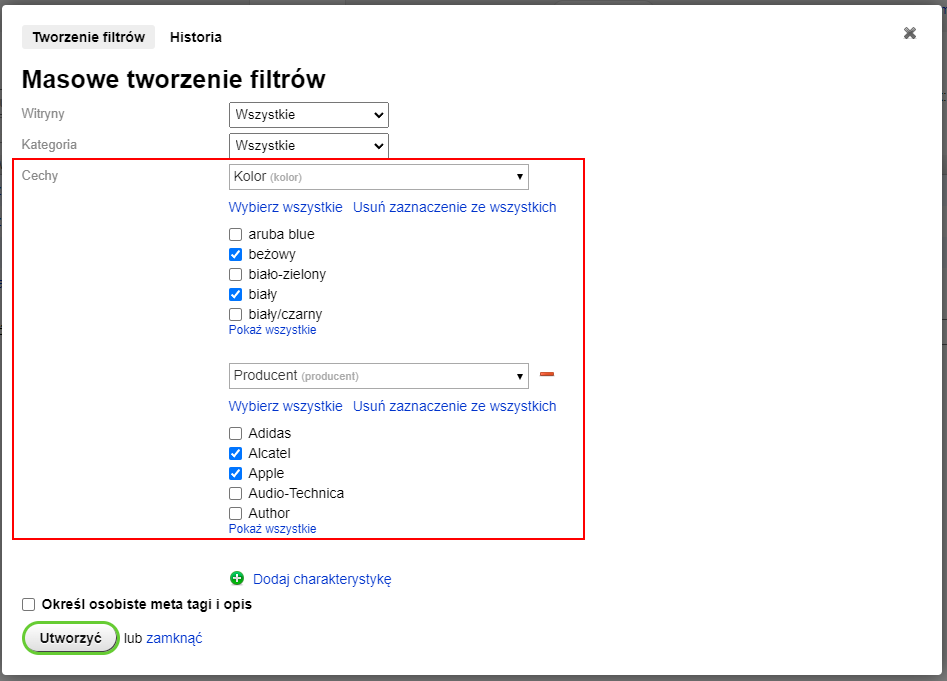
Example: generating filters by two characteristics for all categories

Select two characteristics.


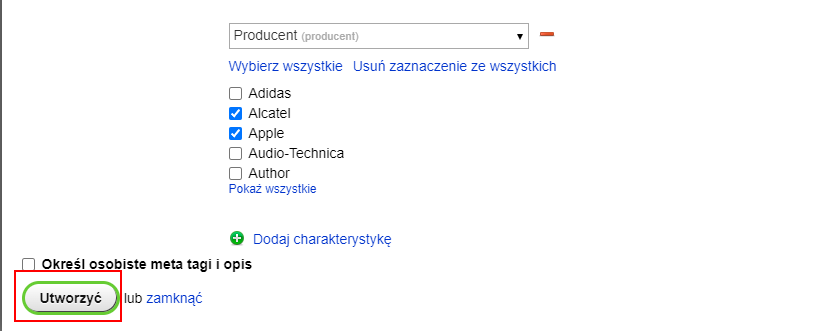
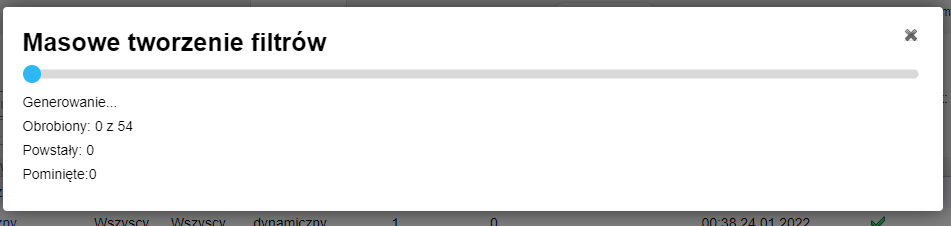
Click the "Create" button.


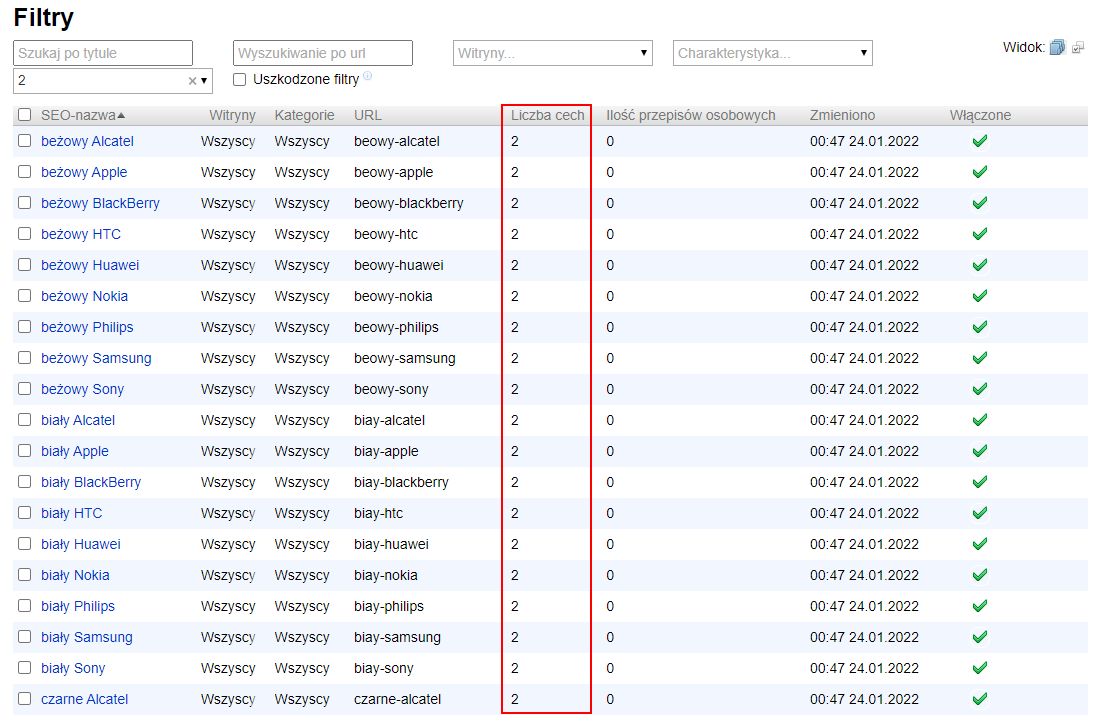
Result:


Example: generating filters by two characteristics for a specific category

Specify the categories for which you want to generate filters.


Select two characteristics. Click the "Create" button.


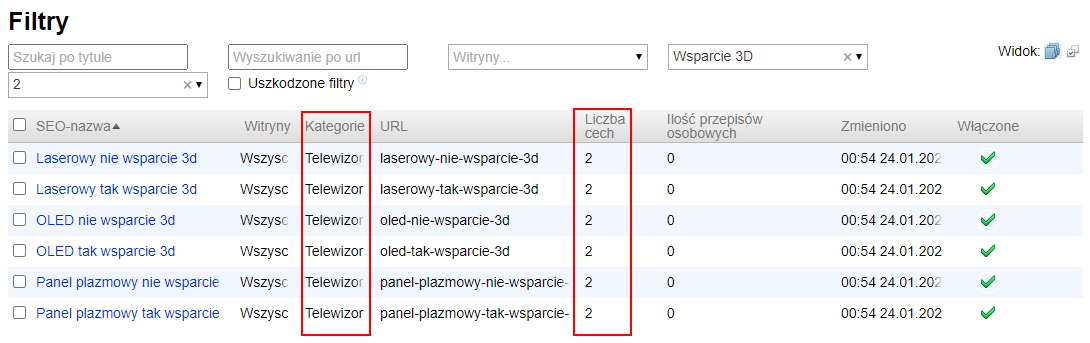
Result:


Example: generating filters by one characteristic with personal tags specified

Select a characteristic.


Save personal templates.


Click the "Create" button.

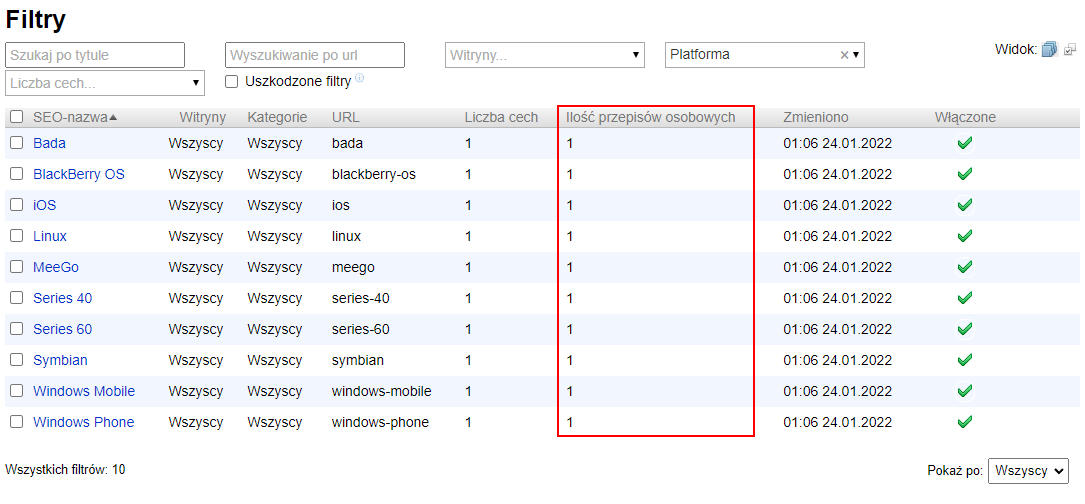
Result in the admin panel:


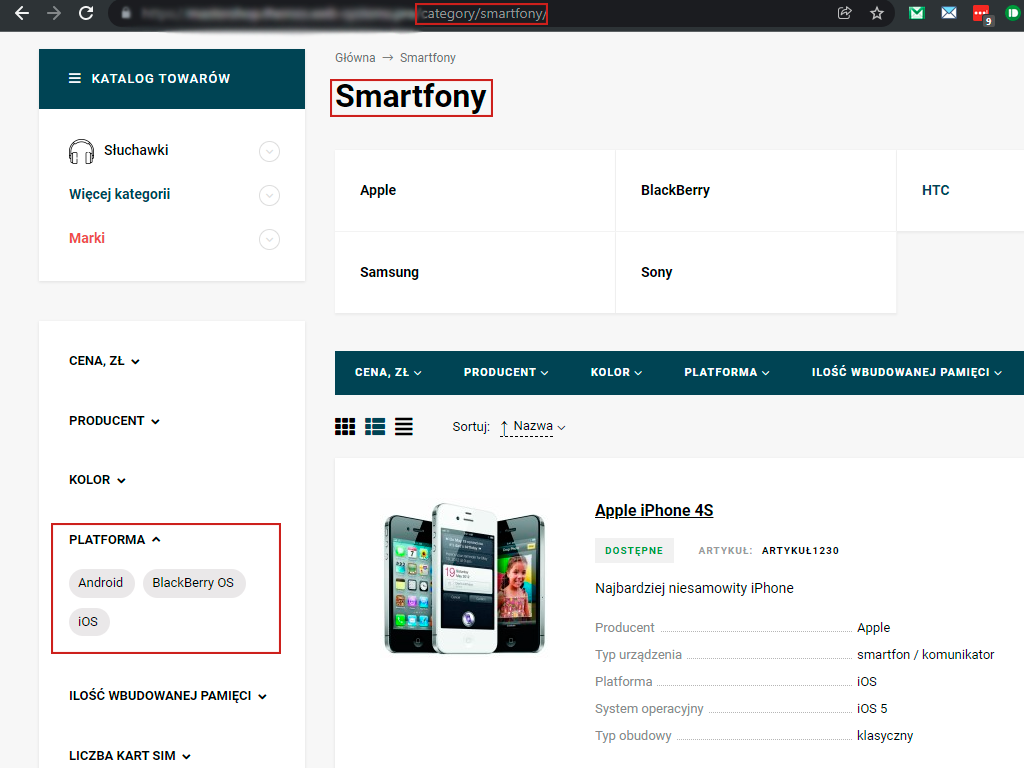
Result on the page before selecting characteristics:


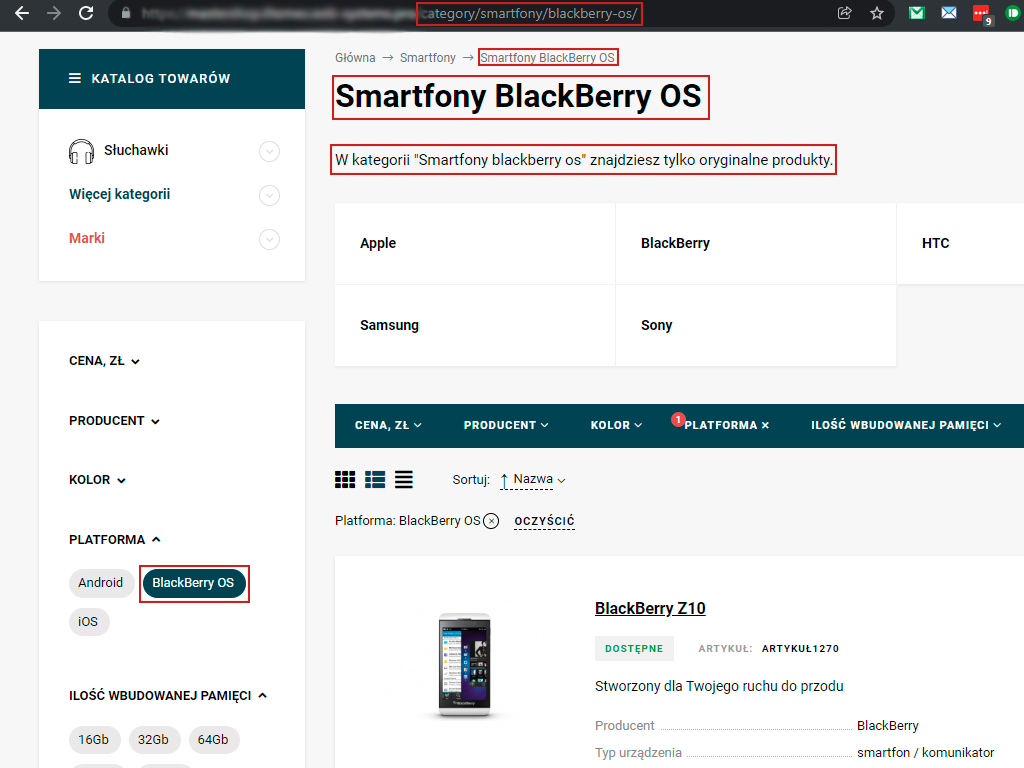
Result on the page after selecting a characteristic


In the source code:


5.4. Working with the filter list

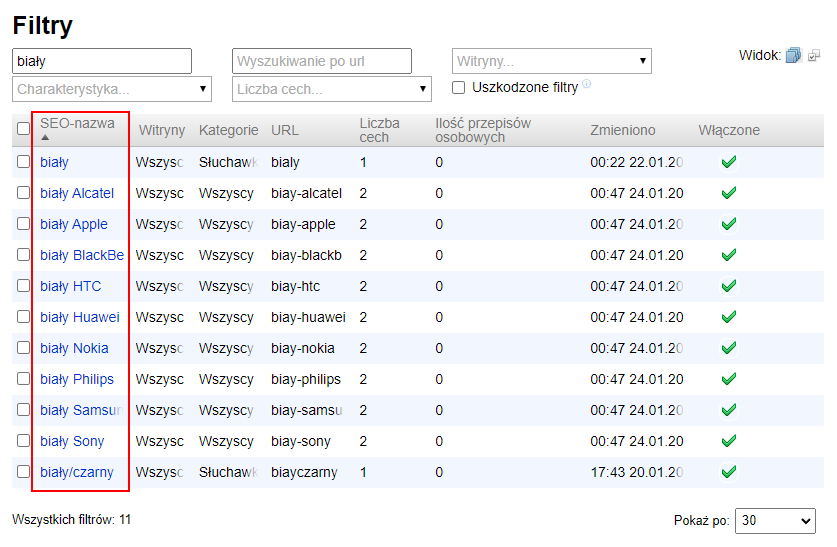
Search by name / Search by URL

Enter the search phrase.


Plugin will filter the results.


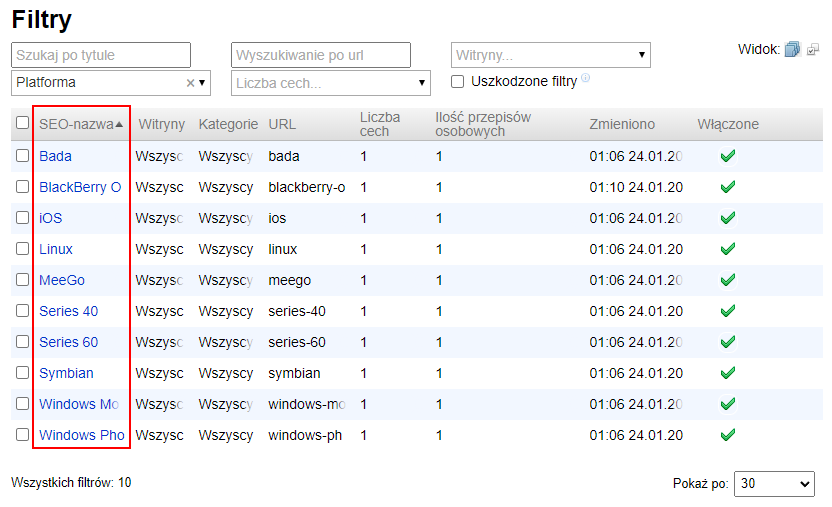
Filtering by characteristic

Select the characteristic to filter by.


Plugin will filter the results.


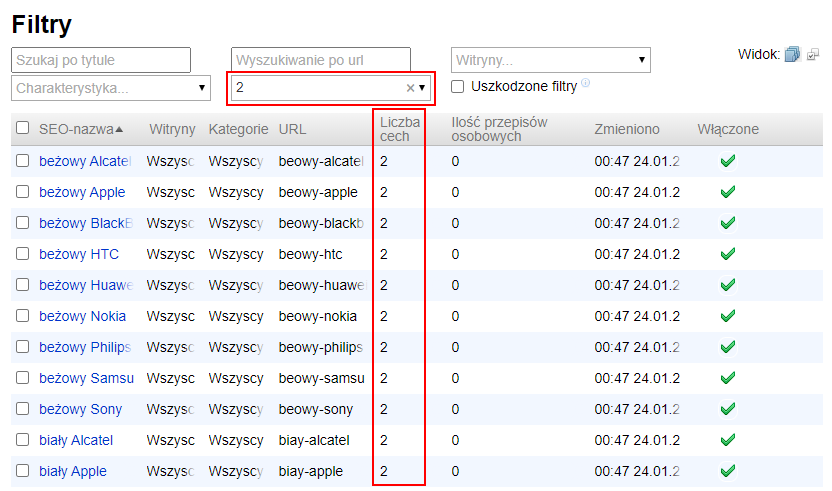
Filtering by number of feature values

Select the number of feature values added to filters. For example, you want to filter only those features to which 1 value has been added. Plugin will filter the results.


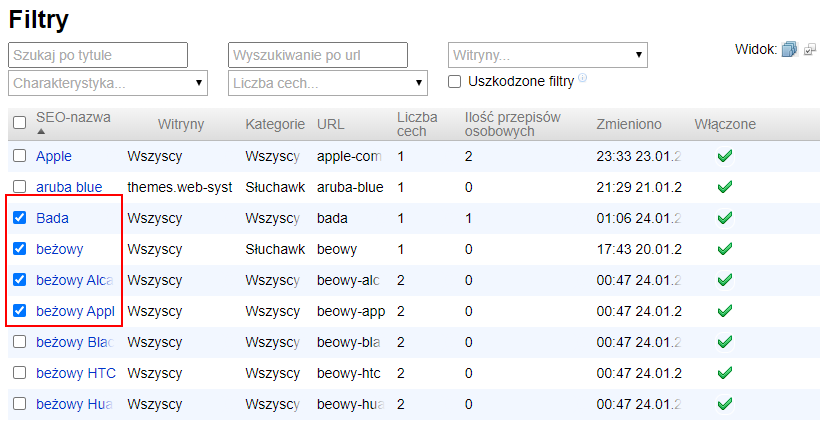
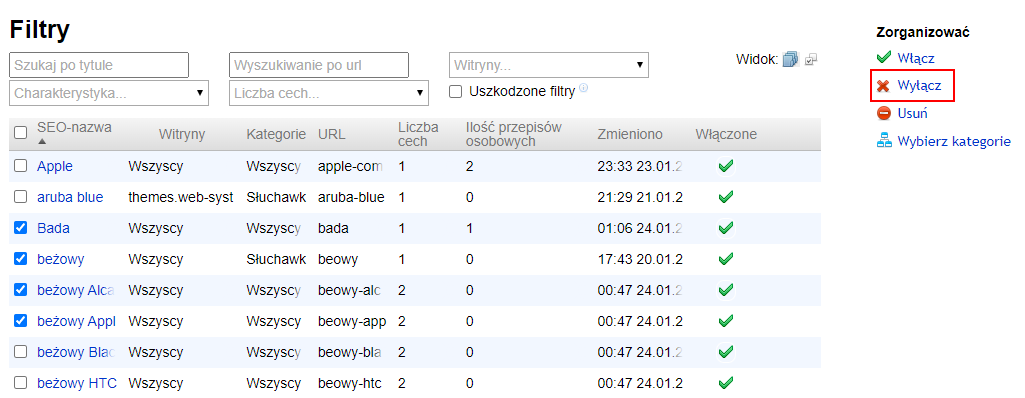
Enable / Disable / Delete filters

Select the features you want to perform these actions on.


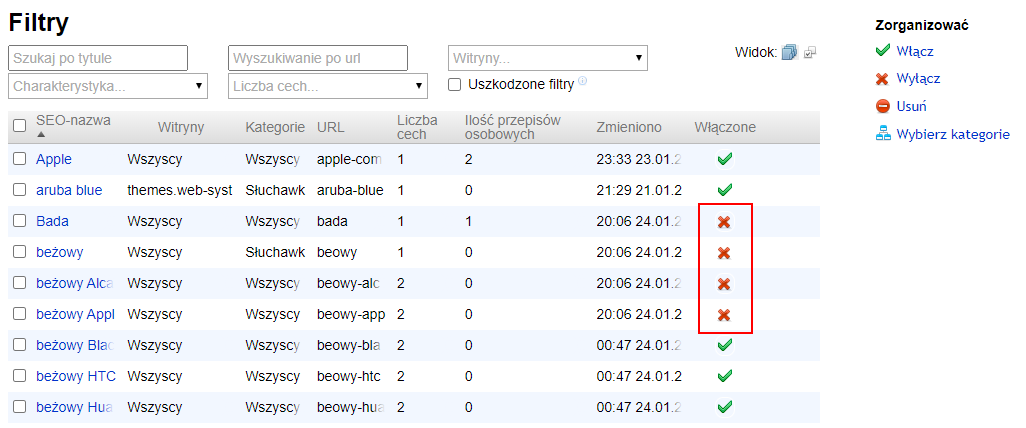
Enable, disable or delete the selected filters.


Result:


6. Example of embedding html code from plugins instructions

6.1. Substituting pagination links

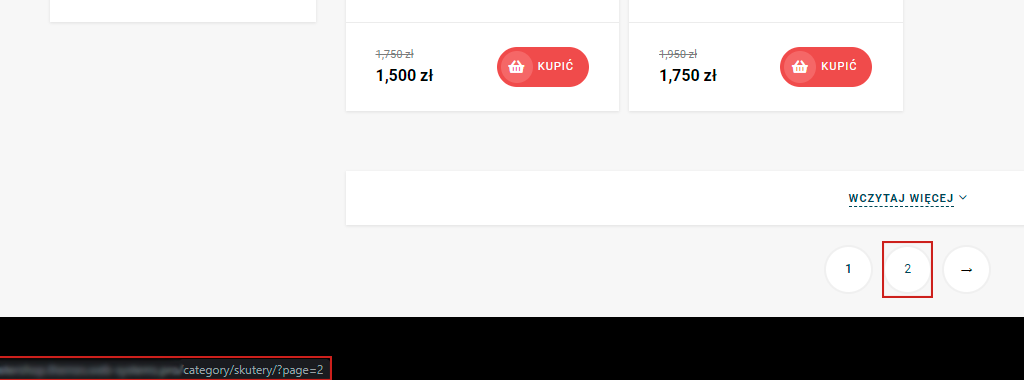
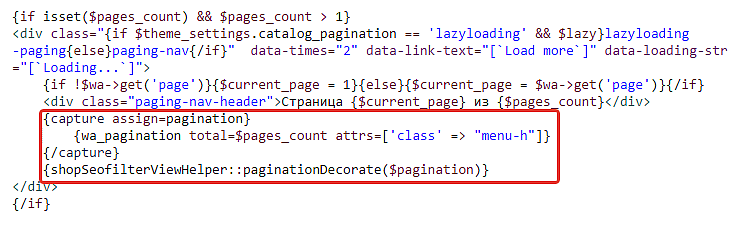
To get correct pagination links, for example like this: https://mysite.com/category/skutery/?page=2, add this code.


To replace links in site navigation, you need to make changes in the project theme.

Open the file list-thumbs.html, find and replace the code:

{wa_pagination total=$pages_count attrs=['class' => "menu-h"]}

with

 {capture assign=pagination}
    {wa_pagination total=$pages_count attrs=['class' => "menu-h"]}
 {/capture}
 {shopSeofilterViewHelper::paginationDecorate($pagination)}


Example for Megashop theme

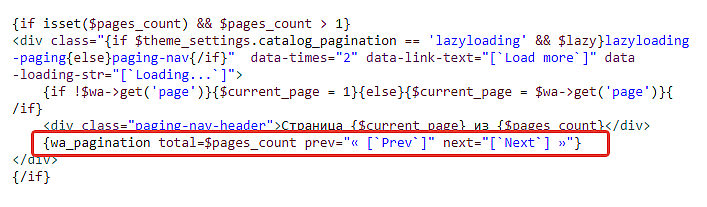
Find the line

{wa_pagination total=$pages_count prev="« Prev" next="Next »"}


And replace it with

 {capture assign=pagination}
      {wa_pagination total=$pages_count attrs=['class' => "menu-h"]}
 {/capture}
 {shopSeofilterViewHelper::paginationDecorate($pagination)}


6.2. Displaying filtering links on brand page

* Configuration instructions for plugins "Brands with pictures and descriptions".

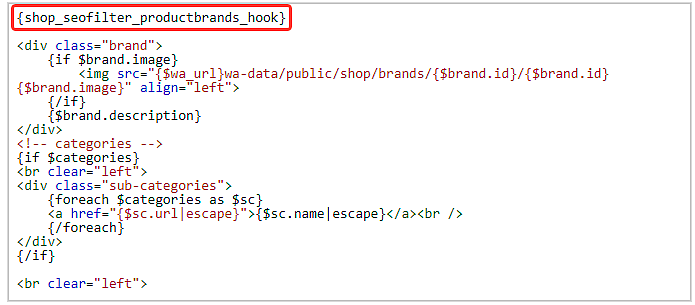
Insert the code {shop_seofilter_productbrands_hook} at the very beginning of the output template on the brand store page: search results in plugins settings "Brands":


6.3. Feature linking

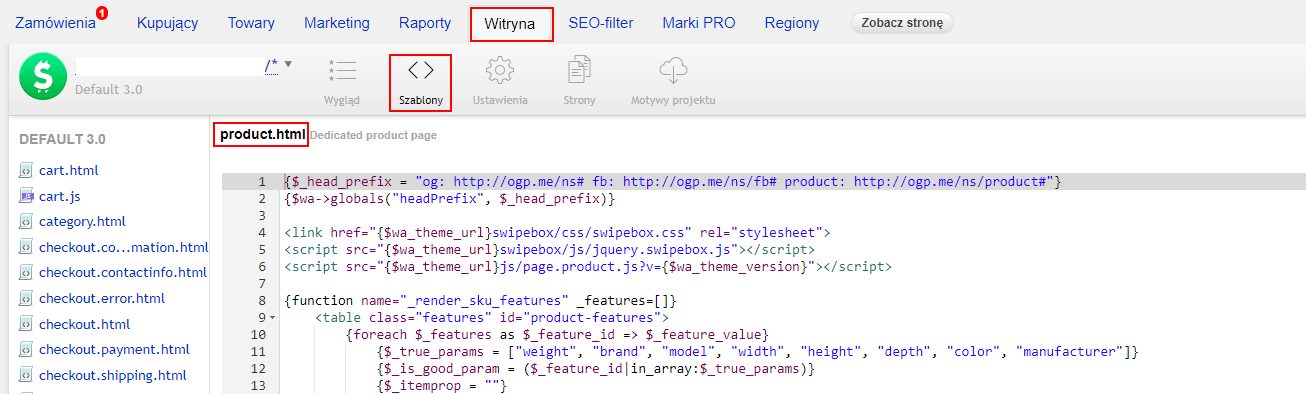
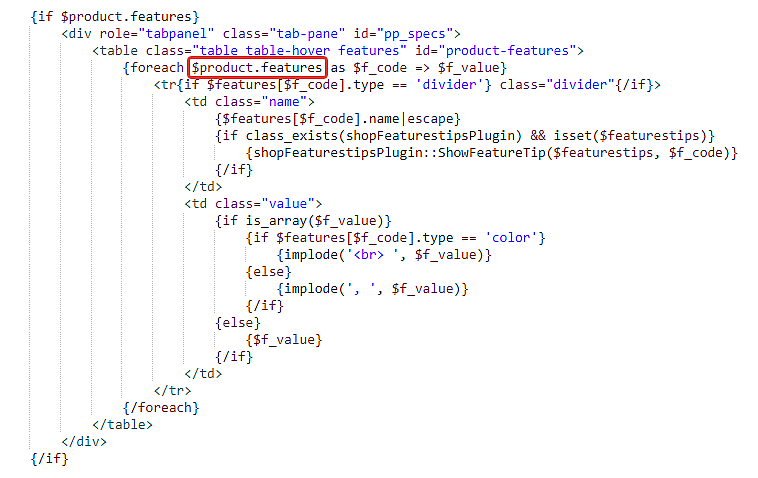
To make the functionality work, changes must be made in the project theme. Go to the product.html template (Shop -> Site -> Templates -> product.html).


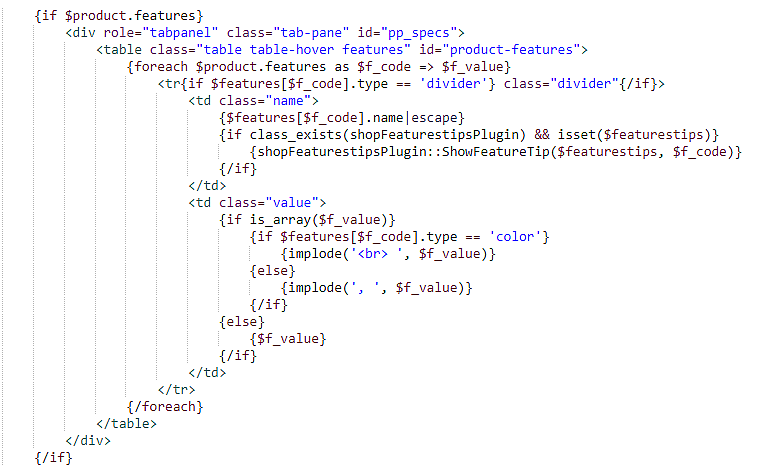
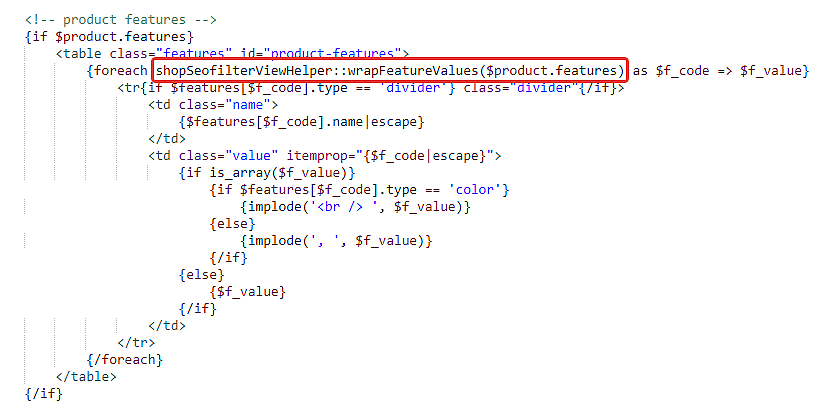
Find the code for displaying features; it may look like this:


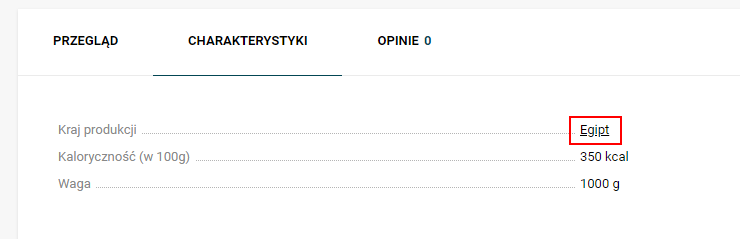
Replace $product.features with shopSeofilterViewHelper::wrapFeatureValues($product.features).


7. Linking product features and "SEO-filter" pages.

To enable this functionality, you need to make changes to the project theme (see point 6.3).

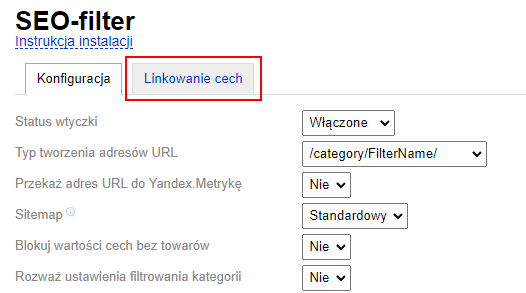
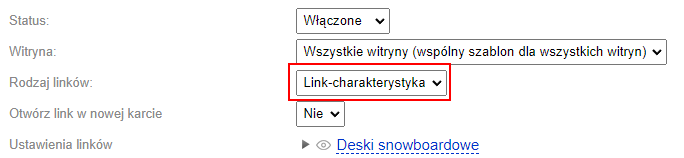
Go to the "Feature Linking" tab in the plugins settings.


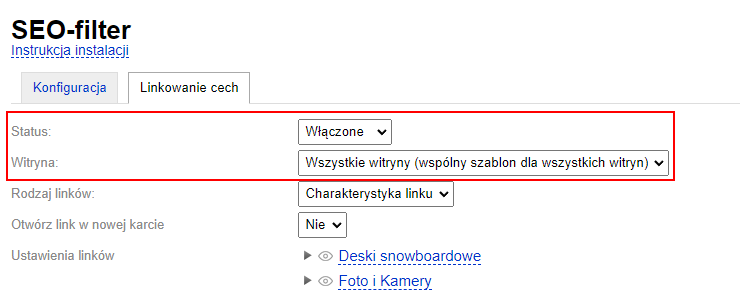
Enable the functionality. If necessary, select the Website.


Select the Link View. There are two options:

  • Link-feature (the feature name will be used as an anchor);
  • Other products (a link with the anchor "other products" will be placed to the right of the specification in parentheses).


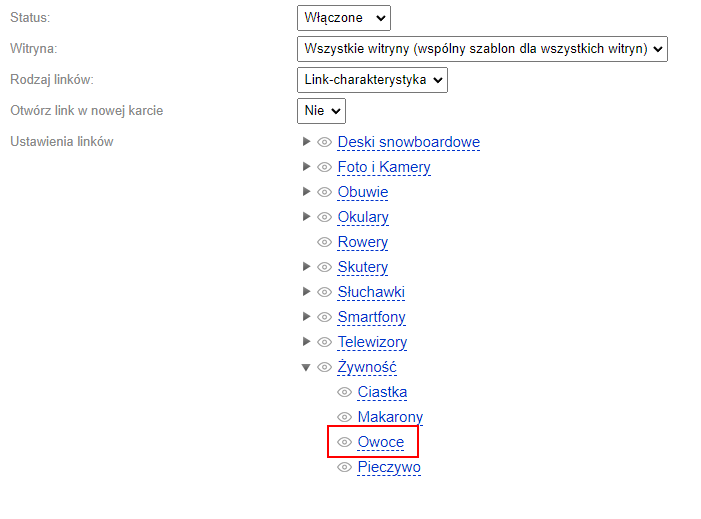
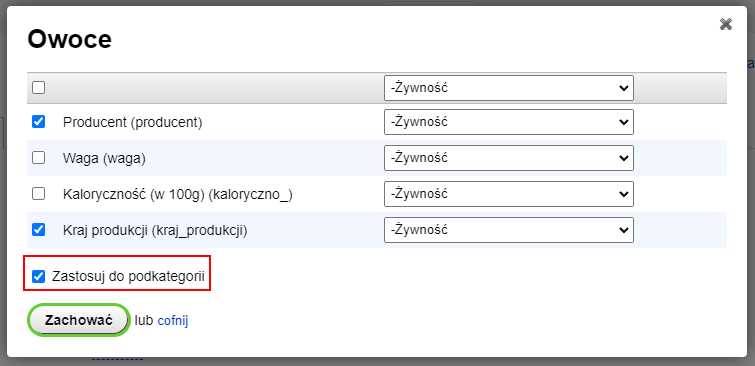
By default, all links in all products will be placed in the product category. But if you want to remove or change the category for some links, do so. Select the categories where products need links to "SEO-filter" pages, for example, "Fruits".


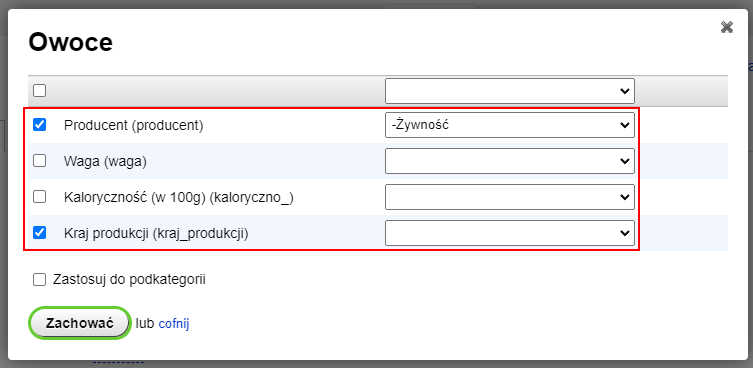
Select the features you want to link. Specify the categories that the links will point to. The default setting is the current category.


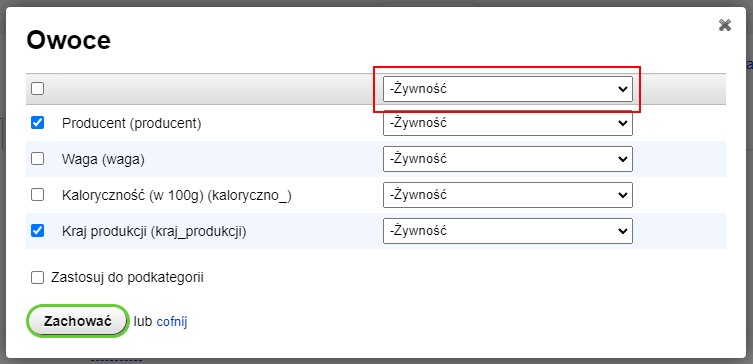
You can assign categories in bulk.


Or apply rules for subcategories.


Save the changes.

Check the placed links in product cards.


8. Instructions for working with import/export of the plugins "SEO-filter".
Important!
1. During import, data will be overwritten. This action cannot be undone.
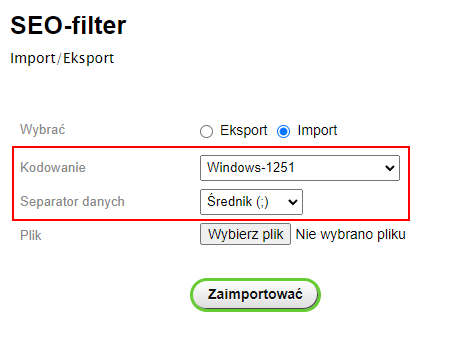
2. Before importing, correctly select the encoding and data separator.
3. It is not possible to create new filters through import. You can only edit existing ones.


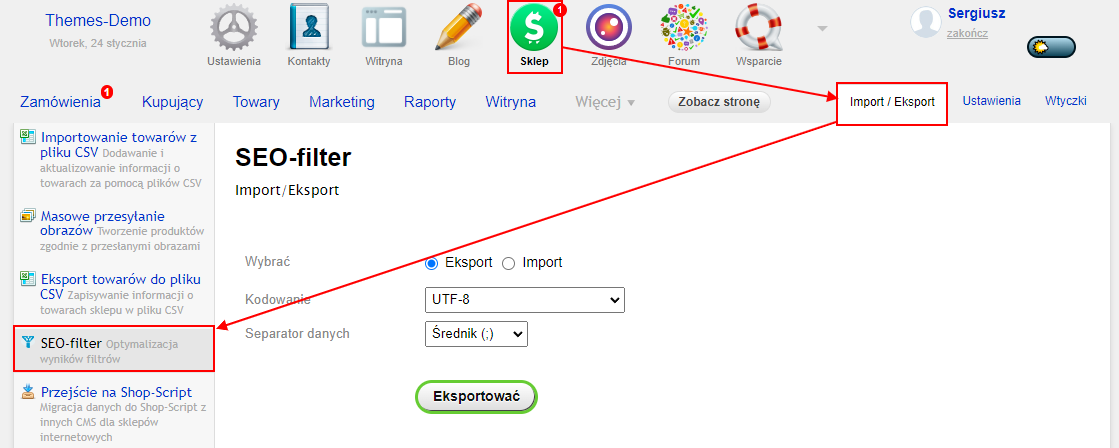
Go to the "Import/Export" tab and open the settings of the plugins "SEO-Filter".


8.1. Export

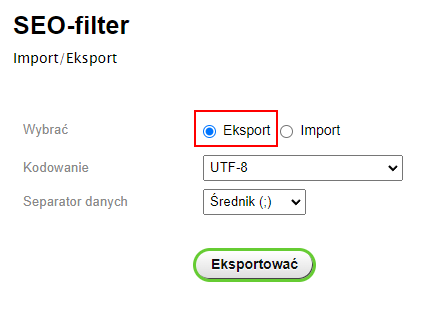
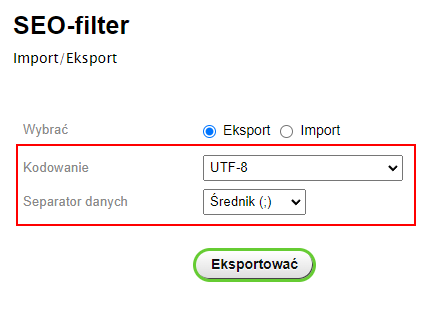
1.1. Select the "Export" mode:


1.2. Select encoding and data separator:


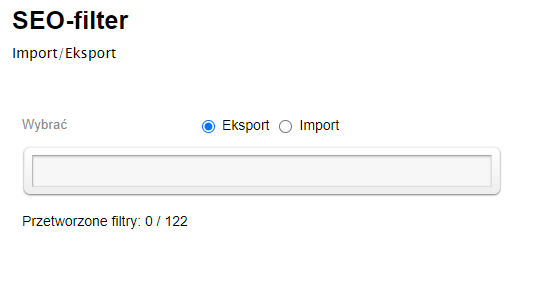
1.3. Click the "Export" button. Wait for the export to complete:


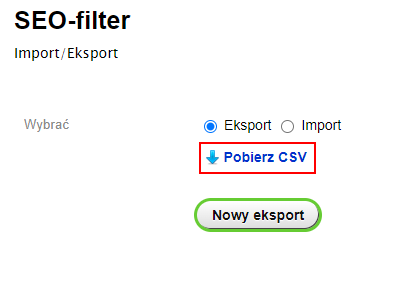
1.4. After the export operation is complete, download the resulting file:


8.2. Editing the file

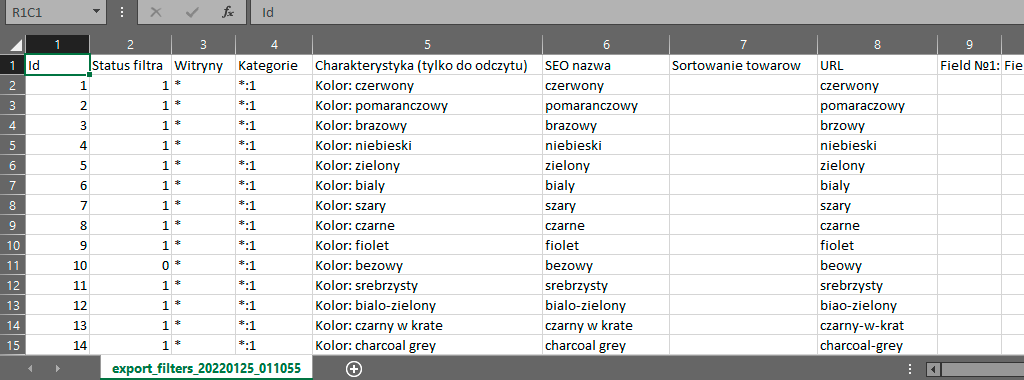
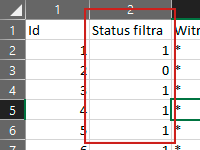
2.1. Open the file exported in part 1 and make the necessary changes:


Personal meta tags and descriptions are not included in the CSV file. The "features" column is not imported. If the value in the URL column is empty or unique, it will not be changed by the filter.

2.2. Example values for the "Filter Status" field:

0 — Disabled;
1 — Enabled;


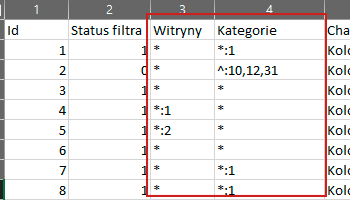
2.3. Example values for the "Websites" / "Categories" fields:

* — all; 
*:1,2,3 — only for specified IDs: 1,2 and 3; 
^:1,2,3 — for all except specified IDs: 1,2 and 3;


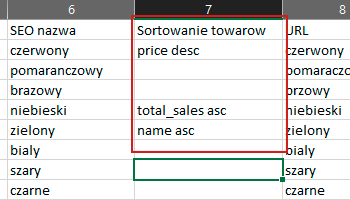
2.4. Example values for the "Product Sorting" field:

Empty field — Default; 
category — Inherit from category;
sort — Manually (according to backend settings);
name asc — By name;
price desc — Most expensive;
price asc — Cheapest;
rating desc — Highly rated;
rating asc — Low rated;
total_sales desc — Best sellers;
total_sales asc — Low sales;
create_datetime desc — Date added;


8.3. Import

Important!
You cannot create new filters using import. You can only edit existing ones.

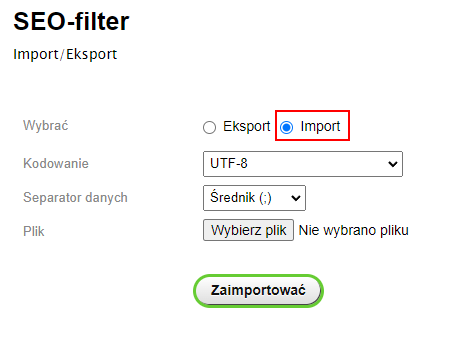
3.1. Switch to "Import" mode:


3.2. Select the encoding and data separator used in the file:


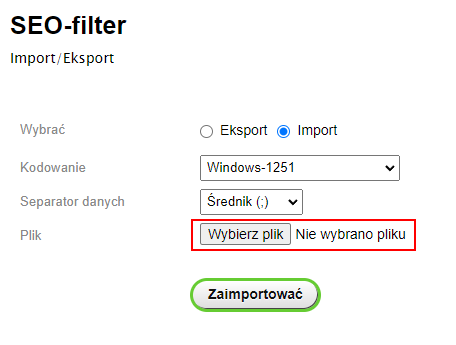
3.3. Click "Choose file" and select the file on your computer:


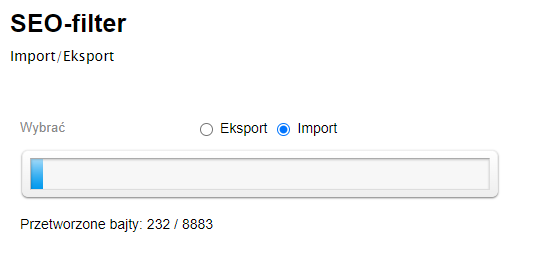
3.4. Click the "Import" button. Wait for the import to complete.


3.5. Import is complete. If you want to upload another file, click the "New import" button.